


Xcitium Verdict Cloud
- Open a Windows profile, then click the 'Xcitium Verdict Cloud' tab.
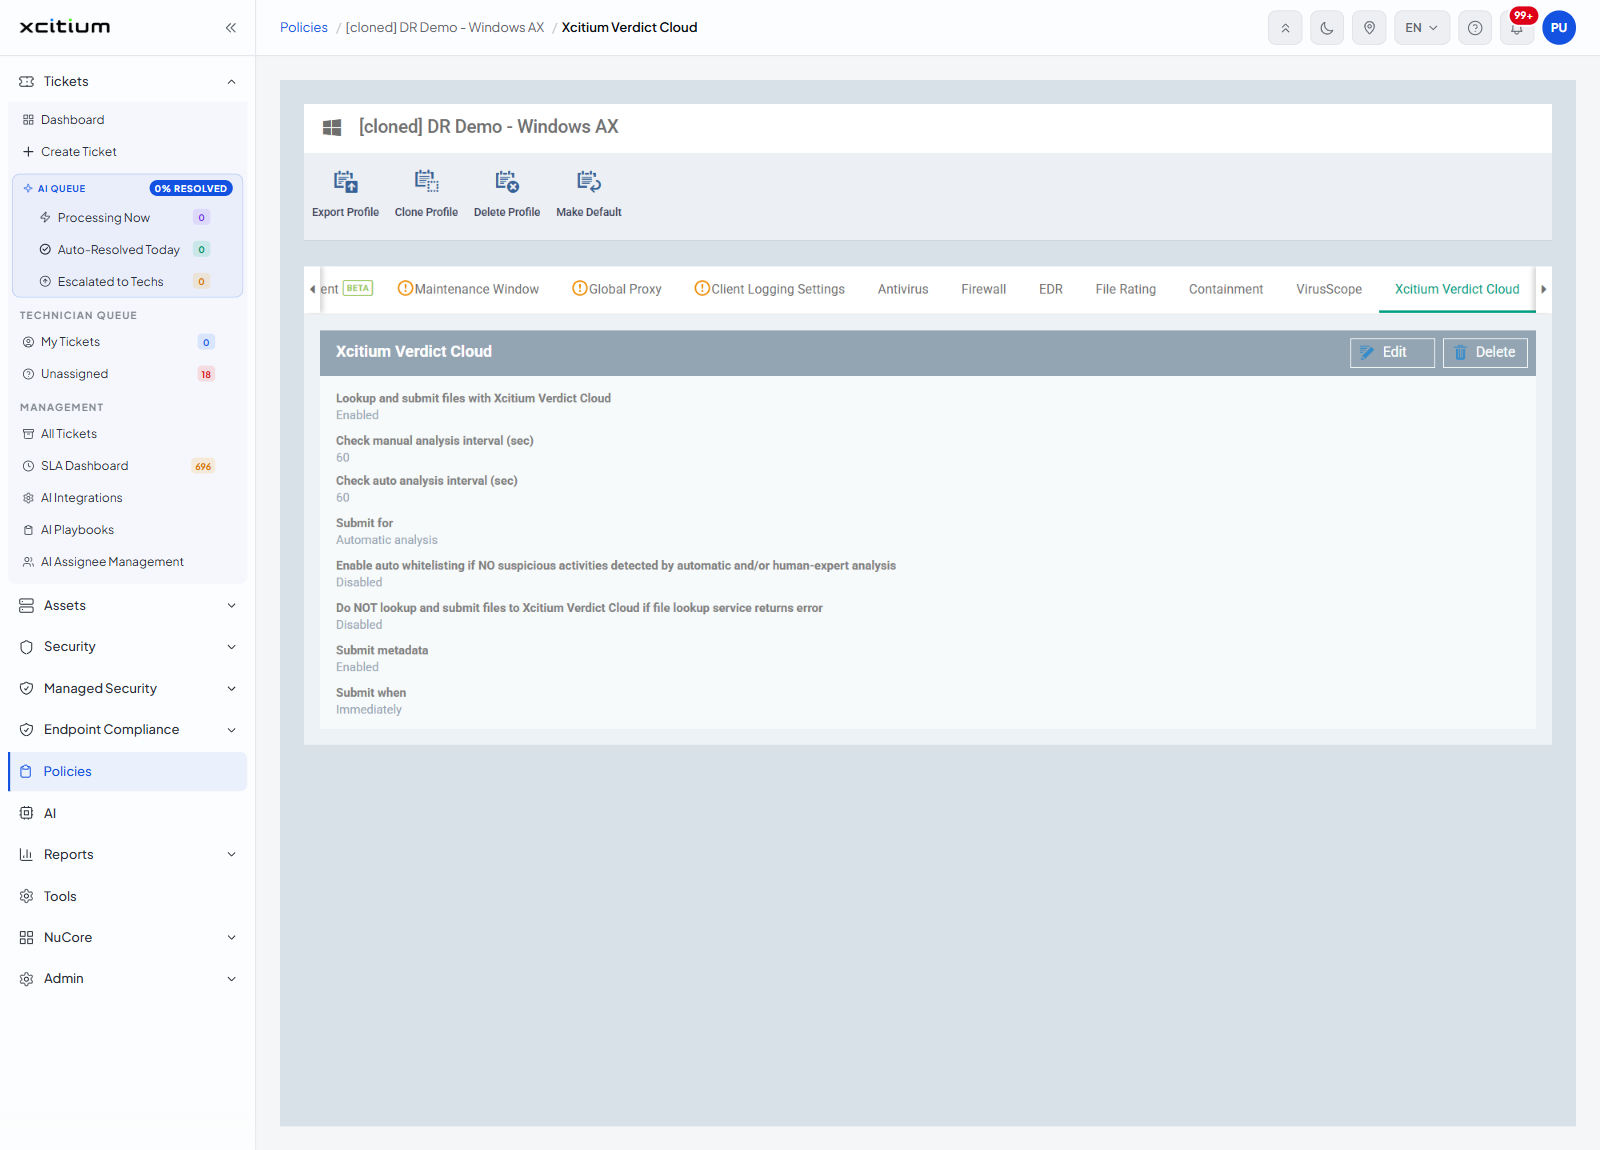
'Xcitium Verdict Cloud' sends files the client cannot judge for itself away for analysis, and says what to do with the answer. The panel carries 'Edit' and 'Delete' buttons.
Settings
| Setting | Value seen | Description |
| Lookup and submit files with Xcitium Verdict Cloud | Enabled | Turns the lookup and submission on. |
| Check manual analysis interval (sec) | 60 | How often the client asks for the result of an analysis a person started. |
| Check auto analysis interval (sec) | 60 | How often the client asks for the result of an automatic analysis. |
| Submit for | Automatic analysis | Which kind of analysis files are sent for. |
| Enable auto whitelisting if NO suspicious activities detected by automatic and/or human-expert analysis | Disabled | Trusts a file automatically when the analysis comes back clean. |
| Do NOT lookup and submit files to Xcitium Verdict Cloud if file lookup service returns error | Disabled | Stops submissions when the lookup service is failing. |
| Submit metadata | Enabled | Sends information about the file as well as the file. |
| Submit when | Immediately | When the file is sent. |
Set up verdict lookups
- Click 'Policies' in the left navigation bar and open the profile.
- Click the 'Xcitium Verdict Cloud' tab.
- Click 'Edit'.
- Turn on 'Lookup and submit files with Xcitium Verdict Cloud'.
- Set the two check intervals and choose what files are submitted for and when.
- Decide whether clean files are trusted automatically.
- Click 'Save'.
Note: how the client rates a file before it gets this far is set in a separate section. See File Rating.