


Client Proxy
- Open a Windows profile, then click the 'Client Proxy' tab.
'Client Proxy' tells the communication client to reach the platform through a proxy server. The panel is headed 'Communication Client Proxy'.
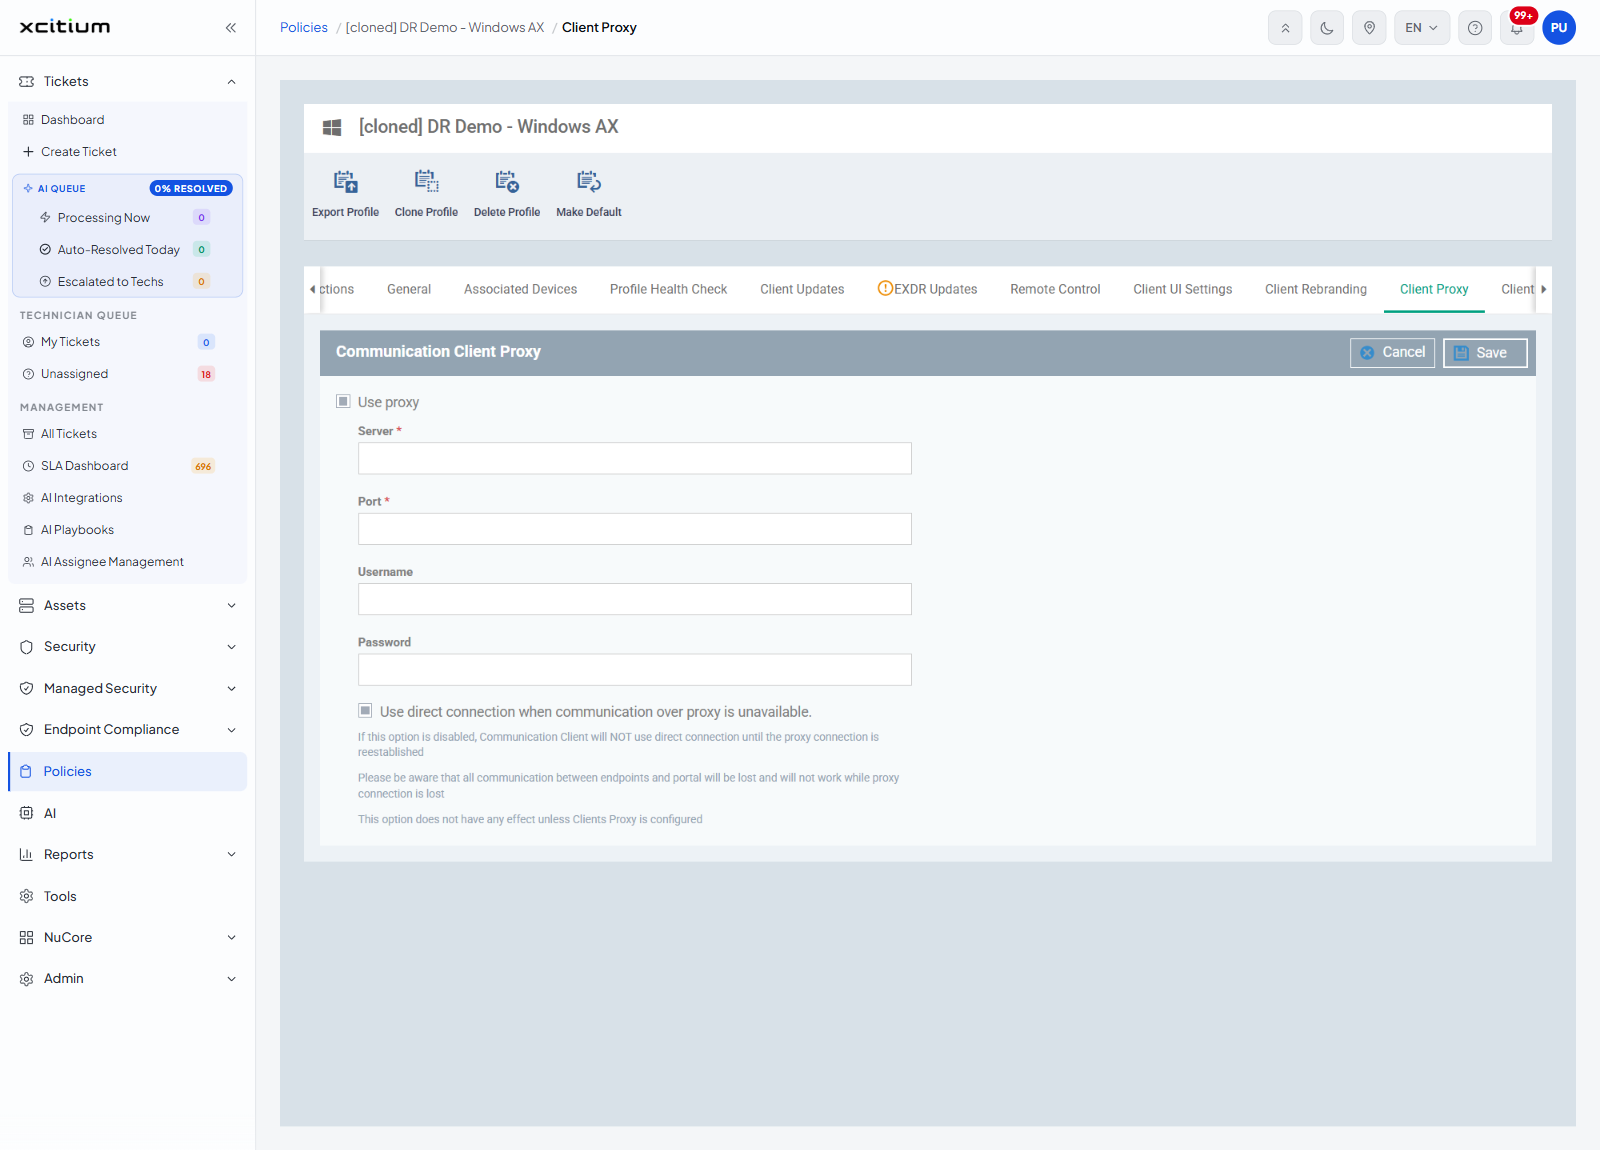
Fields
| Field | Control | Required |
| Use proxy | Check box | No |
| Server | Single-line text box | Yes — marked with a red asterisk |
| Port | Single-line text box | Yes — marked with a red asterisk |
| Username | Single-line text box | No |
| Password | Password box | No |
| Use direct connection when communication over proxy is unavailable. | Check box | No |
Notes shown on the panel
- 'If this option is disabled, Communication Client will NOT use direct connection until the proxy connection is reestablished'
- 'Please be aware that all communication between endpoints and portal will be lost and will not work while proxy connection is lost'
- 'This option does not have any effect unless Clients Proxy is configured'
Buttons
| Button | Description |
| Save | Saves the proxy settings and configures the section. |
| Cancel | Leaves the section as it was. |
Send client traffic through a proxy
- Click 'Policies' in the left navigation bar and open the profile.
- Click the 'Client Proxy' tab.
- Tick 'Use proxy'.
- Type the proxy address in 'Server' and the port in 'Port'.
- Fill in 'Username' and 'Password' if the proxy needs them.
- Decide whether to allow a direct connection when the proxy is unreachable.
- Click 'Save'.
Note: 'Client Proxy' is one of the sections marked 'Required to configure' on the 'Sections' tab. Until it is saved, its tab carries an orange exclamation icon.
Note: the security client has its own proxy section. See XCS Proxy. A proxy for everything else on the device is set in Global Proxy.