


Discovery Settings and Credentials
- Click 'Endpoint Compliance' > any page > 'DISCOVERY' to open this interface.
The 'DISCOVERY' button on the 'Endpoint Compliance' toolbar opens a panel titled 'Discovery Settings and Credentials'. Discovery settings define the part of the network a scan is allowed to look at; credentials give the scan the logins it needs to inspect what it finds there.
Note: The 'DISCOVERY' button is available once a Probe agent has been installed.
You can add, edit and delete discovery settings and credentials from this interface.
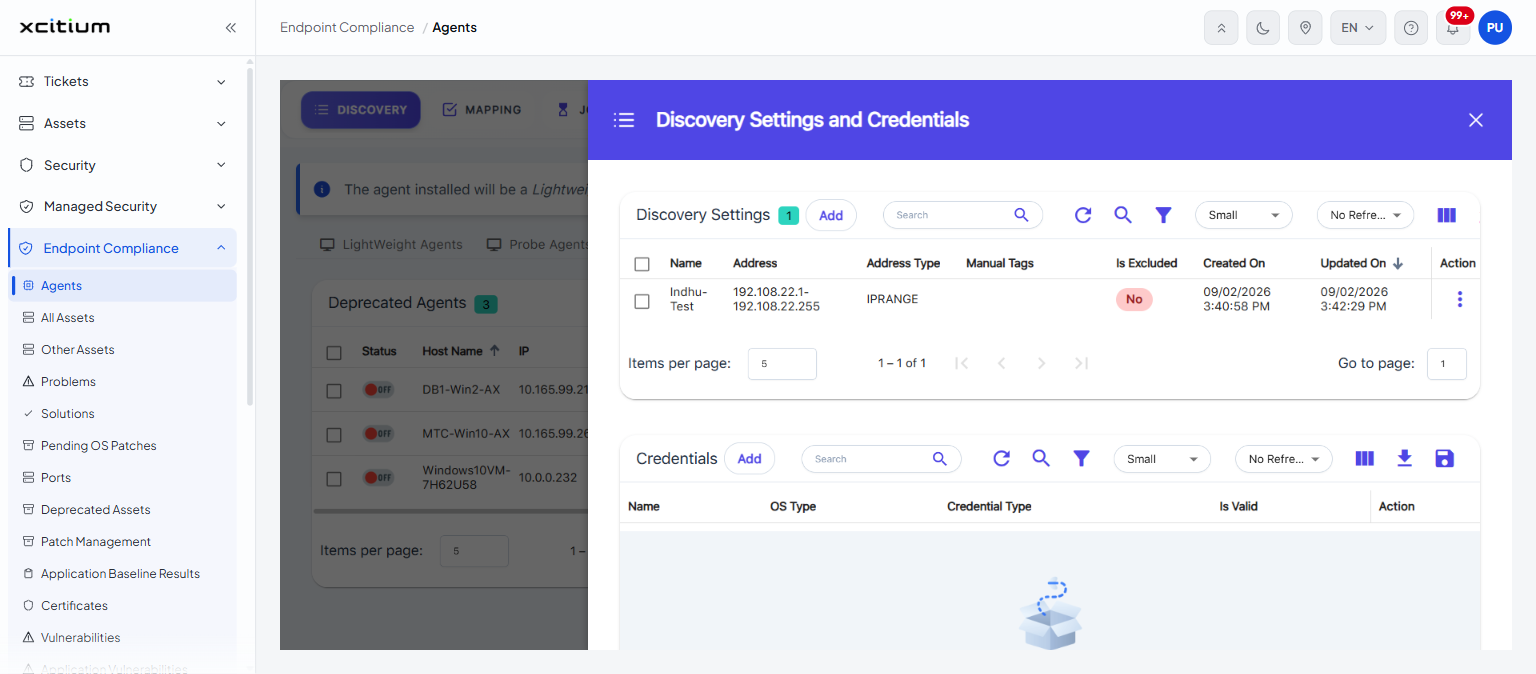
The panel holds two lists, one above the other.
Discovery Settings list
The first card is headed 'Discovery Settings' with a chip showing how many entries there are, and an 'Add' button.
| Column | Description |
| (check box) | Selects the row. The check box in the heading selects every row on the page. |
| Name | The label given to the discovery setting. |
| Address | The network address, range, CIDR block or domain the setting covers. |
| Address Type | Which kind of address the entry holds, for example 'IPRANGE'. |
| Manual Tags | Any tags added to the entry by hand. |
| Is Excluded | Whether the address is excluded from scanning. Shows 'No' or 'Yes'. |
| Created On | The date and time the entry was created. |
| Updated On | The date and time the entry was last changed. |
| Action | Opens the row menu, which offers 'Edit' and 'Delete'. |
This list carries the shared grid toolbar plus an 'upload' button.
Credentials list
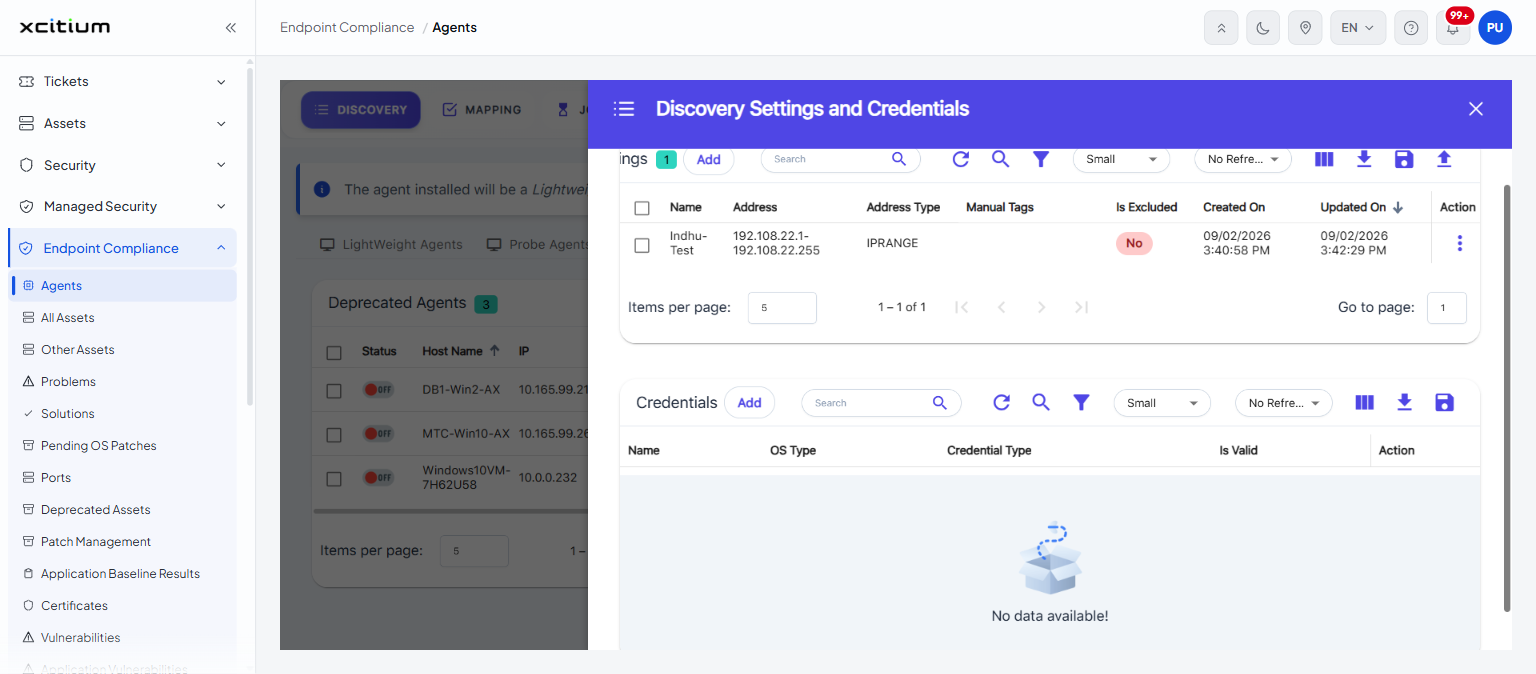
The second card is headed 'Credentials' with an 'Add' button.
| Column | Description |
| Name | The label given to the credential. |
| OS Type | The platform the credential is for. |
| Credential Type | The kind of credential it is. |
| Is Valid | Whether the credential has been validated. |
| Action | Opens the row menu. |
Add a discovery setting
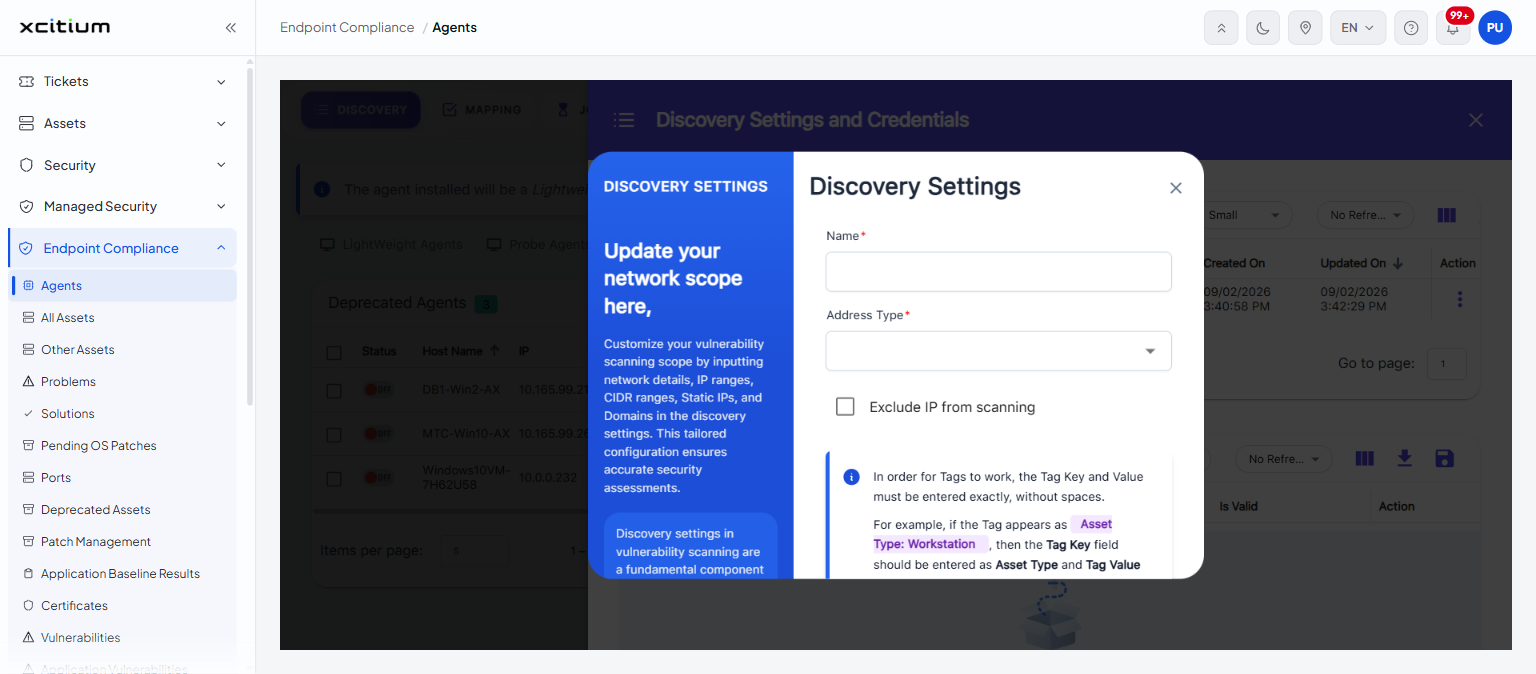
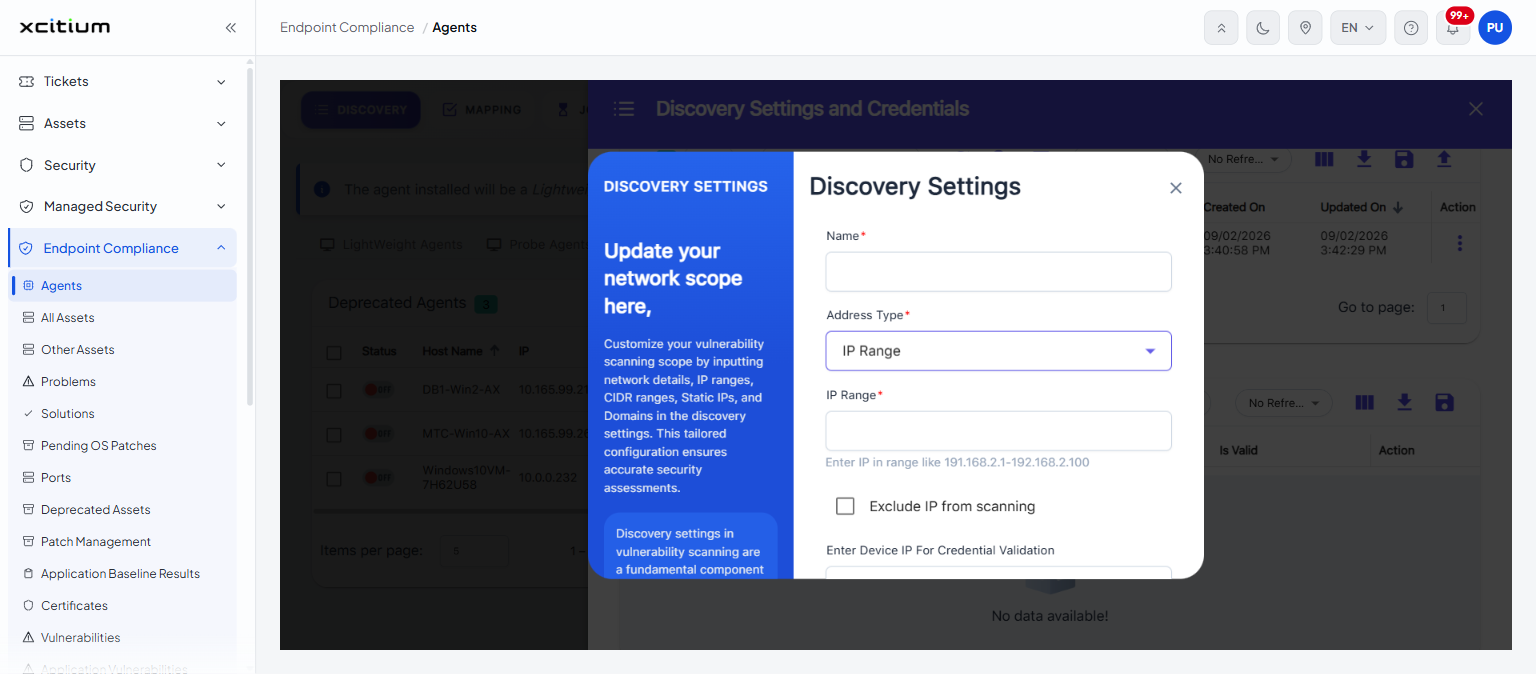
Click 'Add' on the 'Discovery Settings' card. A form headed 'Discovery Settings' opens.
| Field | Control | Description |
| Name | Text box, placeholder 'Enter Name' | The label for this discovery setting. Required. |
| Address Type | Drop-down | The kind of address you are about to enter. The options are 'Static IP', 'CIDR', 'Domain' and 'IP Range'. Required; no option is selected to begin with. |
| (address) | Text box | Appears once 'Address Type' is chosen, and is labelled to match it. Choosing 'IP Range', for example, adds a required 'IP Range' box with the placeholder 'Enter IP Range'. |
| Exclude IP from scanning | Check box | Leaves the address out of scans. Cleared by default. |
| Enter Device IP For Credential Validation | Text box, placeholder 'Enter comma seperated IPs' | The device addresses used to check the credentials. Optional. |
| Tags | Tag Key and Tag Value boxes | Tags to attach to anything found under this setting. |
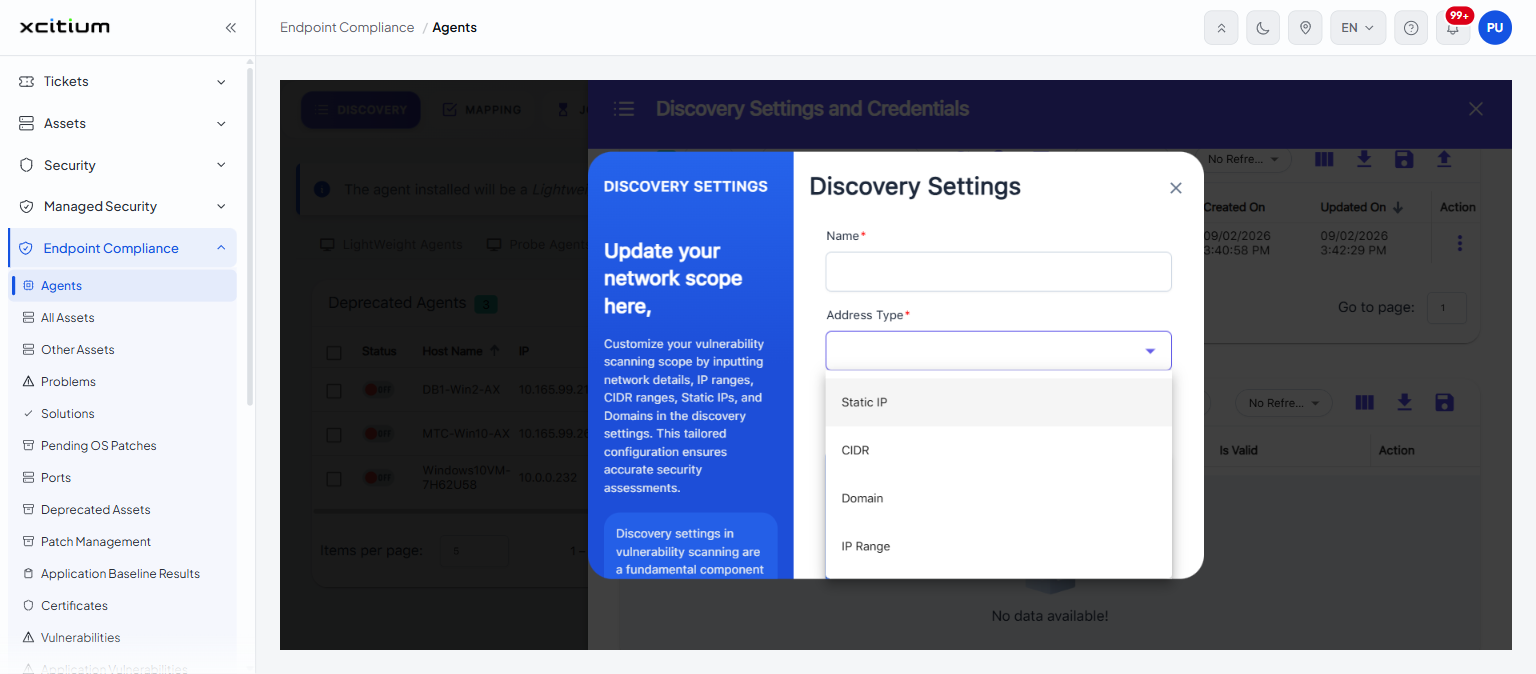
The form carries these notes about tags:
- 'In order for Tags to work, the Tag Key and Value must be entered exactly, without spaces.'
- 'For example, if the Tag appears as Asset Type: Workstation, then the Tag Key field should be entered as Asset Type and Tag Value field should be entered as Workstation respectively'
- 'The Tag Key must be unique. Creating a new tag with the same key will result in the deletion of the existing tag.'
To add a discovery setting:
- Click 'DISCOVERY' on the 'Endpoint Compliance' toolbar.
- Click 'Add' on the 'Discovery Settings' card.
- Type a name in the 'Name' box.
- Choose an entry from the 'Address Type' drop-down.
- Fill in the address box that appears.
- Tick 'Exclude IP from scanning' if this address should be left out of scans.
- Add a 'Tag Key' and 'Tag Value' if you want the discovered assets tagged.
- Click 'Save', or click 'Cancel' to abandon the form.
Add a credential
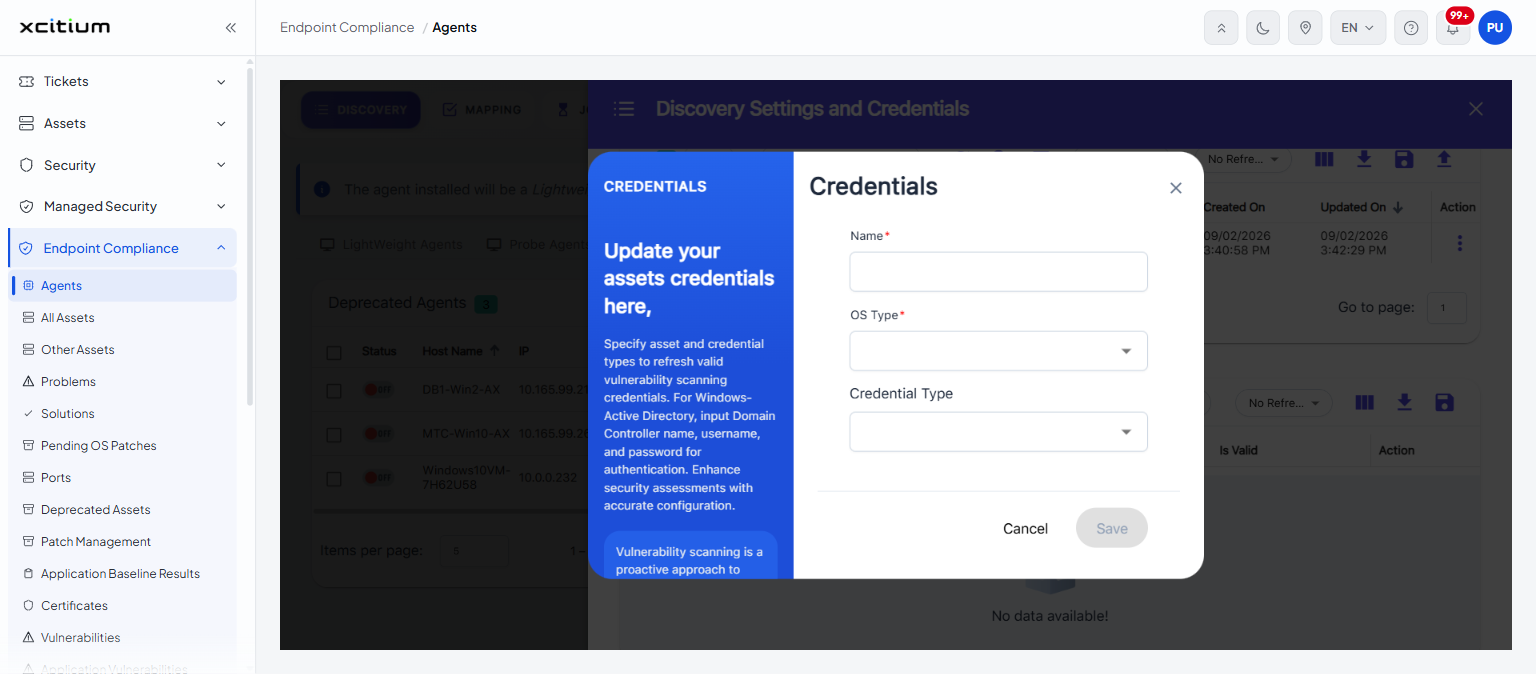
Click 'Add' on the 'Credentials' card. A form headed 'Credentials' opens. The panel beside it explains: 'Specify asset and credential types to refresh valid vulnerability scanning credentials. For Windows-Active Directory, input Domain Controller name, username, and password for authentication.'
| Field | Control | Description |
| Name | Text box, placeholder 'Enter Name' | The label for this credential. Required. |
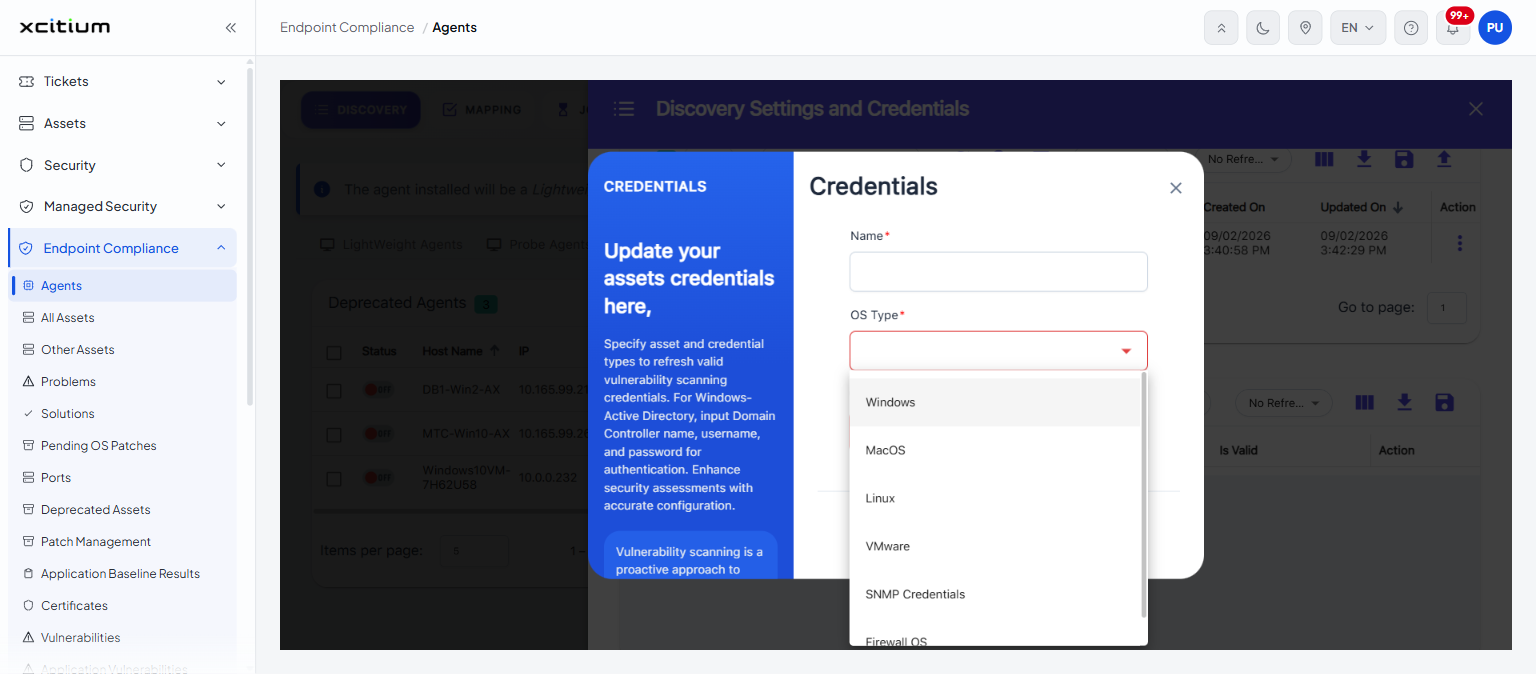
| OS Type | Drop-down | The platform the credential is for. The options are 'Windows', 'MacOS', 'Linux', 'VMware', 'SNMP Credentials' and 'Firewall OS'. Required; no option is selected to begin with. |
| Credential Type | Drop-down | The kind of credential. The options depend on 'OS Type'. With 'Windows' chosen the options are 'AD' and 'Asset Credential'. |
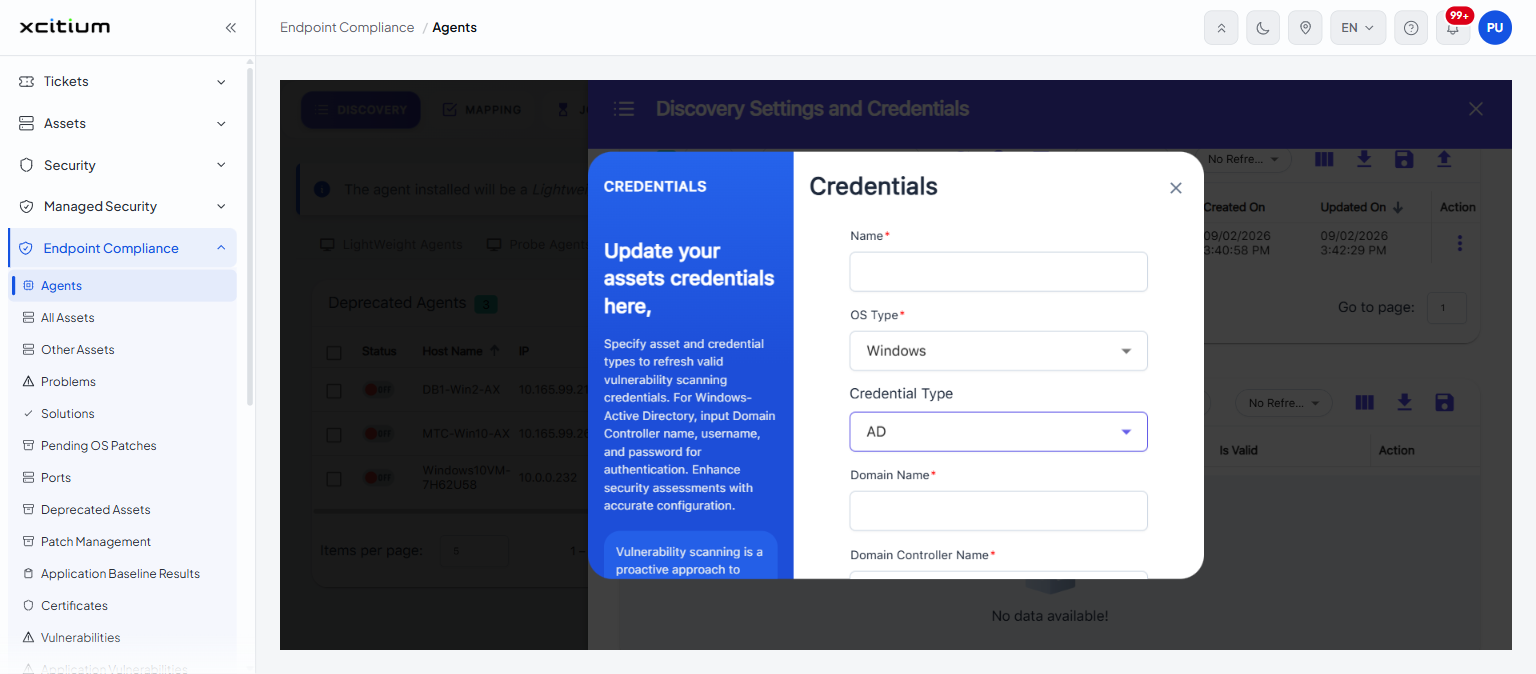
Choosing a 'Credential Type' adds the login fields. For 'Windows' with 'AD':
| Field | Control | Description |
| Domain Name | Text box | The Active Directory domain. Required. |
| Domain Controller Name | Text box | The domain controller to authenticate against. Required. |
| User Name | Text box | The account to sign in with. Required. |
| Password | Masked text box | That account's password. Required. |
For 'Windows' with 'Asset Credential' the fields are 'Domain Name', 'User Name' and 'Password'; there is no 'Domain Controller Name'.
To add a credential:
- Click 'DISCOVERY' on the 'Endpoint Compliance' toolbar.
- Click 'Add' on the 'Credentials' card.
- Type a name in the 'Name' box.
- Choose the platform from 'OS Type'.
- Choose the kind of credential from 'Credential Type'.
- Fill in the login fields that appear.
- Click 'Save', or click 'Cancel' to abandon the form.
Note: close the 'Discovery Settings and Credentials' panel with the X at the top right.