


Manage a Training Repository
- Click 'AI' > 'AI Training' > 'Manage Repository' on a repository card to open this interface. The same screen opens from 'Edit' on the card's three-dot menu.
The screen is headed 'AI Training Materials'. It names the repository, sets how the agent recalls what it has learned, and holds the two steps of training: uploading material and training on it.
A 'Back' link returns to the repository list and a 'Save' button keeps the repository name and search setting.
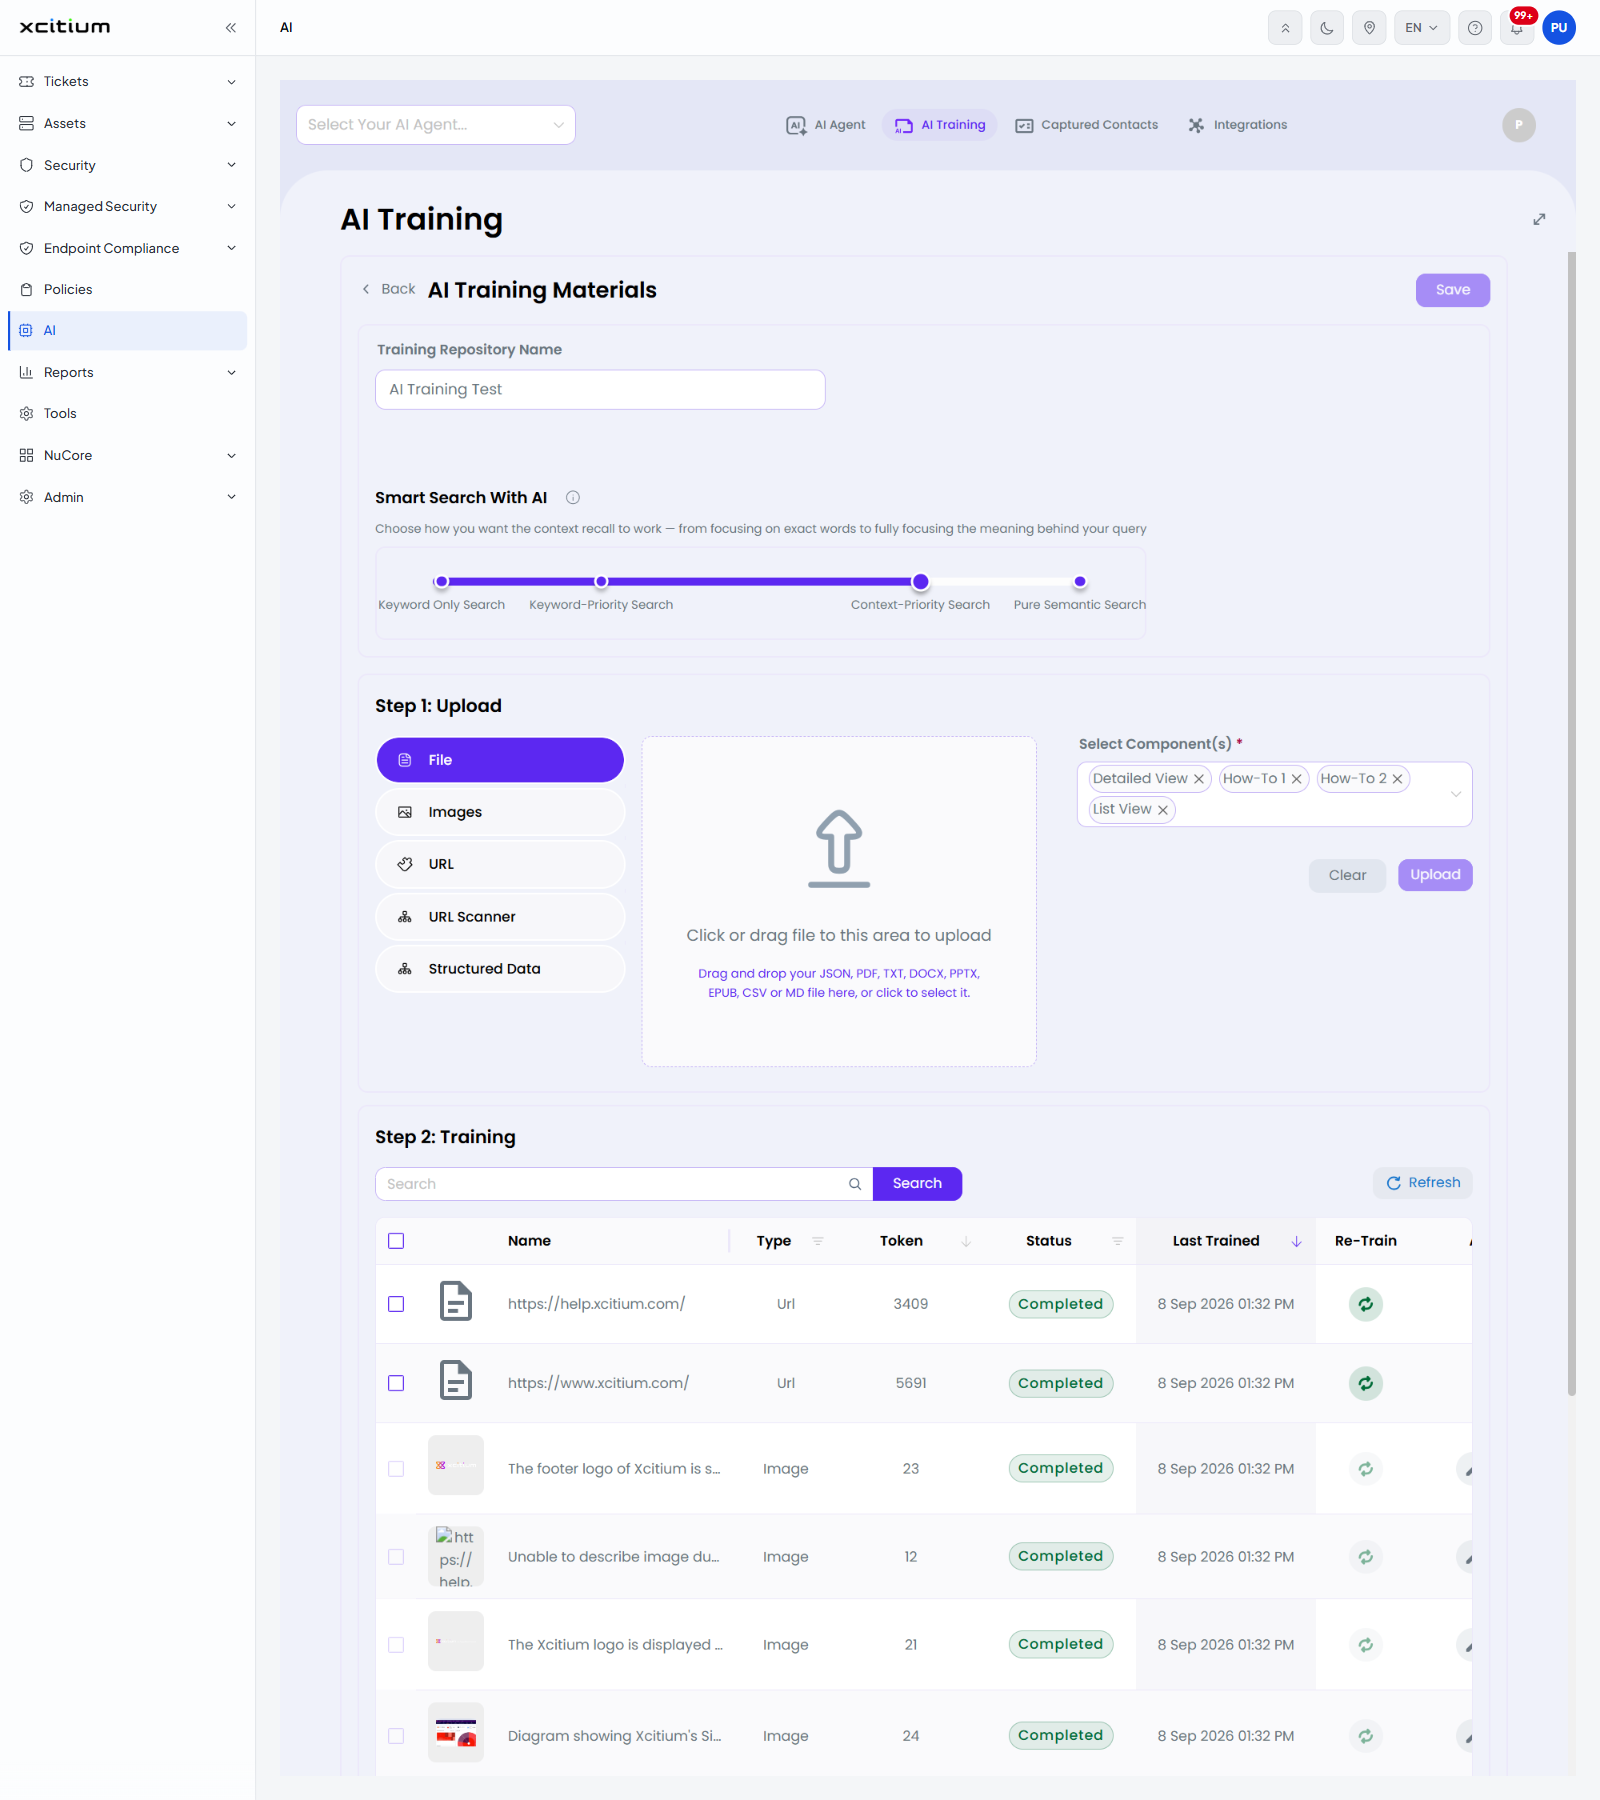
Repository settings
| Field | Control | Description |
| Training Repository Name | Text box | The name of the repository. |
| Smart Search With AI | Slider with four stops | 'Choose how you want the context recall to work - from focusing on exact words to fully focusing the meaning behind your query'. The stops are 'Keyword Only Search', 'Keyword-Priority Search', 'Context-Priority Search' and 'Pure Semantic Search'. |
Step 1: Upload
Five buttons on the left choose the kind of material you are adding.
| Source | What it accepts |
| File | 'Click or drag file to this area to upload' - 'Drag and drop your JSON, PDF, TXT, DOCX, PPTX, EPUB, CSV or MD file here, or click to select it.' |
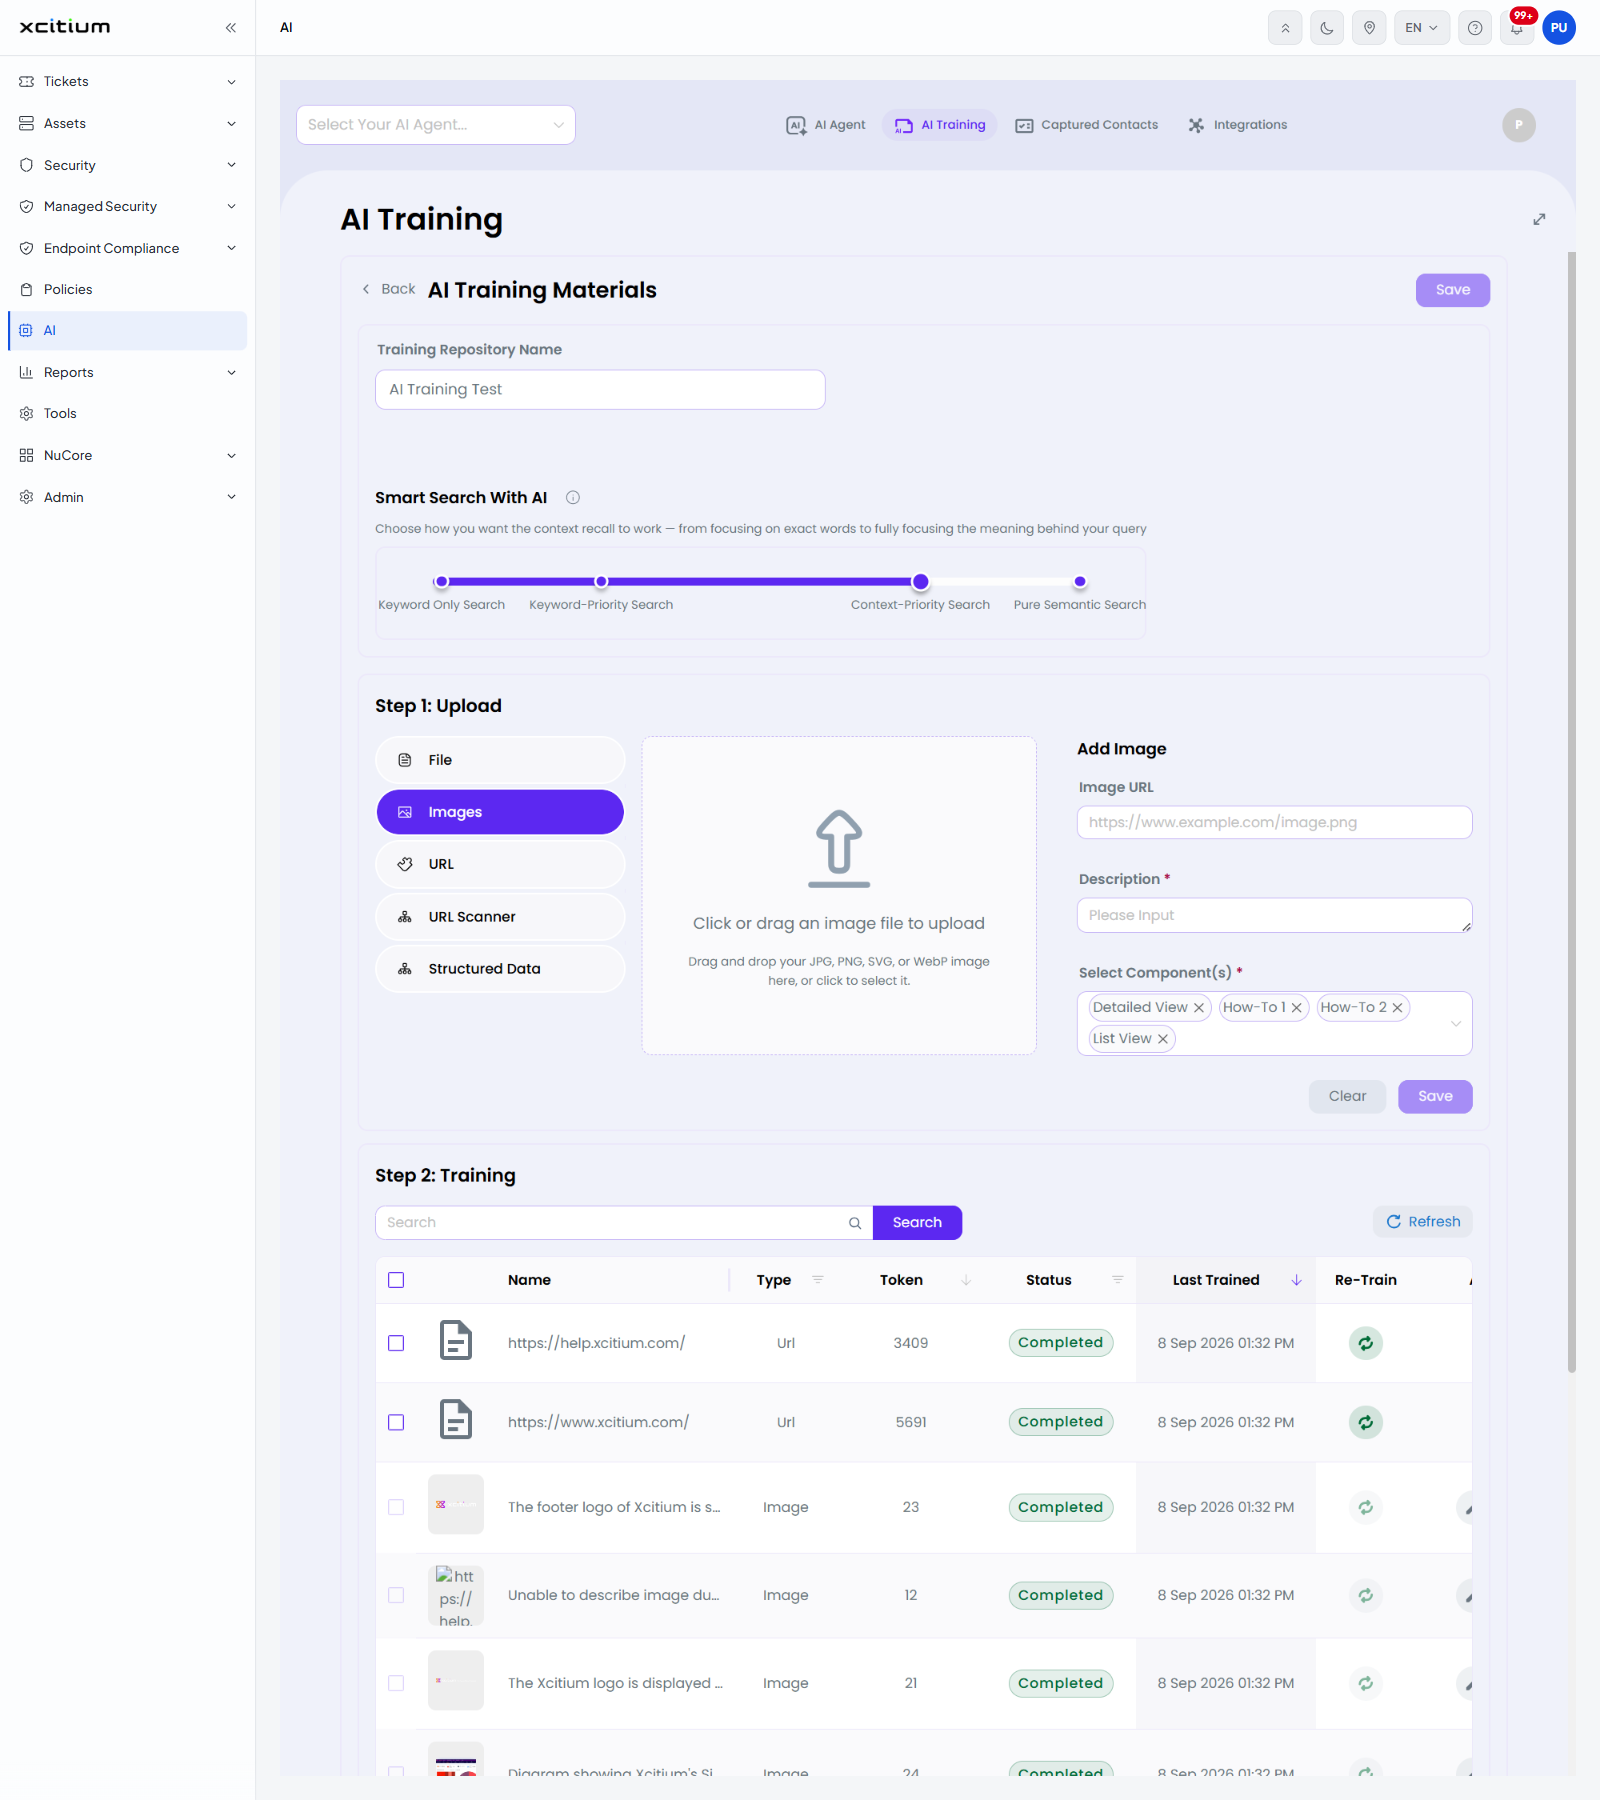
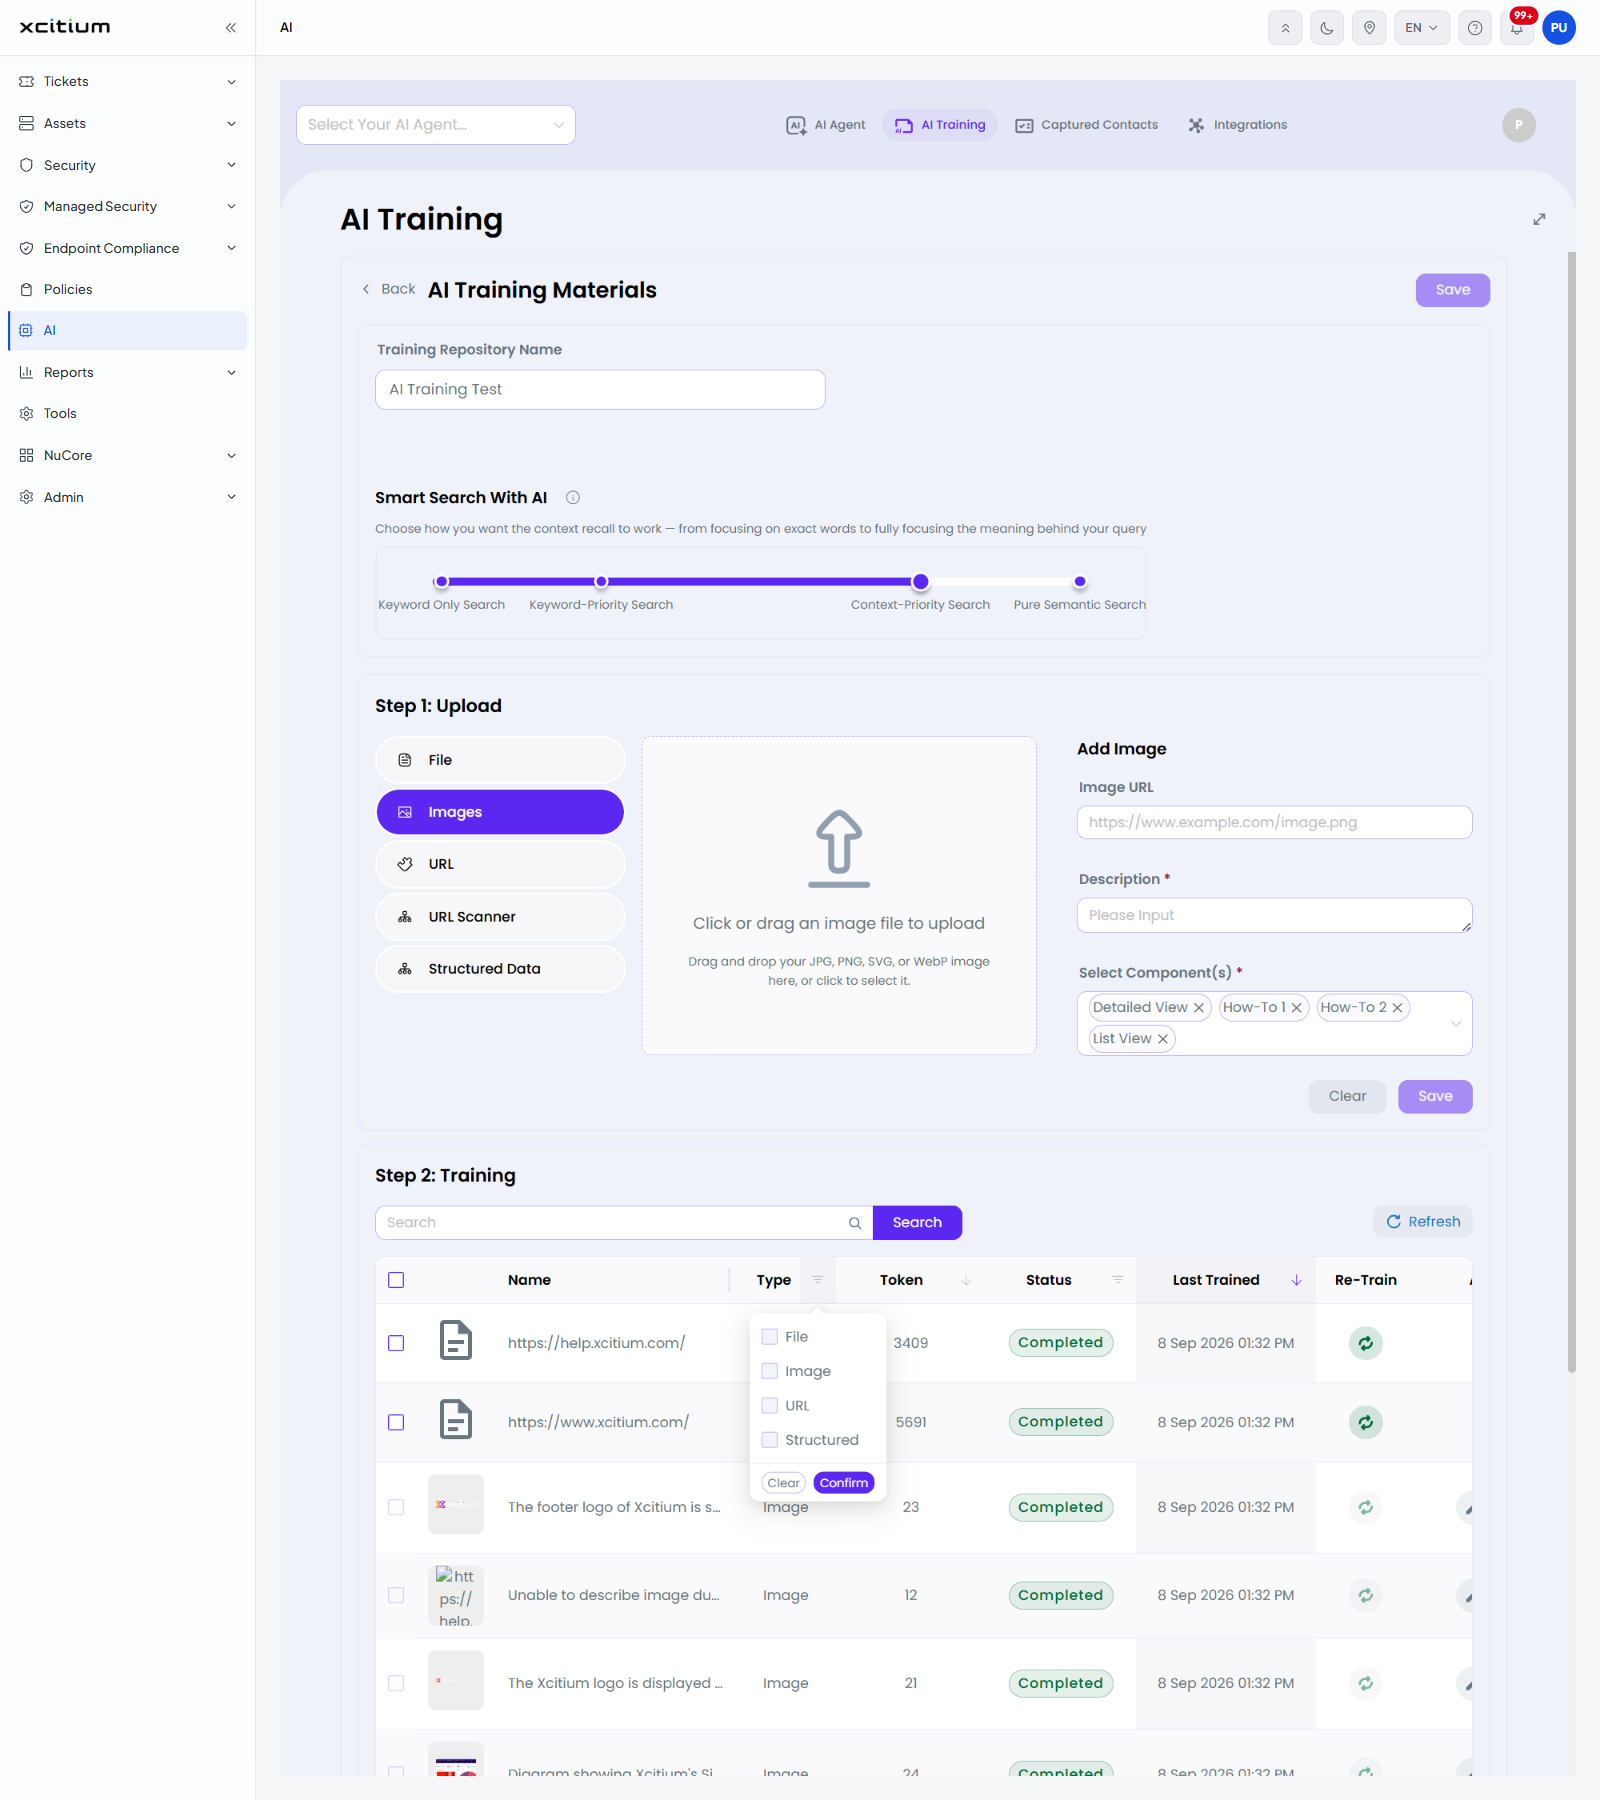
| Images | 'Click or drag an image file to upload' - 'Drag and drop your JPG, PNG, SVG, or WebP image here, or click to select it.' An 'Add Image' panel takes an image by address instead. |
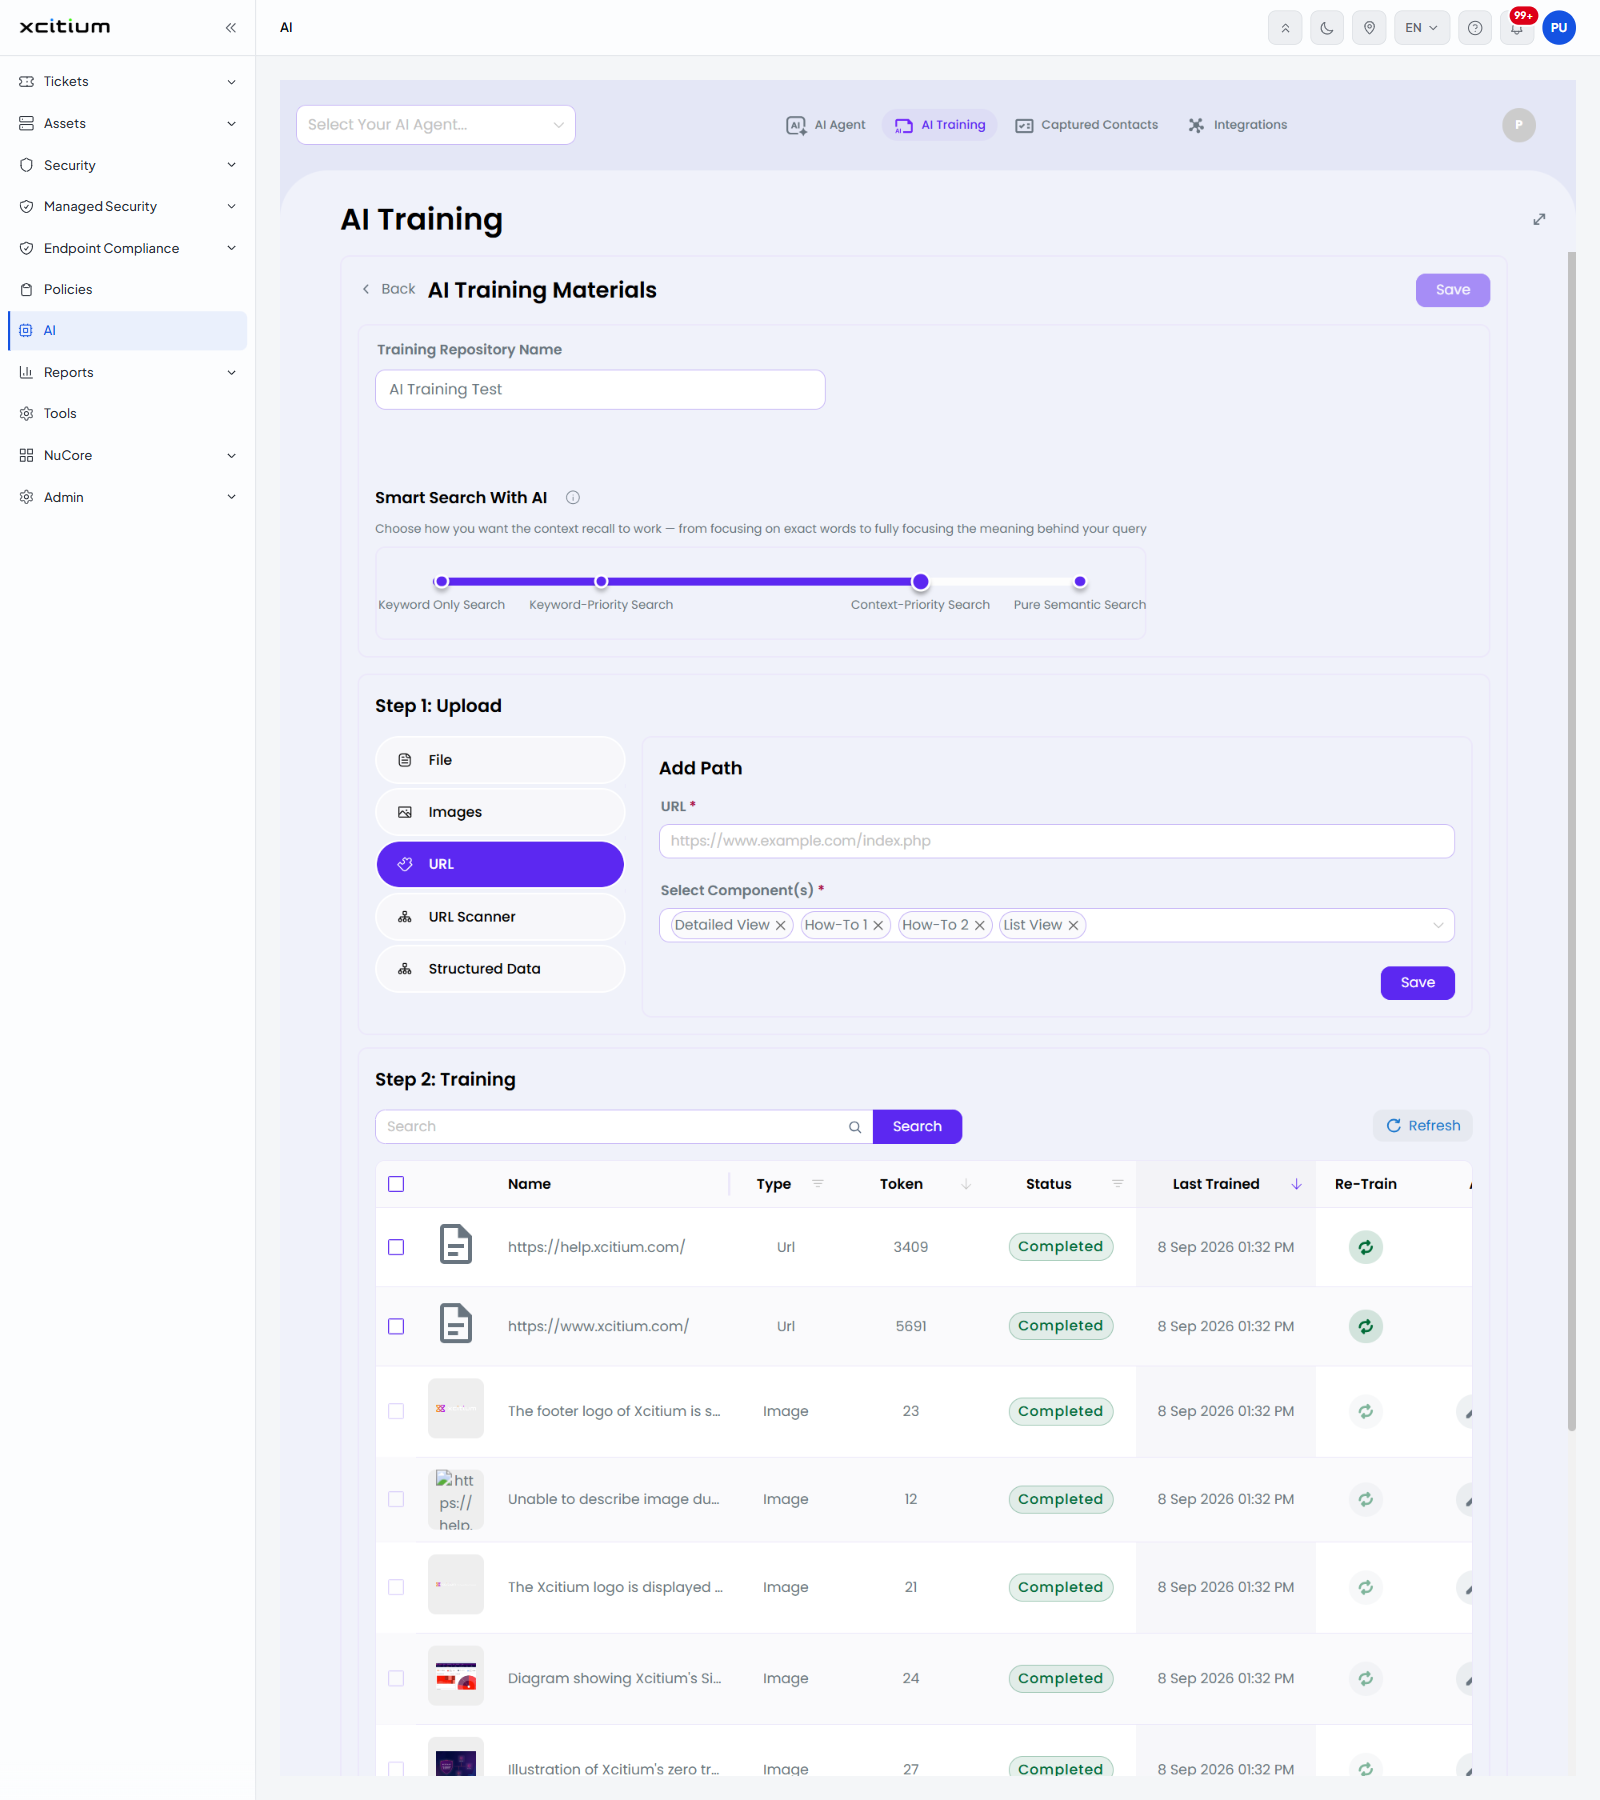
| URL | One web page at a time, with an 'Add Path' button for more. |
| URL Scanner | Crawls a site and finds the pages for you. |
| Structured Data | 'Click or drag CSV file to this area to upload', with its own 'Materials' list underneath. |
File and Images
| Field | Control | Description |
| Select Component(s) | Multi-select, required | Where the material may be used in an answer. The options are 'Detailed View', 'How-To 1', 'How-To 2' and 'List View'. All four are selected in the example. |
| Image URL | Text box (Images only) | The address of an image to add. The placeholder is 'https://www.example.com/image.png'. |
| Description | Text box, required (Images only) | What the image shows. The placeholder is 'Please Input'. |
| Clear | Button | Empties the form. |
| Upload / Save | Button | Adds the material to the repository. |
URL
| Field | Control | Description |
| URL | Text box, required | The address of the page. The placeholder is 'https://www.example.com/index.php'. |
| Add Path | Button | Adds another address box. |
| Select Component(s) | Multi-select, required | As above. |
| Save | Button | Adds the pages to the repository. |
URL Scanner
The 'Job Training' panel lists the crawls you have run and has an 'Add New' button.
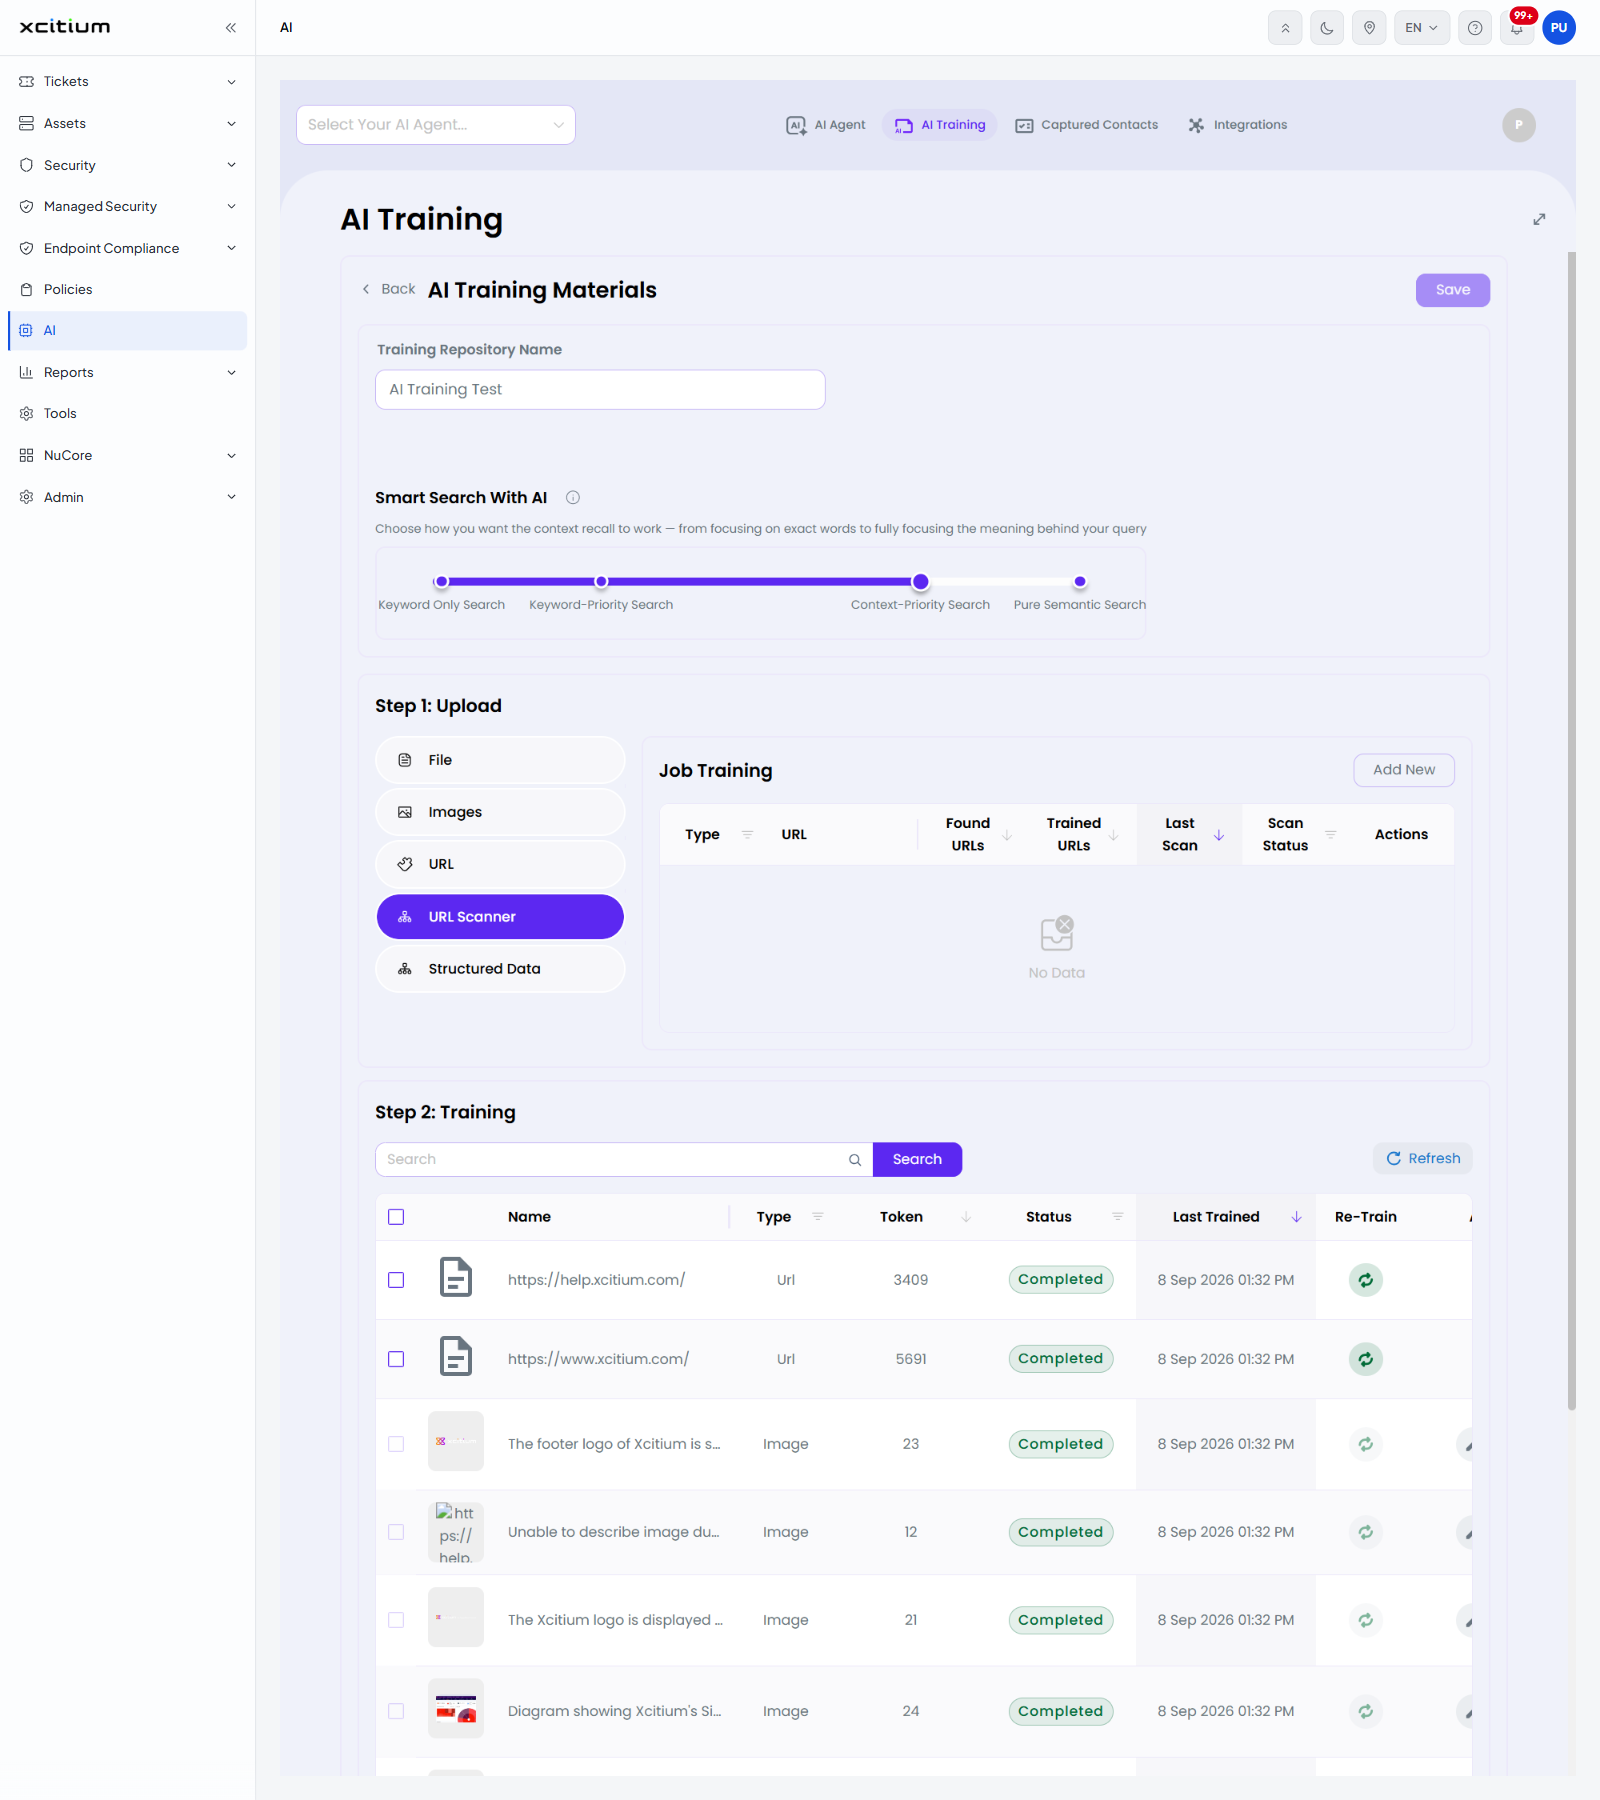
| Column | Description |
| Type | Whether the job was started from a URL or a sitemap. The column can be filtered. |
| URL | The address the crawl started from. |
| Found URLs | How many pages the crawl found. The column can be sorted. |
| Trained URLs | How many of them were trained. The column can be sorted. |
| Last Scan | When the crawl last ran. The column can be sorted. |
| Scan Status | The state of the crawl. The column can be filtered. |
| Actions | Buttons for running and removing the job. |
When no crawl has been run the panel shows 'No Data'.
The 'Add New' crawl dialog
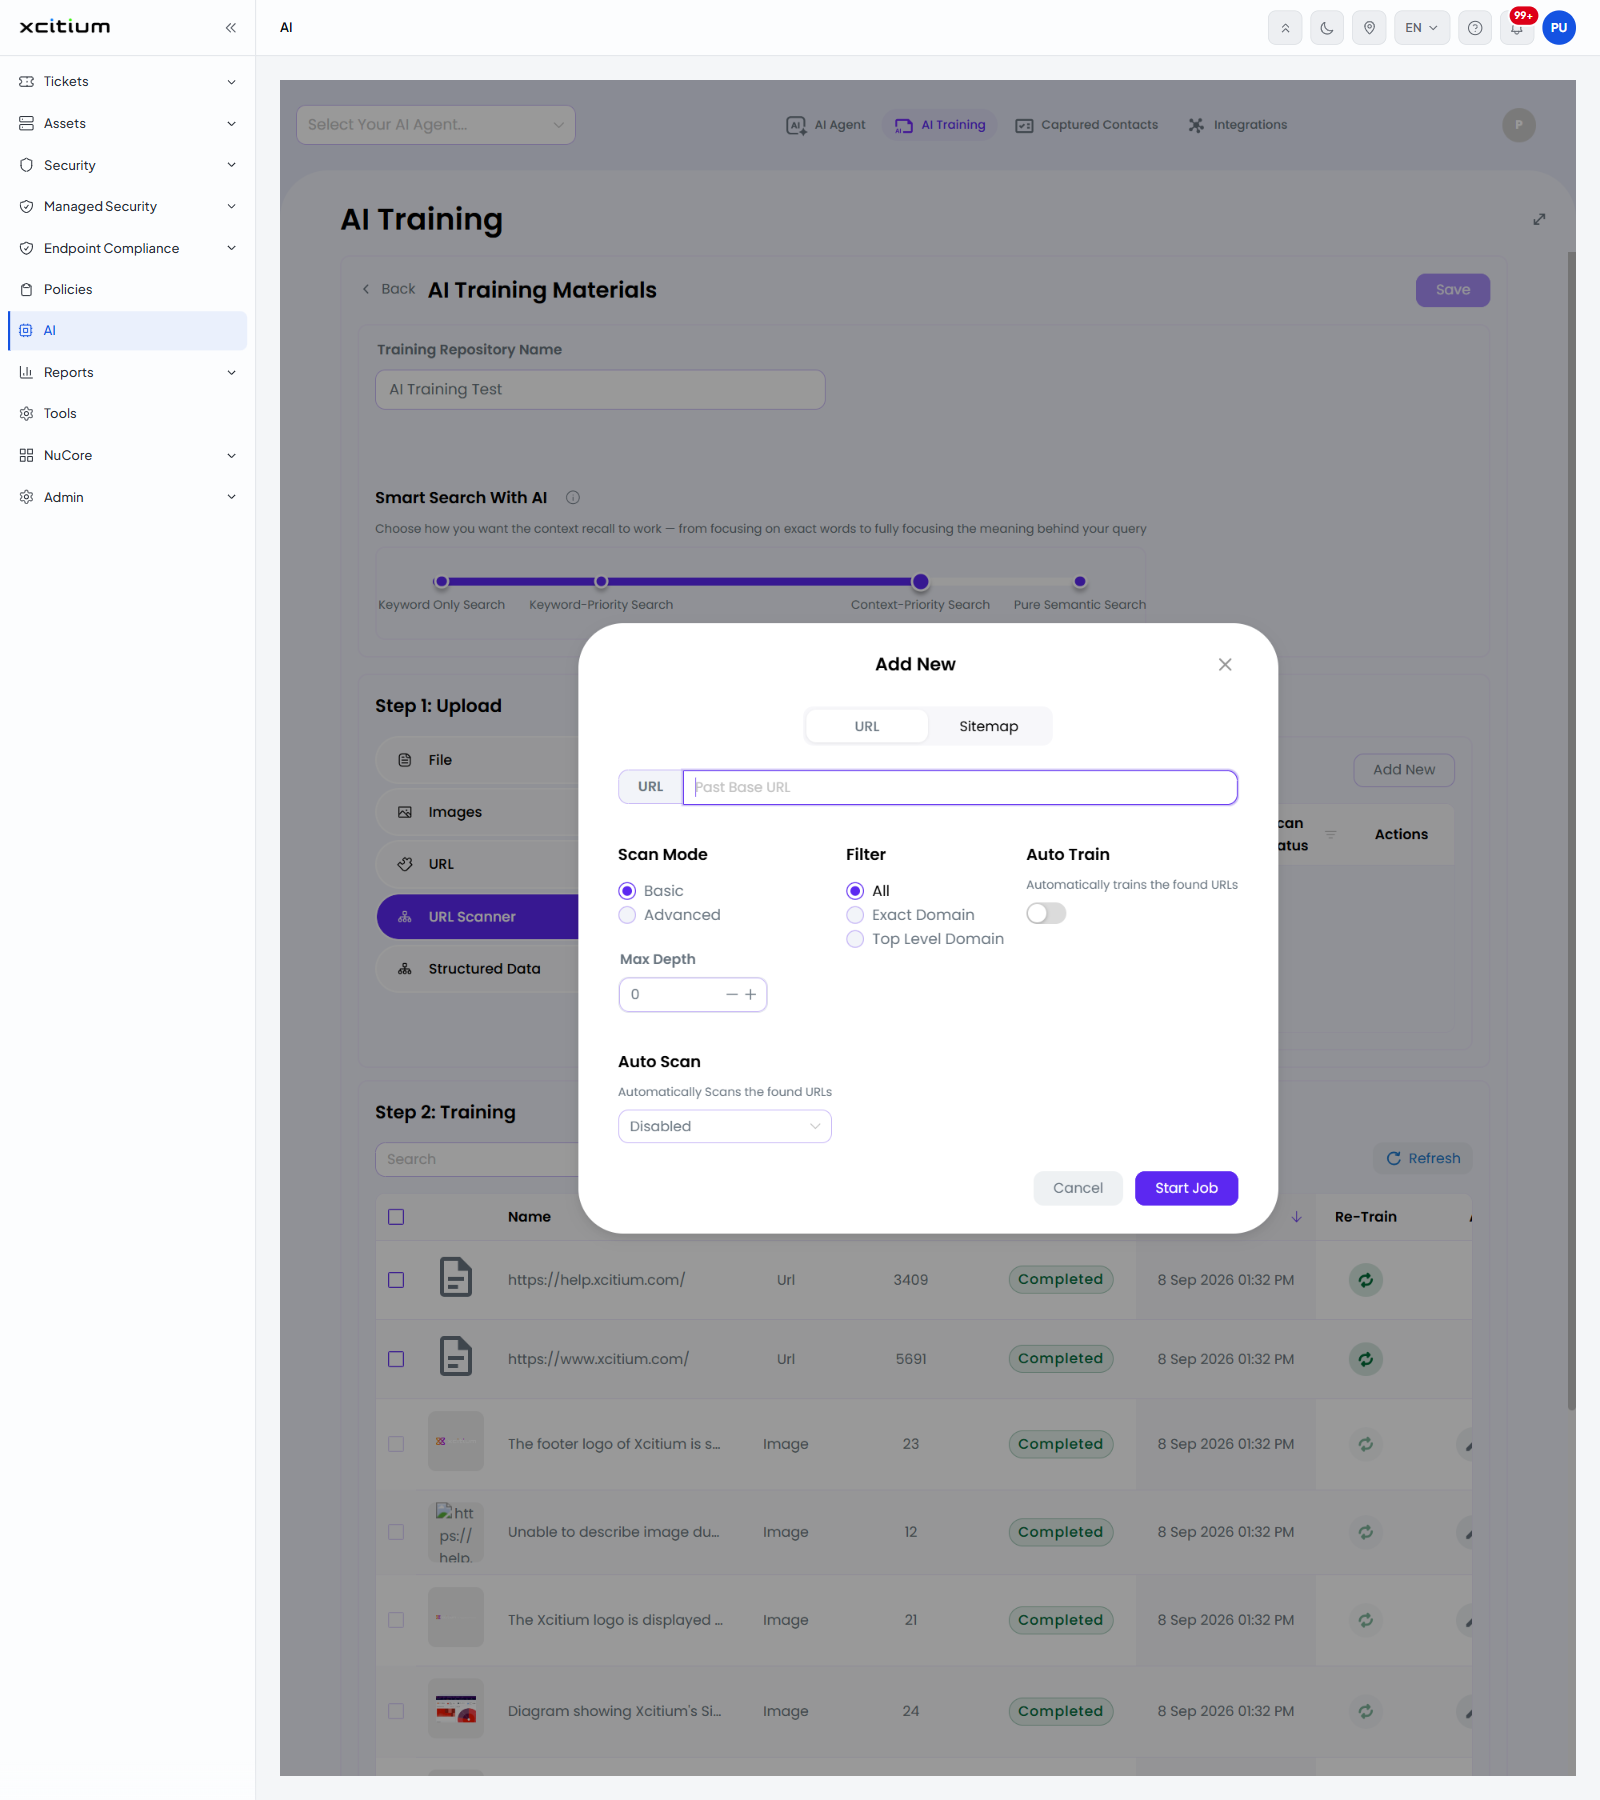
| Field | Control | Description |
| URL / Sitemap | Two tabs | Crawl from a page address or from a sitemap. 'URL' is selected by default. |
| URL | Text box | The address to start from. The placeholder is 'Past Base URL'. |
| Scan Mode | Option buttons | 'Basic' (selected by default) or 'Advanced'. |
| Max Depth | Number box with minus and plus buttons | How many links deep to follow. The default is 0. |
| Filter | Option buttons | 'All' (selected by default), 'Exact Domain' or 'Top Level Domain'. |
| Auto Scan | Drop-down | 'Automatically Scans the found URLs'. Set to 'Disabled' by default. |
| Auto Train | Toggle | 'Automatically trains the found URLs'. Off by default. |
The dialog starts the crawl with 'Start Job' or closes with 'Cancel' or the X button.
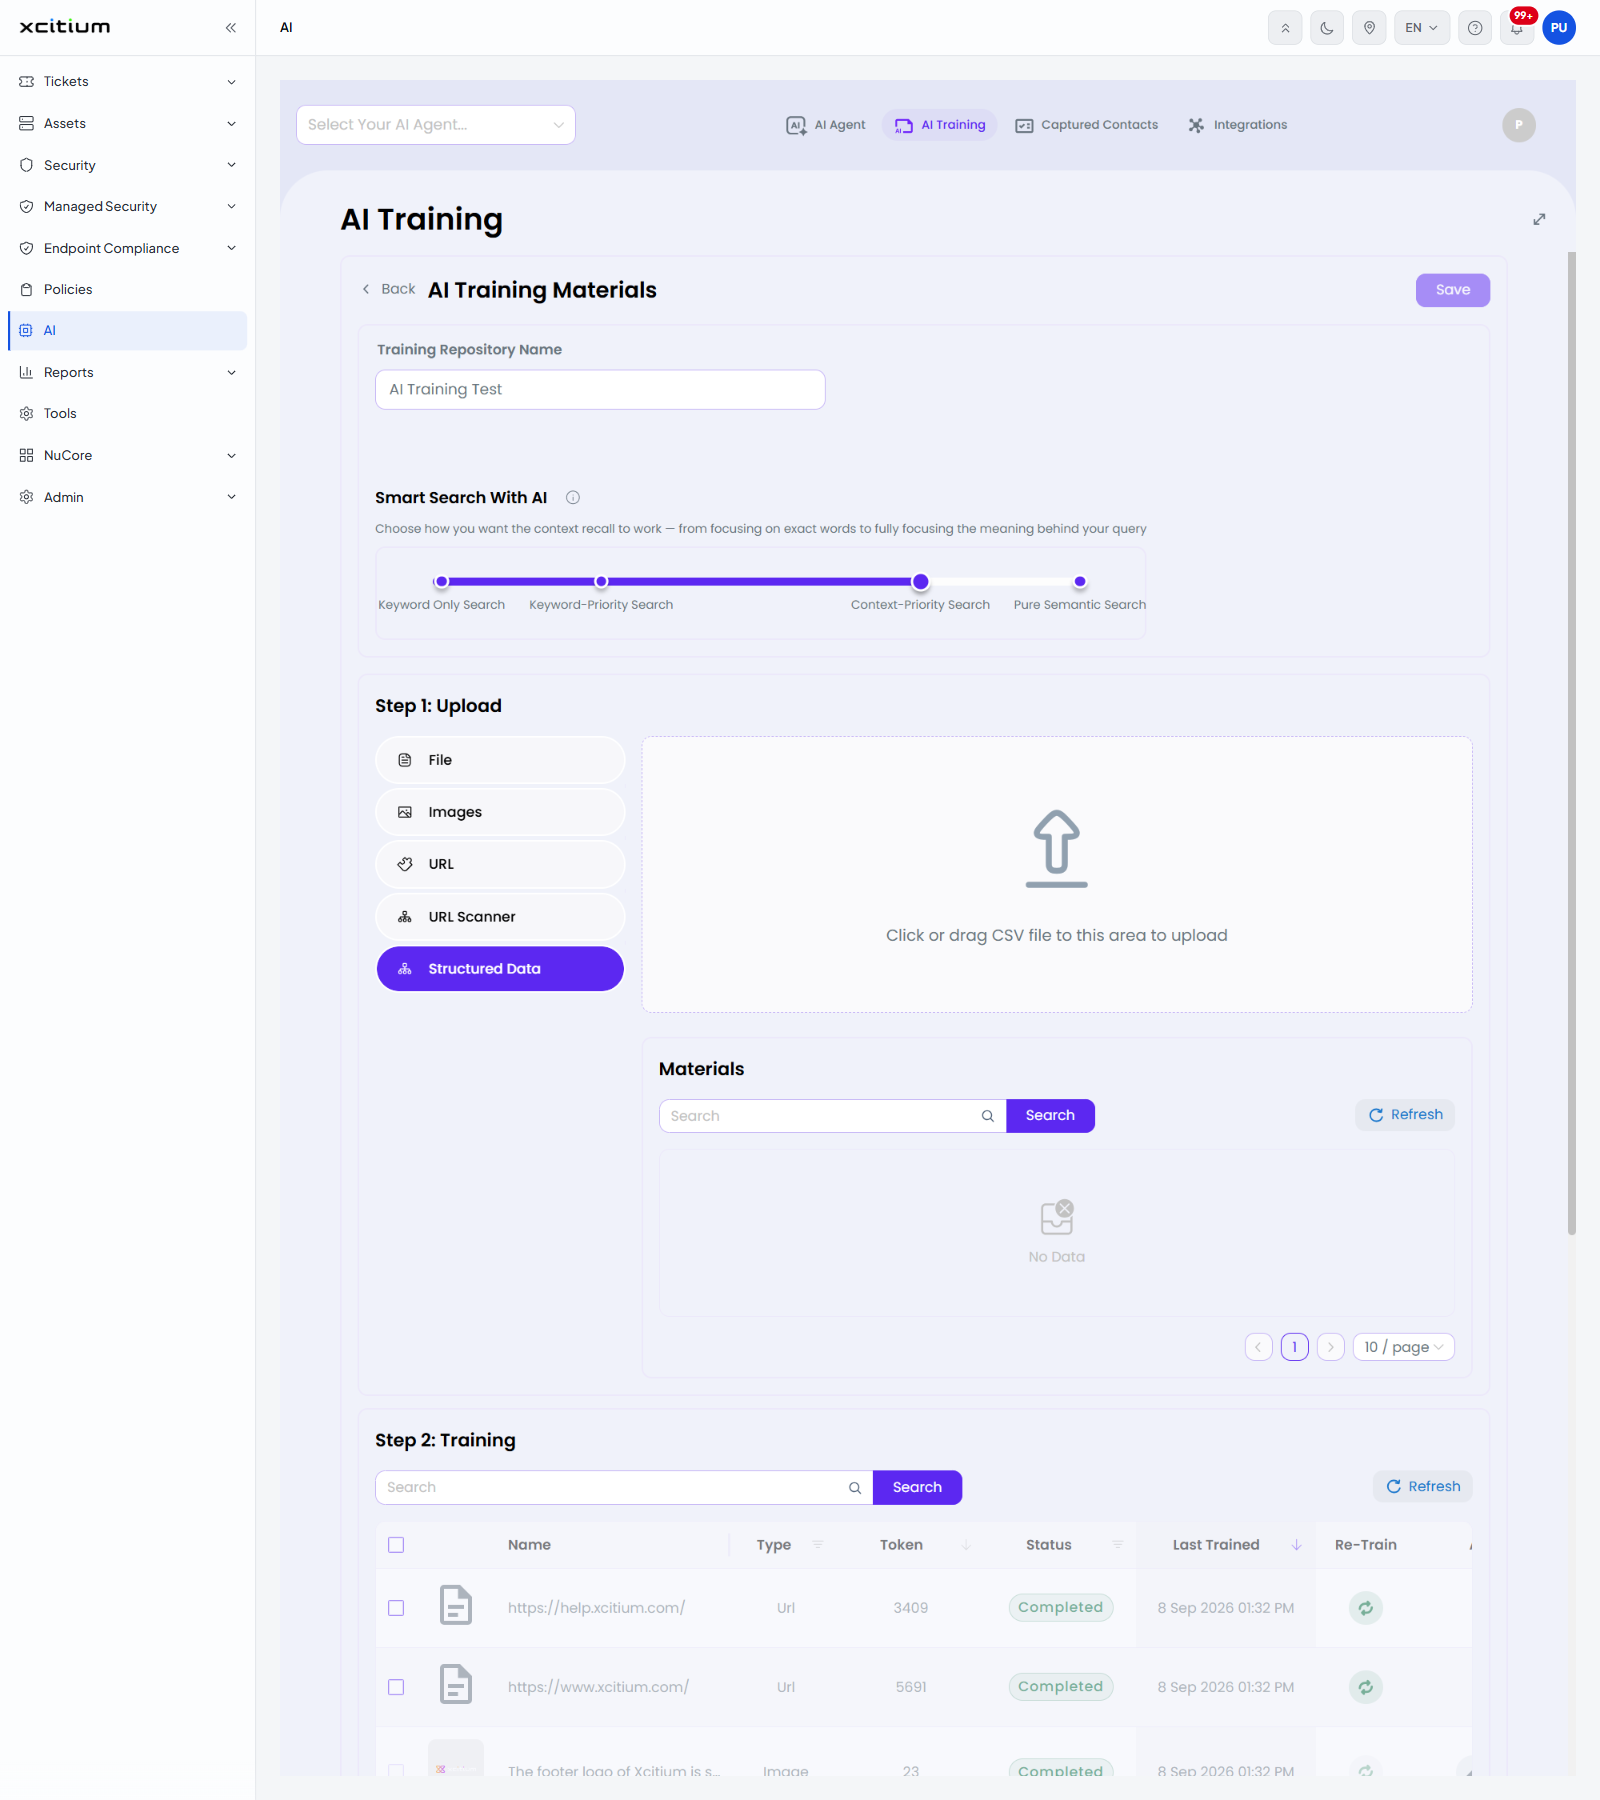
Step 2: Training
Everything in the repository is listed here with its training state. A 'Search' box with a 'Search' button narrows the list and a 'Refresh' button reloads it.
| Column | Description |
| Tick box | Selects rows. The box in the header selects every row on the page. |
| Name | The address of the page, the file name, or the description of the image, with a thumbnail or file icon. |
| Type | 'Url', 'Image', 'File' or 'Structured'. The column can be filtered; the filter offers 'File', 'Image', 'URL' and 'Structured' with 'Clear' and 'Confirm' buttons. |
| Token | How many tokens the material uses. The column can be sorted. |
| Status | The training state. The filter offers 'Initial', 'In Progress', 'Completed' and 'Failed' with 'Clear' and 'Confirm' buttons. |
| Last Trained | When the material was last trained. The column can be sorted. |
| Re-Train | A circular-arrow button that trains the material again. |
| Actions | Buttons for editing and removing the material. |
Add a web page to a repository
- Click 'AI' > 'AI Training' > 'Manage Repository' on the repository.
- In 'Step 1: Upload' click 'URL'.
- Type the address in 'URL', and click 'Add Path' for each further page.
- Choose where the page may be used in 'Select Component(s)'.
- Click 'Save'. The page appears in 'Step 2: Training' and trains itself.
Crawl a whole site
- In 'Step 1: Upload' click 'URL Scanner'.
- Click 'Add New'.
- Choose 'URL' or 'Sitemap' and type the address.
- Choose 'Basic' or 'Advanced' in 'Scan Mode' and set 'Max Depth'.
- Choose how wide to crawl in 'Filter'.
- Turn on 'Auto Train' if the pages found should be trained without you asking.
- Click 'Start Job'.
Note: Re-train material after you change the page or file it came from, otherwise the agent answers from the old version.