


Embed the Agent on Your Website
- Click 'AI' > 'AI Agent' > 'Manage Your AI Agent' > 'Agent Design' > 'Embed & Deploy' to open this interface.
'Embed & Deploy' is where you connect a sign-in provider and copy the code that puts the chat widget on your site. The sub-title reads 'Configure authentication and embed your chatbot on your website'.
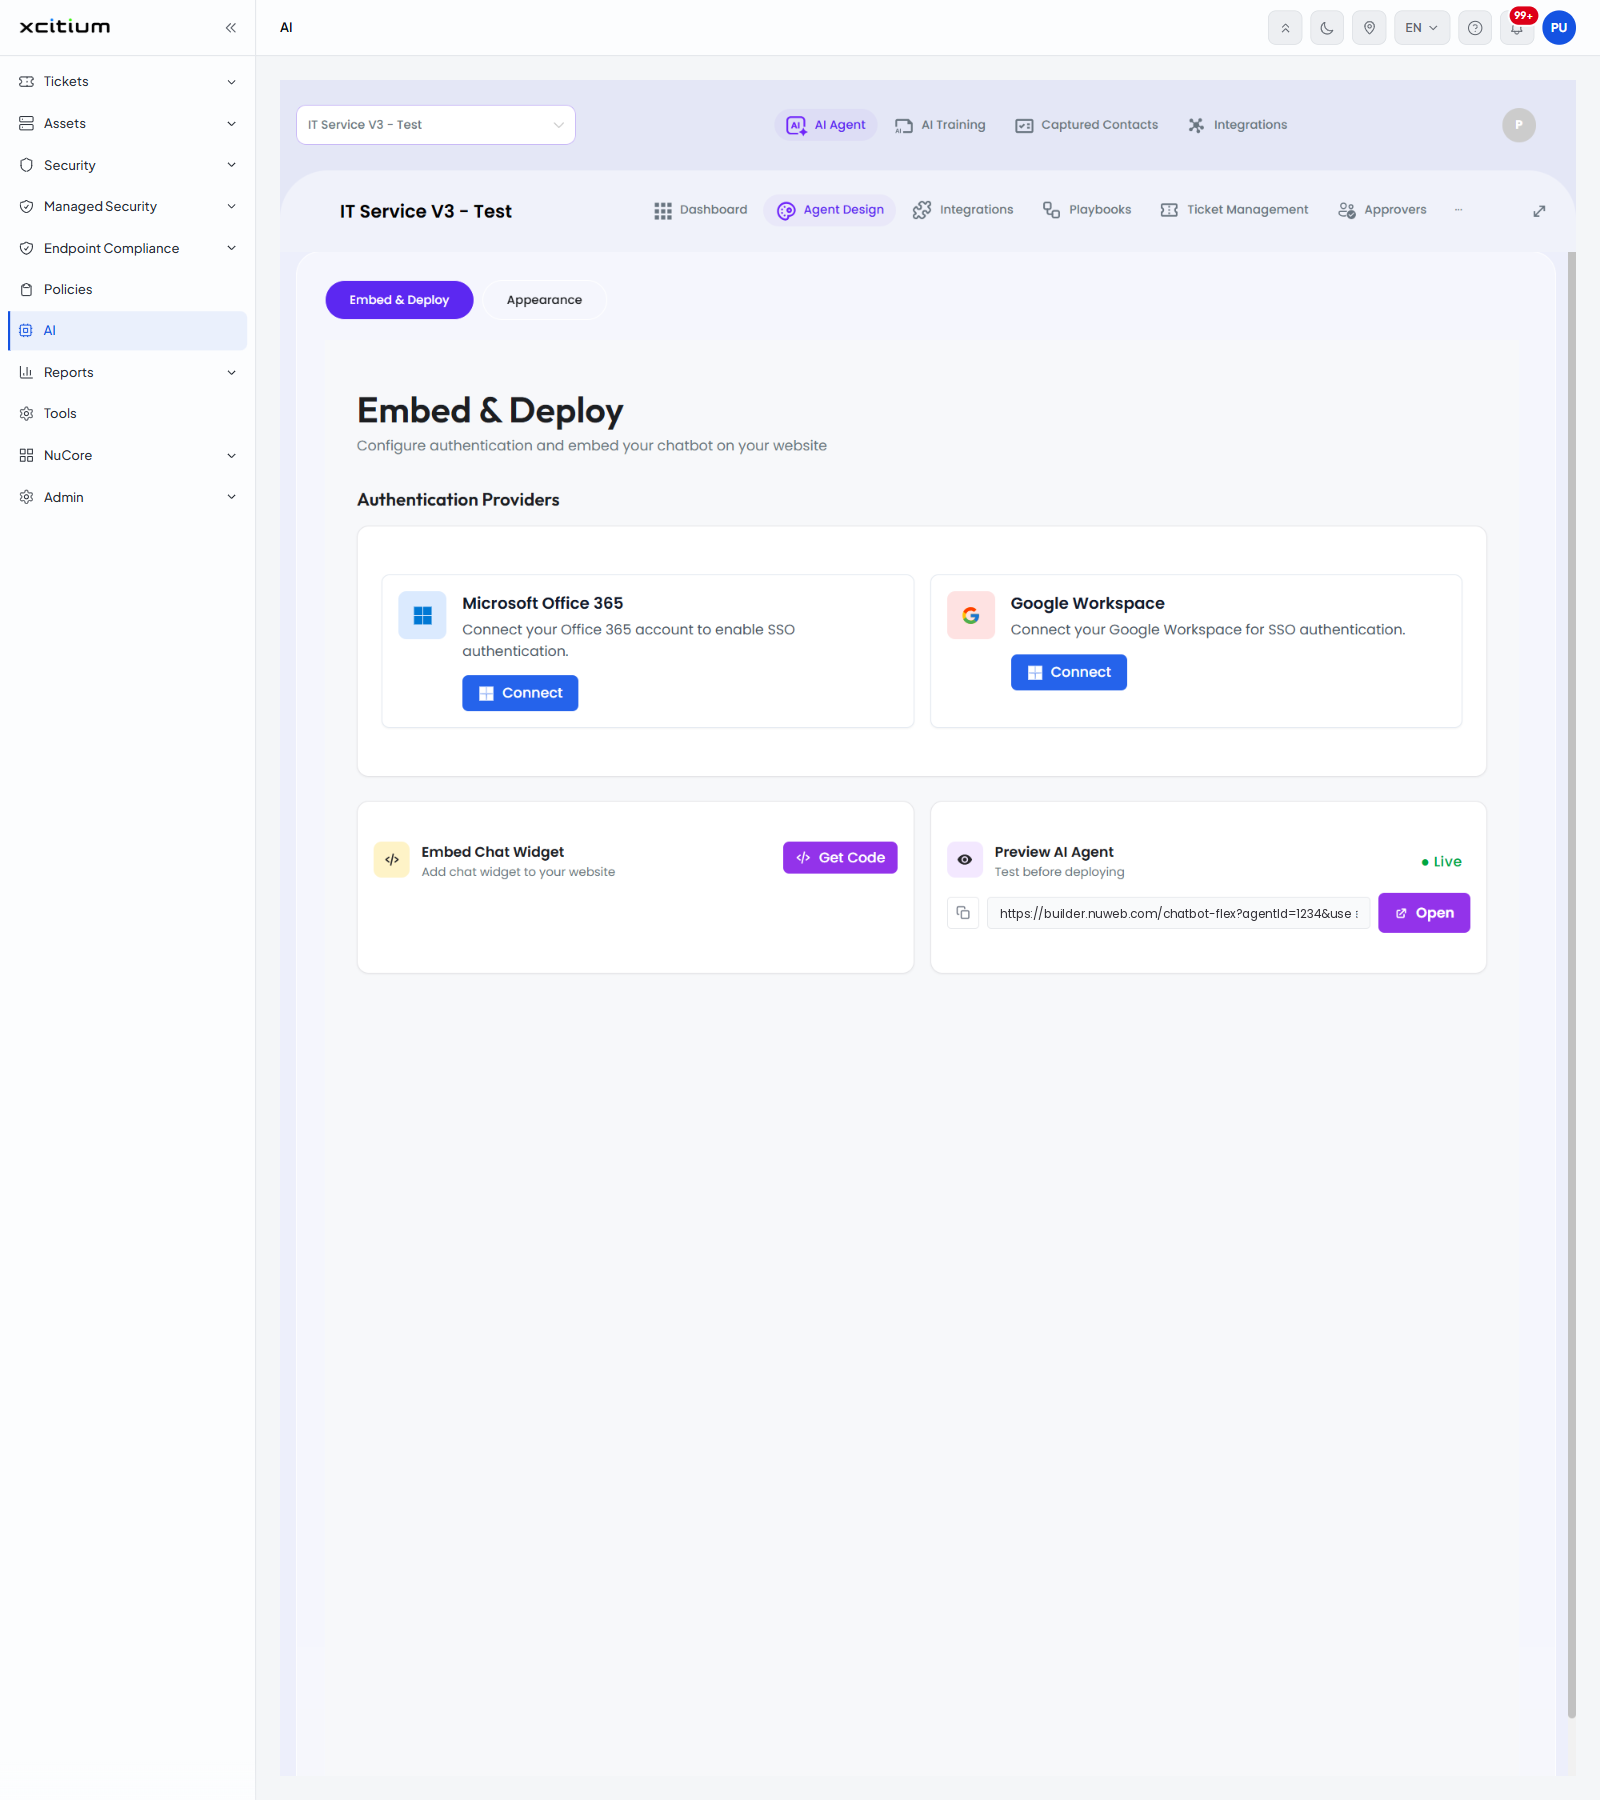
Authentication Providers
| Provider | Description | Button |
| Microsoft Office 365 | 'Connect your Office 365 account to enable SSO authentication.' | Connect |
| Google Workspace | 'Connect your Google Workspace for SSO authentication.' | Connect |
Embed Chat Widget
'Add chat widget to your website'. Click 'Get Code' to open the 'Get Embed Code' dialog.
Preview AI Agent
'Test before deploying'. A status marker shows whether the agent is 'Live'. The panel holds a read-only preview address, a copy button and an 'Open' button that opens the preview in a new tab.
The 'Get Embed Code' dialog
'Configure your embed settings and copy the code to your website.' The dialog has three tabs and closes with 'Cancel'. 'Copy Code' puts the snippet on your clipboard.
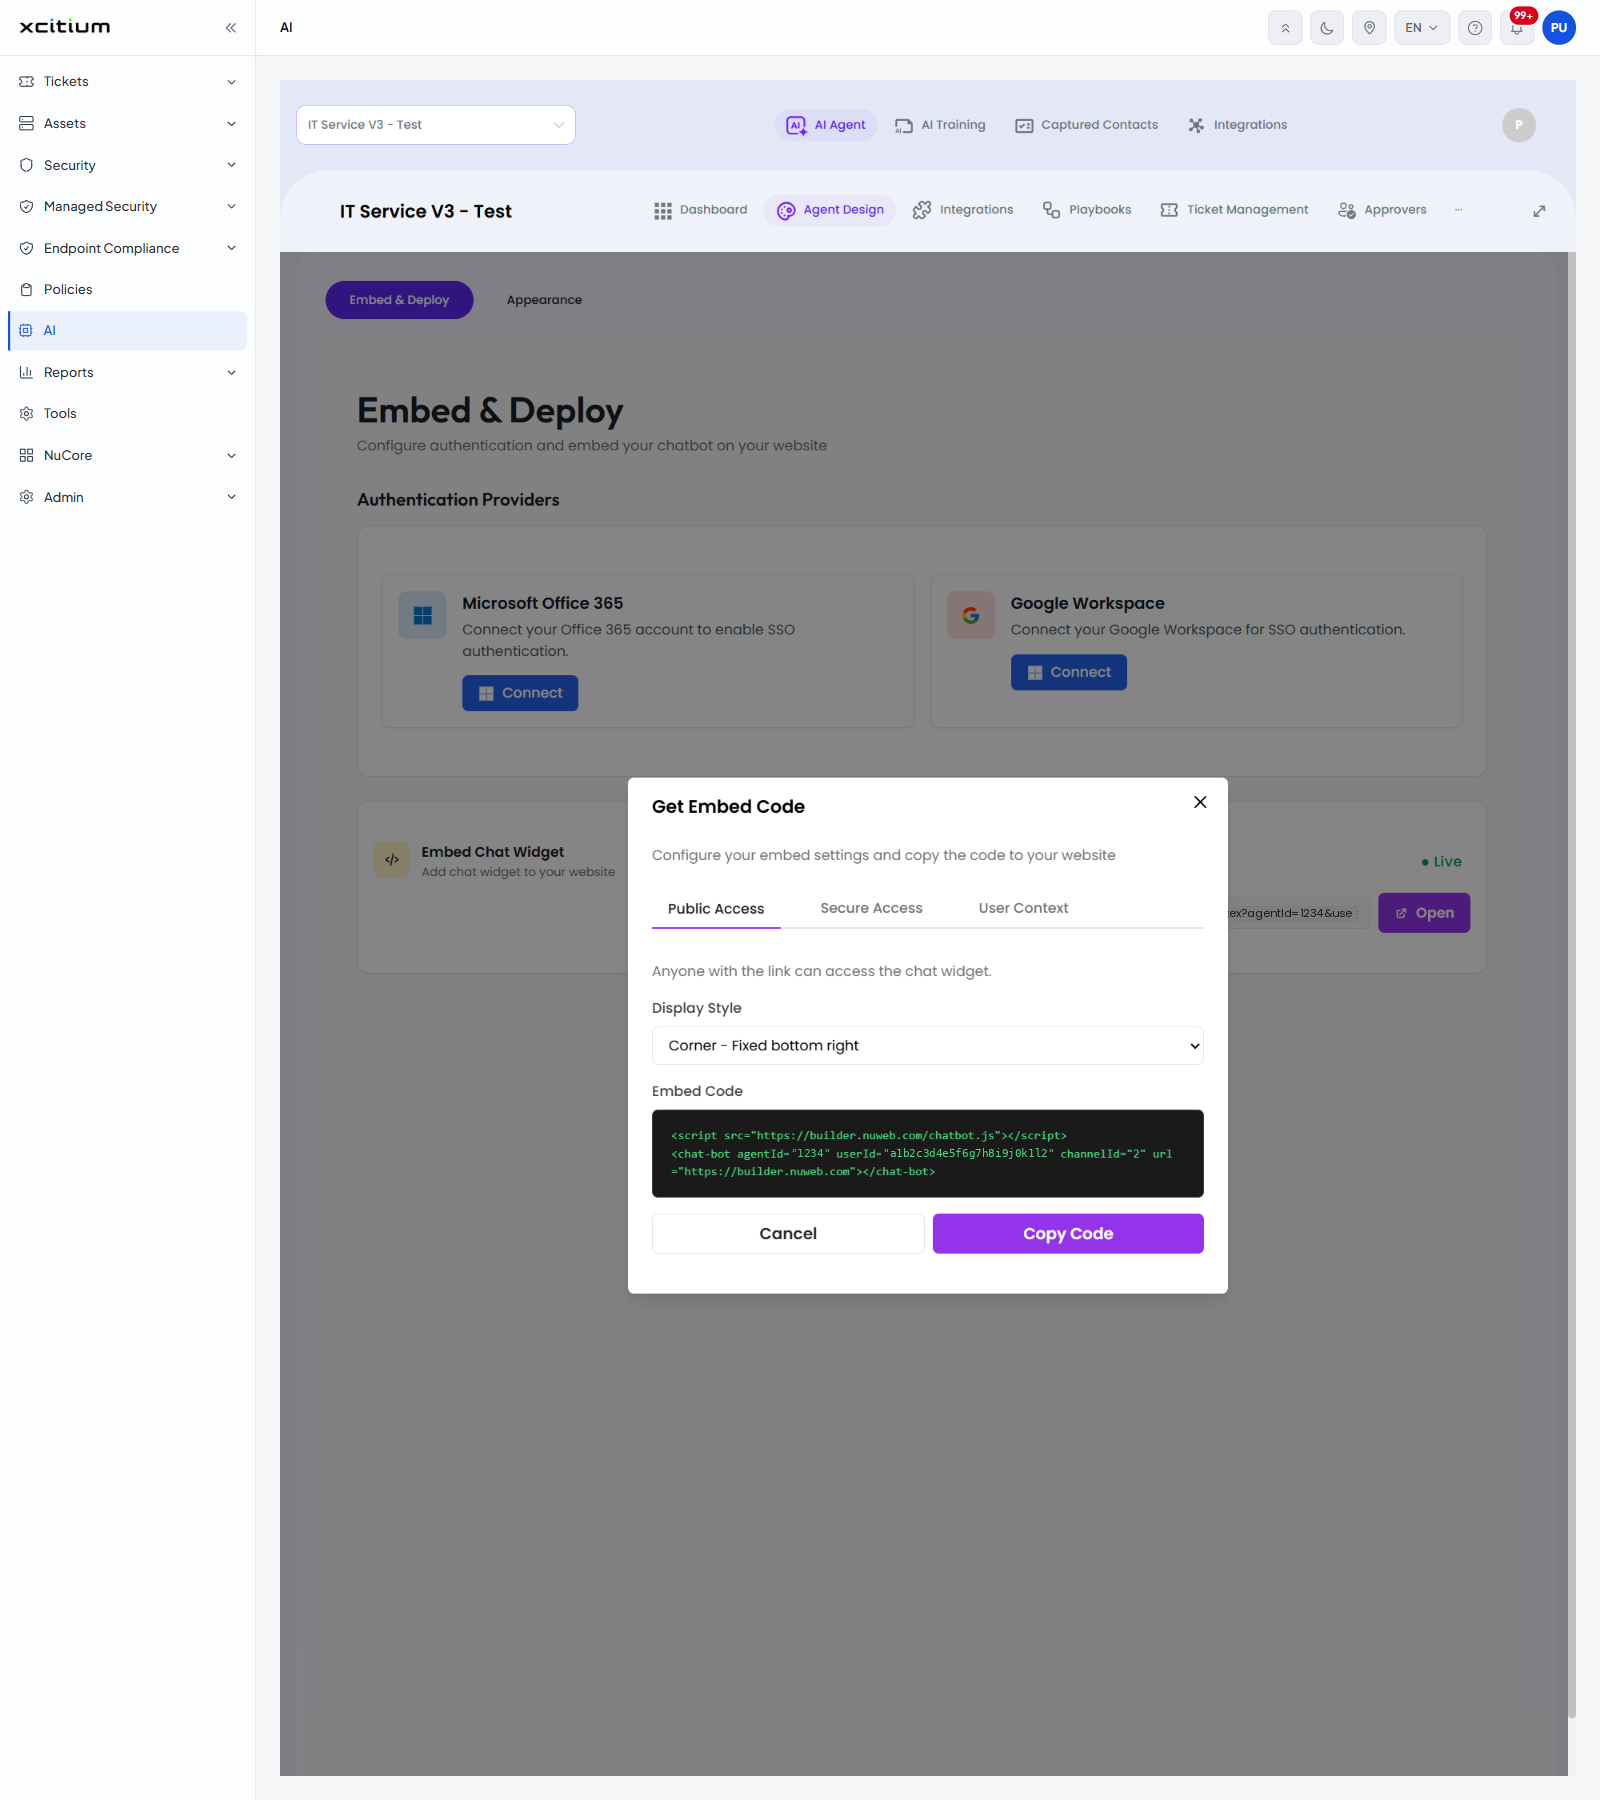
| Tab | Description |
| Public Access | 'Anyone with the link can access the chat widget.' |
| Secure Access | 'Users must sign in with their organization account to access the chat.' |
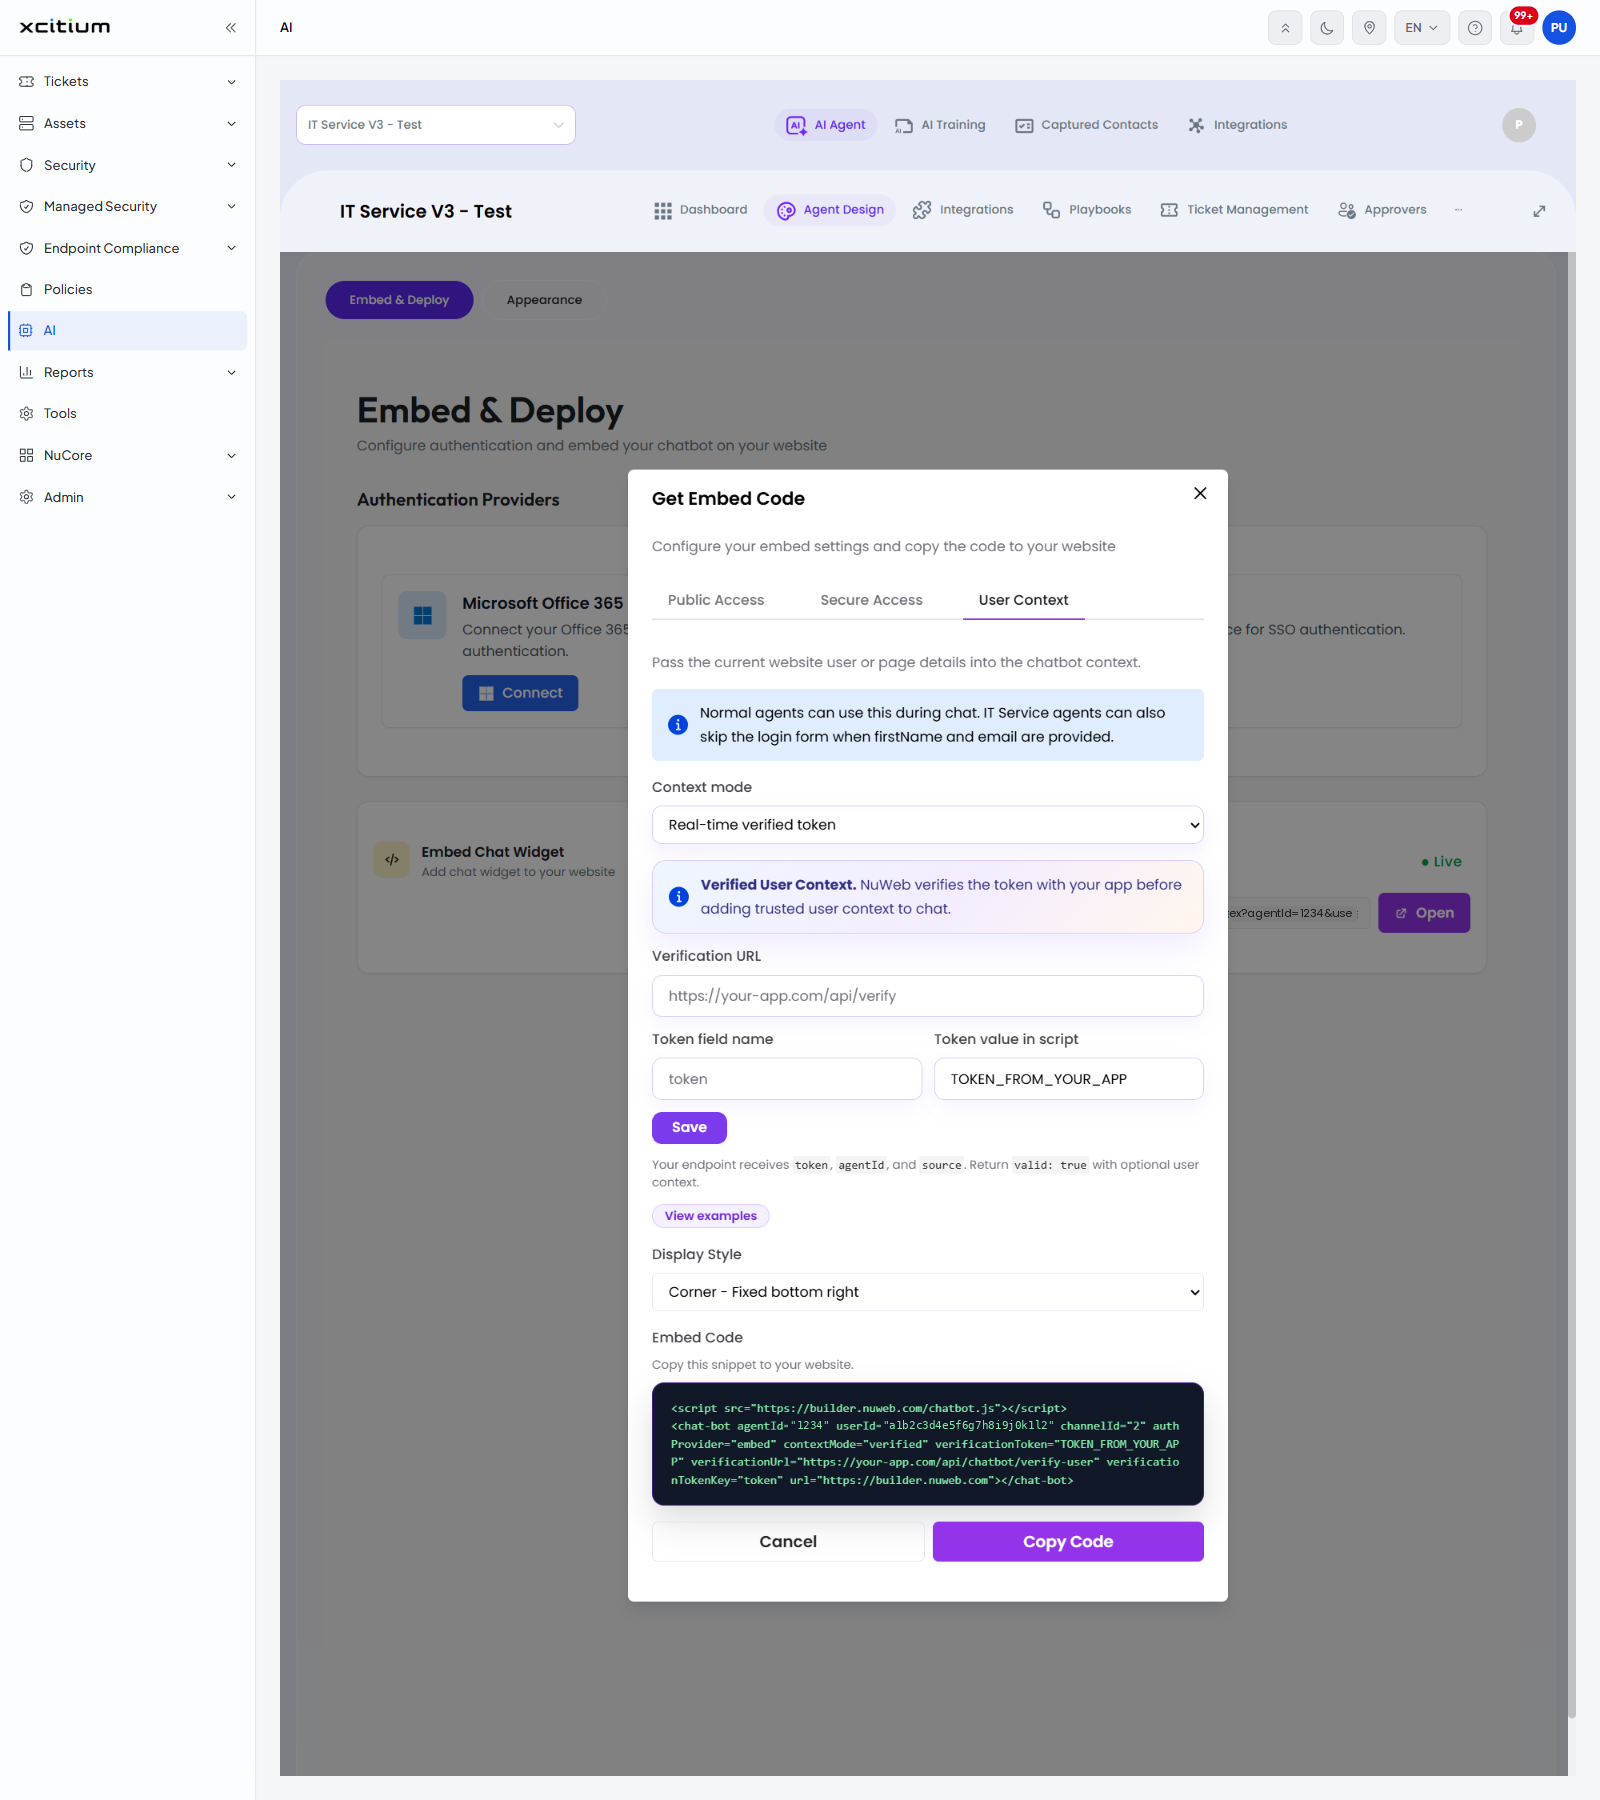
| User Context | 'Pass the current website user or page details into the chatbot context.' |
Fields in the dialog
| Field | Tab | Options |
| Display Style | All three | 'Corner - Fixed bottom right' (the default), 'Floating - Draggable widget', 'Flex - Inline responsive'. |
| Select authentication provider | Secure Access | 'Microsoft Office 365', 'Google Workspace', 'Okta (Coming Soon)', 'Azure AD (Coming Soon)'. A 'Connect' button sits beside it. |
| Context mode | User Context | 'Real-time verified token', 'Encrypted JSON (AES-256-GCM)', 'Plain JSON (base64url encoded)'. |
| Verification URL | User Context | The address on your own site that checks the token. |
| Token field name | User Context | The name of the field that carries the token. |
| Token value in script | User Context | The token placeholder written into the snippet. |
| Embed Code | All three | The read-only snippet to paste into your site. |
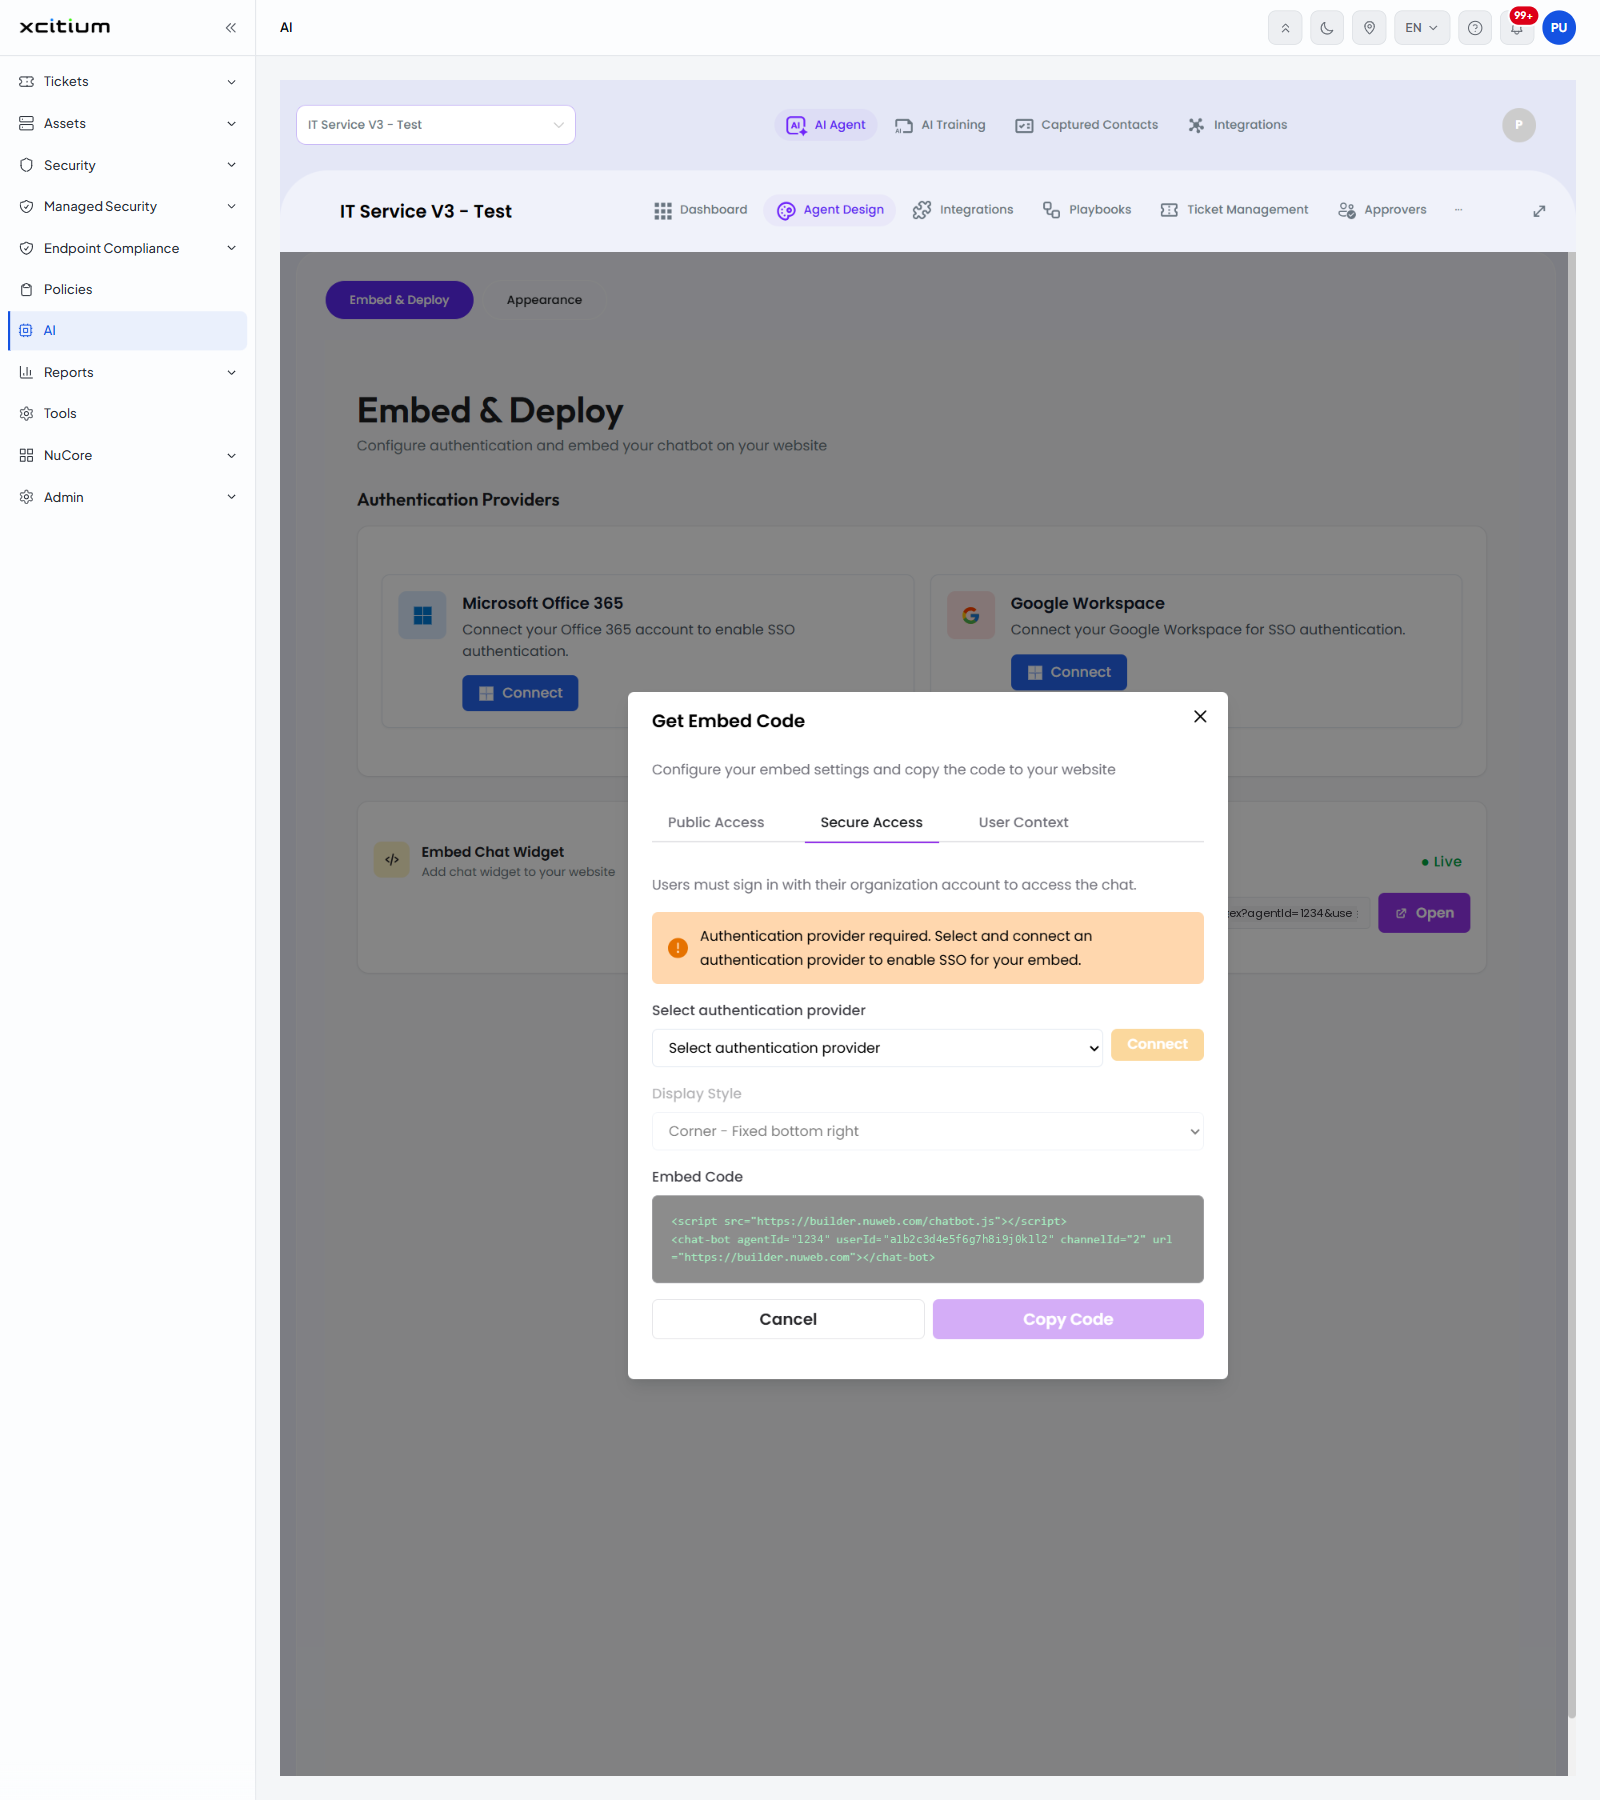
On 'Secure Access' the dialog warns 'Authentication provider required. Select and connect an authentication provider to enable SSO for your embed.'
On 'User Context' the dialog explains 'Normal agents can use this during chat. IT Service agents can also skip the login form when firstName and email are provided.' and, under the fields, 'Your endpoint receives token, agentId, and source. Return valid: true with optional user context.' A 'View examples' link and a 'Save' button sit in the same panel.
Put the widget on your site
- Click 'AI' > 'AI Agent' > 'Manage Your AI Agent' > 'Agent Design'.
- Click the 'Embed & Deploy' sub-tab.
- If visitors must sign in, click 'Connect' on 'Microsoft Office 365' or 'Google Workspace'.
- Click 'Get Code' on 'Embed Chat Widget'.
- Choose 'Public Access', 'Secure Access' or 'User Context'.
- Choose the 'Display Style' and complete any fields the tab asks for.
- Click 'Copy Code' and paste the snippet into your website.
- Click 'Open' on 'Preview AI Agent' to check the result.
Note: The embed snippet contains an agent id and a user id. Treat it as confidential.