


- Introduction
- Tickets
- Assets
- All Devices
- Device List
- Filter The Device List
- Group Management
- Enroll A Device
- Device Details
- View And Edit The Device Name
- View Device Summary Information
- View Network Information
- View Policies Associated With A Device
- View Applications Installed On A Device
- View The Command Queue
- View MSI Installation State
- View And Manage Patches On A Device
- View A Device's Groups
- View Device Logs
- Manage A Device's Policies
- Run A Procedure On A Device
- Install And Manage Packages On A Device
- Reboot Or Shut Down A Device
- Collect Performance Logs
- Change A Device's Owner
- Delete A Device
- Bulk Installation Package
- Device List
- Monitor Health
- Monitoring And Management
- Alerts
- Procedures
- Monitors
- Filter The Monitors List
- Create A Monitor
- A Monitor's General Tab
- A Monitor's Conditions Tab
- Add A Performance Condition
- Add A File Size Condition
- Add A Folder Size Condition
- Add A Disk Condition
- Add A Service Condition
- Add A Process Condition
- Add An Event Condition
- Add A TCP Condition
- Add A Ping Condition
- Add A Web Page Condition
- Add A Device Status Condition
- Add A Custom Script Condition
- Add A Security Events Condition
- Add A Security Client Events Condition
- Add An OS Patches Event Condition
- A Monitor's Policies Tab
- A Monitor's Logs Tab
- Clone, Import, Export And Delete Monitors
- Maintenance Windows
- Network Management
- Applications
- Endpoint Intelligence
- All Devices
- Security
- Threat Dashboards
- Endpoint Security
- SIEM - X
- Cloud Security
- Network Security
- Email Security
- Threat Labs
- Managed Security
- Endpoint Compliance
- Work With Endpoint Compliance Lists
- Agents
- All Assets
- Other Assets
- Deprecated Assets
- Problems
- Solutions
- Pending OS Patches
- Ports
- Patch Management
- Application Baseline Results
- Certificates
- Vulnerabilities
- Application Vulnerabilities
- Vulnerability By OS
- OS Vulnerabilities
- Network Scan Findings
- Compliance Standards
- Compliance Assessment
- Compliance Check Master
- Discovery Settings And Credentials
- Manage Mapping
- Jobs
- Alerts
- Policies
- The Profile List
- Policy Configuration
- Default Policies
- Predefined Policies
- The Policy Editor
- The Profile Editor
- Sections Configuration
- Add And Remove Profile Sections
- Profile Sections On Other Operating Systems
- General (Windows Profile)
- Associated Devices (Windows Profile)
- Profile Health Check
- Client Updates
- EXDR Updates
- Remote Control
- Client UI Settings
- Client Rebranding
- Client Proxy
- Client Access Control
- Remote Tools
- Monitors
- Procedures
- Patch Management
- Maintenance Window
- Global Proxy
- Client Logging Settings
- Antivirus
- Firewall
- EDR
- File Rating
- Containment
- VirusScope
- Xcitium Verdict Cloud
- Agent Discovering Settings
- External Devices Control
- Miscellaneous
- Script Analysis
- Data Loss Prevention
- XCS Access Control
- XCS Proxy
- XCS Updates
- XCS UI Settings
- XCS Logging Settings
- Performance
- Applications
- Chat
- Thumbnails
- AI
- Customers
- Reports
- Standard Reports
- Custom Reports
- The Report Catalogue
- Configure And Generate A Custom Report
- Generated Reports
- Advanced Reports
- Reports Beta
- SLA Reports
- Audit Logs
- Tools
- NuCore
- Admin
Import Users
Import User opens a page where you upload a CSV file to add many users at once, all against the same customer and role.
Steps
- On the User List, click Import User.
- Click Browse and choose your CSV file.
- Choose the Customer and the Role the imported users will get.
- Click Import users from list.
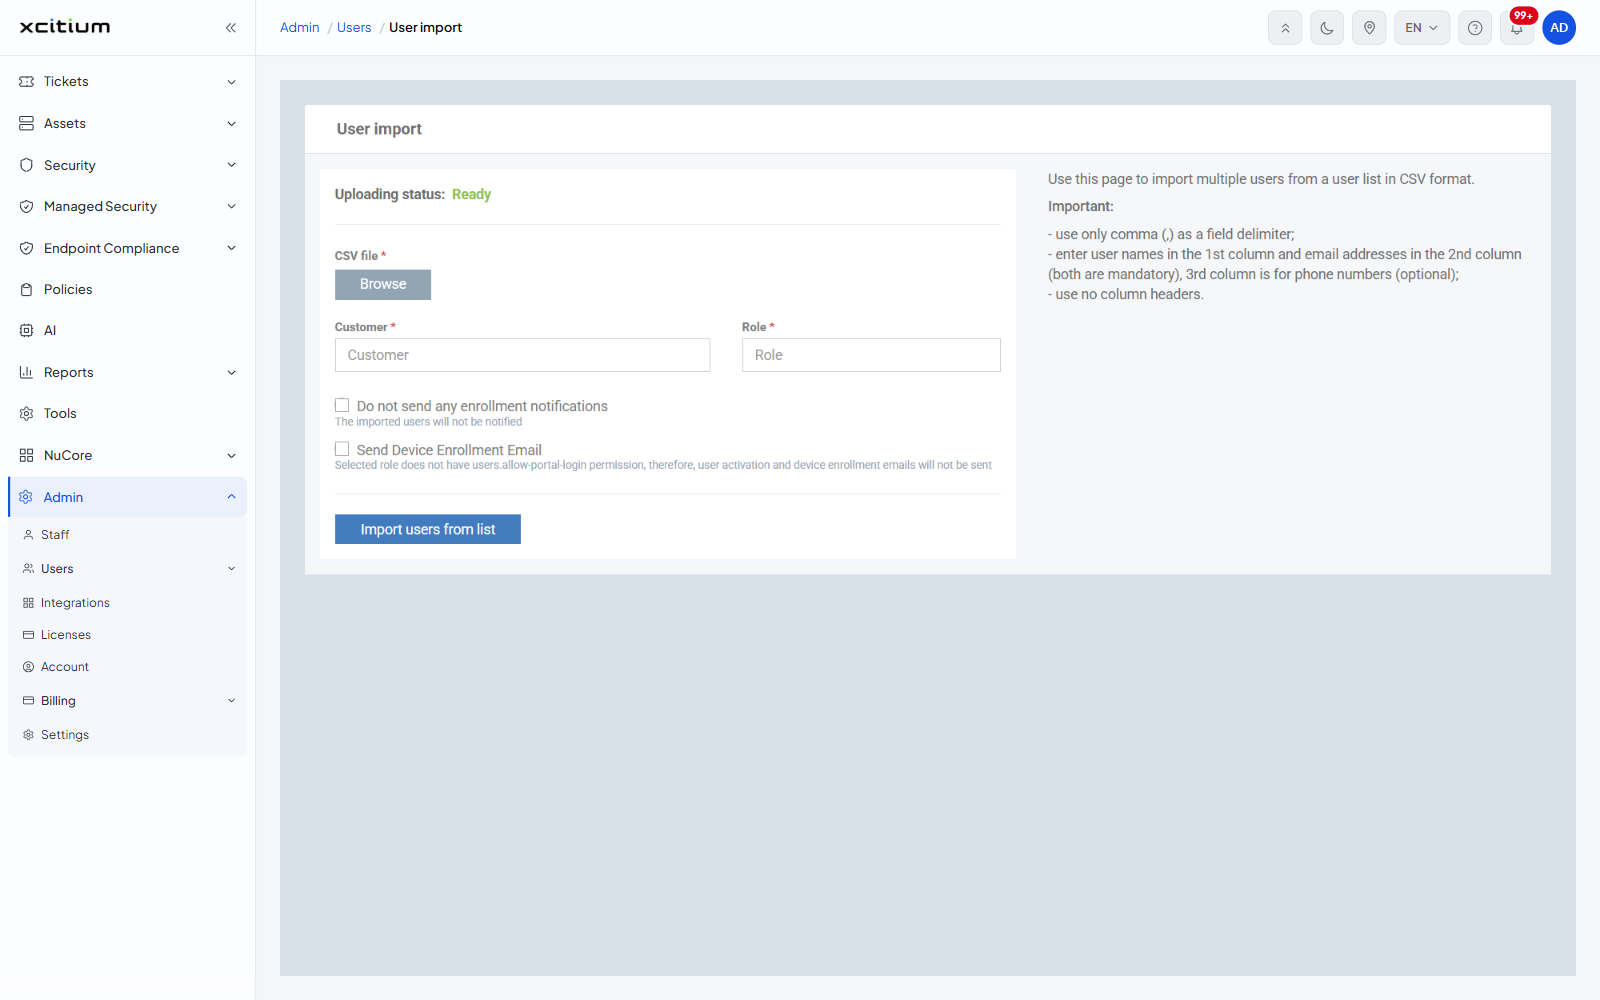
How the CSV must be laid out
- Use only a comma as the field delimiter
- Put user names in the first column and email addresses in the second — both are required
- Put phone numbers in the third column, which is optional
- Do not include column headers
Fields and options
- CSV file — required; click Browse to choose it
- Customer — required; type at least two characters to search
- Role — required; type at least two characters to search
- Do not send any enrollment notifications — the imported users will not be notified
- Send Device Enrollment Email — sends each imported user a link to enrol their device
Both checkboxes are unavailable while the chosen role cannot sign in to the portal. Discard import clears what you have chosen, and Clear errors report clears the result of a previous attempt. The Uploading status line reads Ready until an import starts.