


Create a Discovery
- Click 'Assets' > 'Network Management' > 'Discoveries', then click 'Create Discovery' on the toolbar.
The wizard has two steps. The first names the discovery and chooses how it will look for devices; the second collects the details that method needs.
You can scan an address range from a probe device, or read an Active Directory with or without a probe device.
Step 1 — name and method
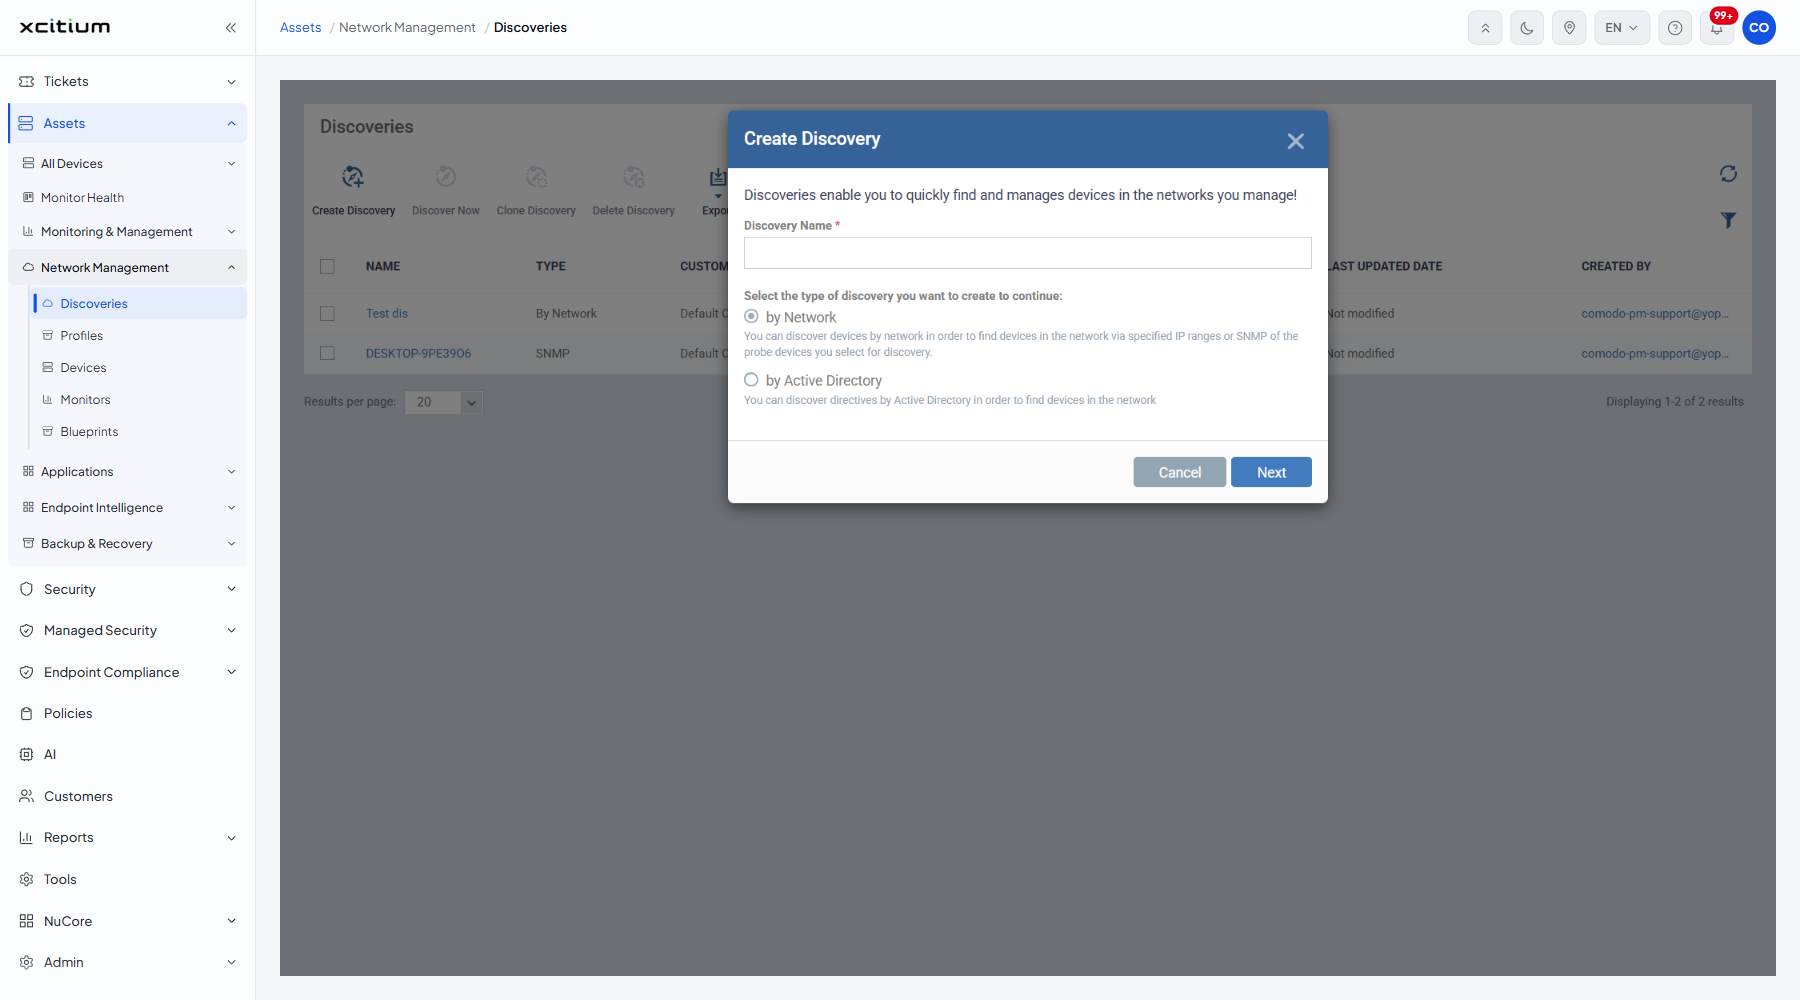
The step opens with the line 'Discoveries enable you to quickly find and manages devices in the networks you manage!'
| Field | Type | Options / default | Required |
| Discovery Name | Text box | Empty by default. Leaving it empty and clicking 'Next' shows the error 'You must specify discovery name'. | Yes |
| by Network | Radio | The default. 'You can discover devices by network in order to find devices in the network via specified IP ranges or SNMP of the probe devices you select for discovery.' | Yes |
| by Active Directory | Radio | 'You can discover directives by Active Directory in order to find devices in the network' | Yes |
Step 2 — by Network
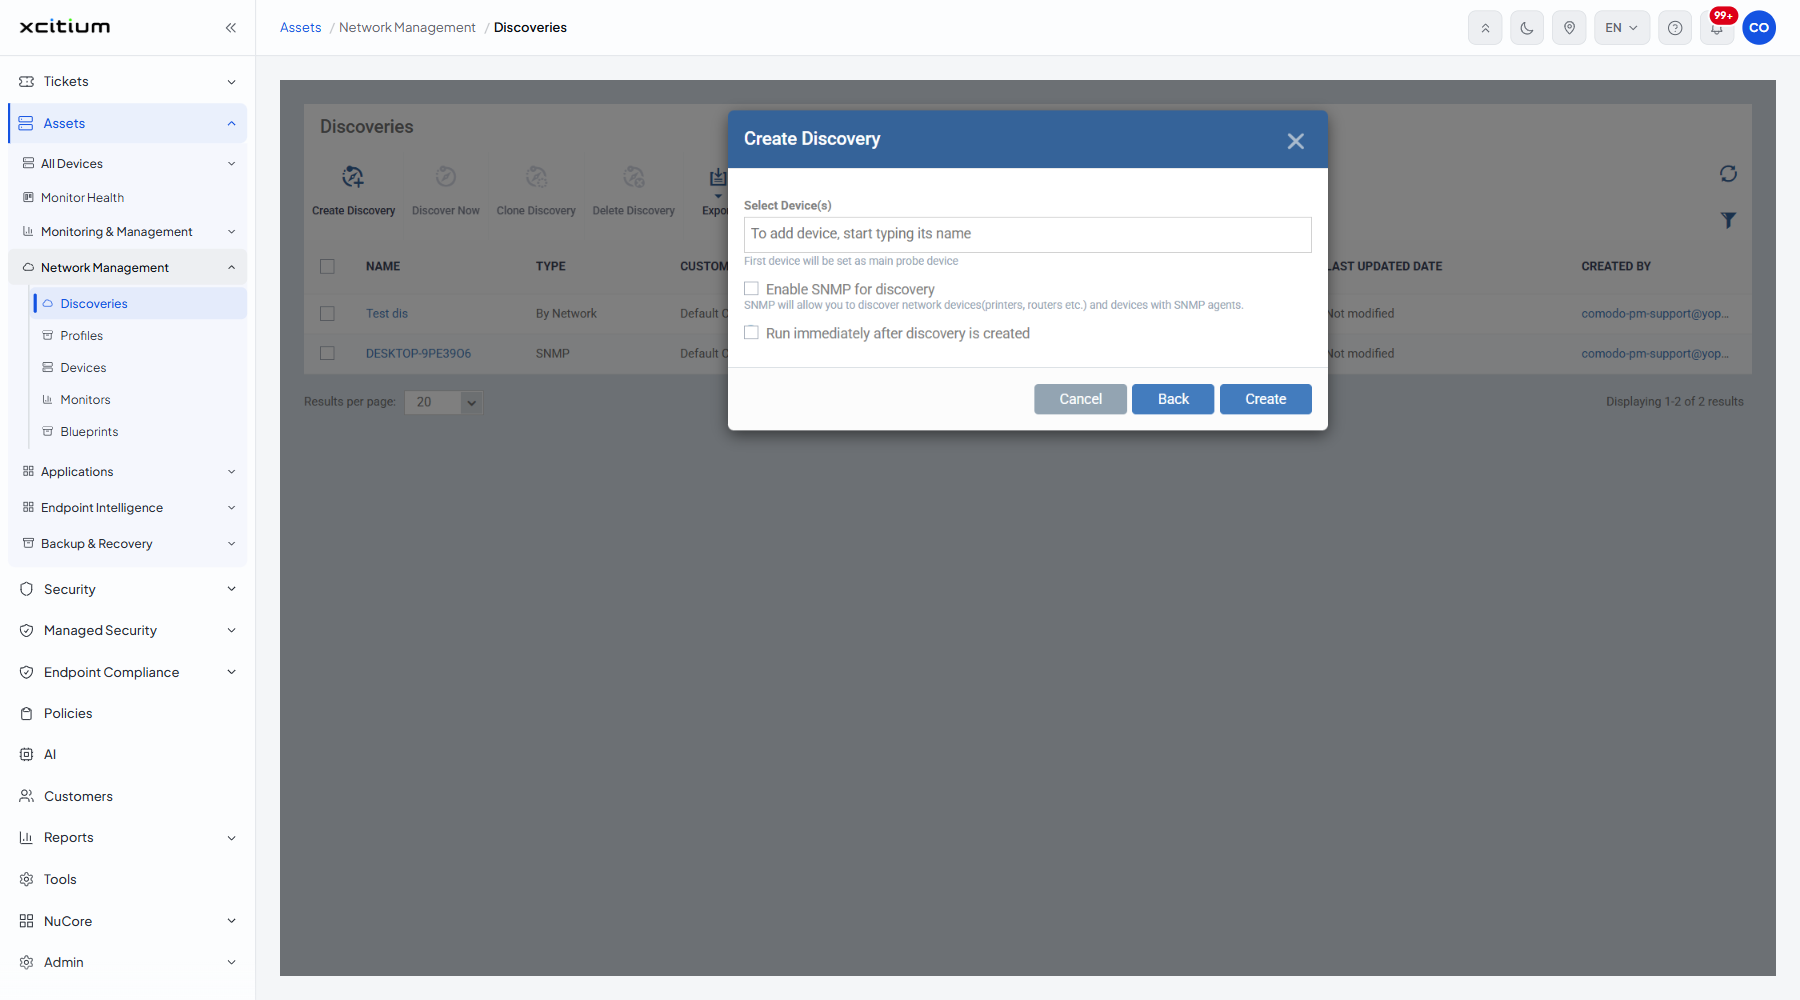
| Field | Type | Options / default | Required |
| Select Device(s) | Search picker | Empty by default, with the placeholder 'To add device, start typing its name' and the helper line 'First device will be set as main probe device'. | No |
| Enable SNMP for discovery | Checkbox | Clear by default. Helper line: 'SNMP will allow you to discover network devices(printers, routers etc.) and devices with SNMP agents.' | No |
| Run immediately after discovery is created | Checkbox | Clear by default. | No |
Step 2 — by Active Directory
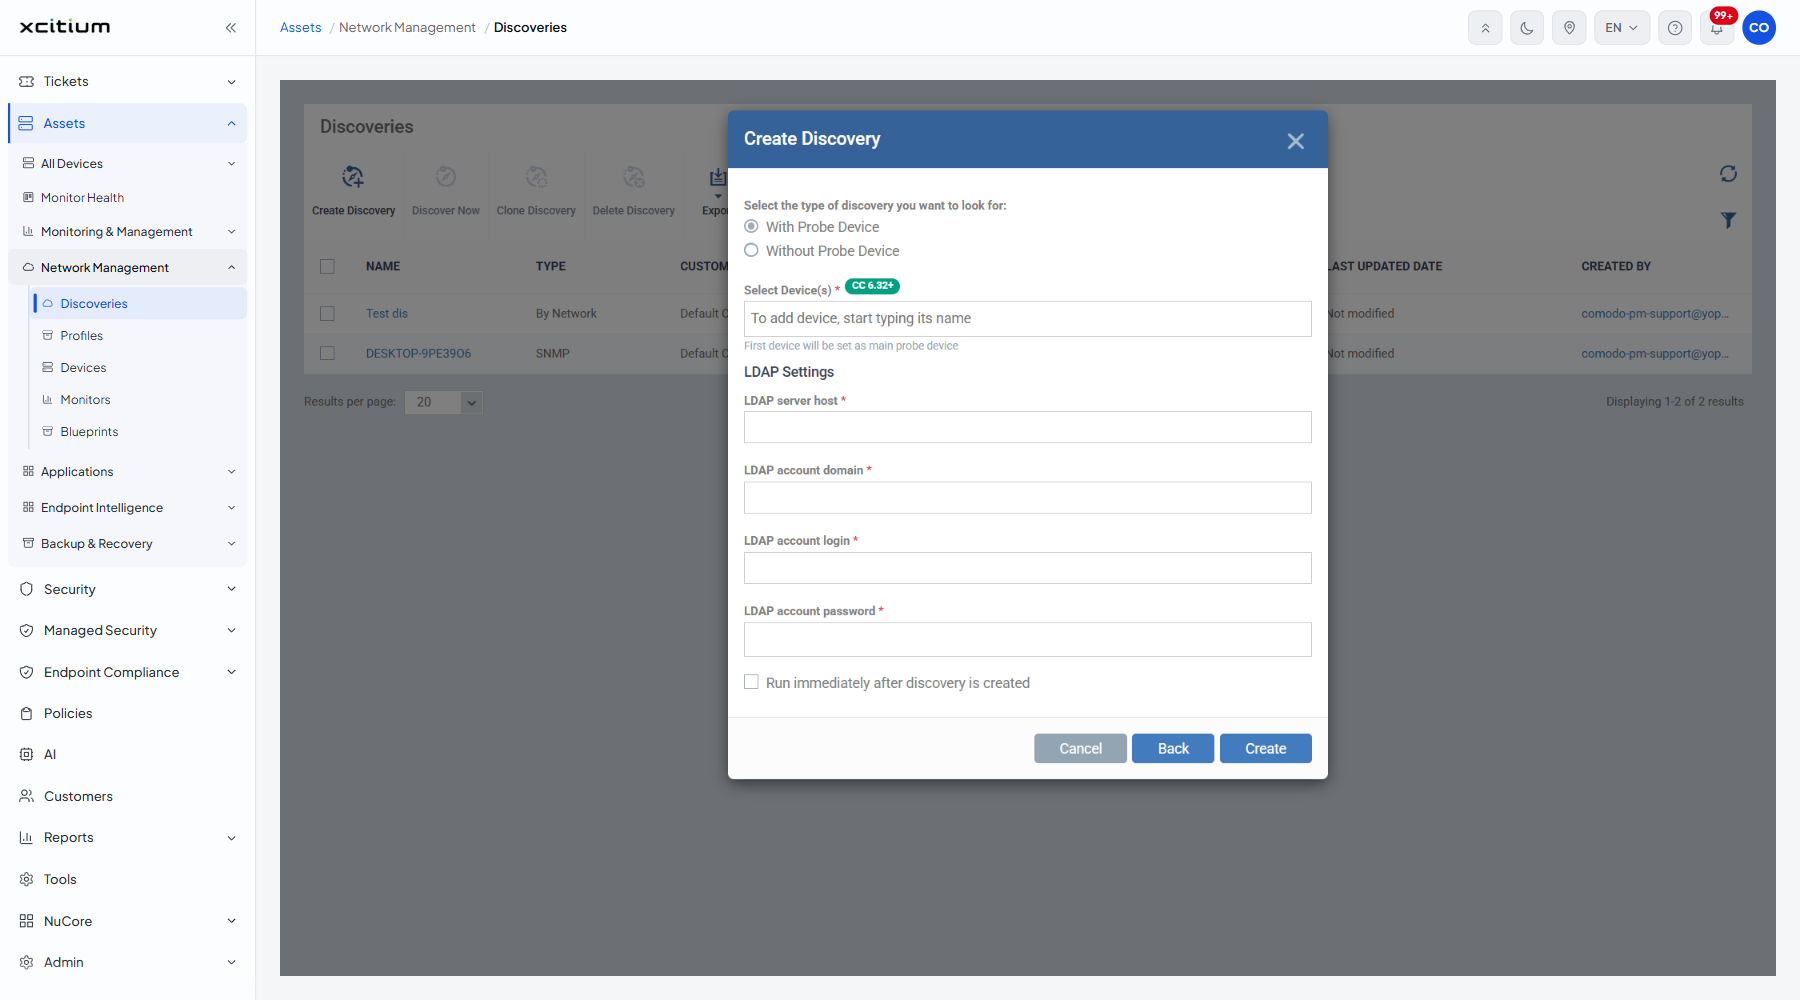
| Field | Type | Options / default | Required |
| Select the type of discovery you want to look for | Radio pair | 'With Probe Device' (default) or 'Without Probe Device'. | Yes |
| Select Device(s) | Search picker | Shown only with 'With Probe Device'. Badged 'CC 6.32+'. Helper line 'First device will be set as main probe device'. | Yes |
| LDAP server host | Text box | Empty by default. | Yes |
| LDAP account domain | Text box | Empty by default. | Yes |
| LDAP account login | Text box | Empty by default. | Yes |
| LDAP account password | Password box | Empty by default. | Yes |
| Run immediately after discovery is created | Checkbox | Clear by default. | No |
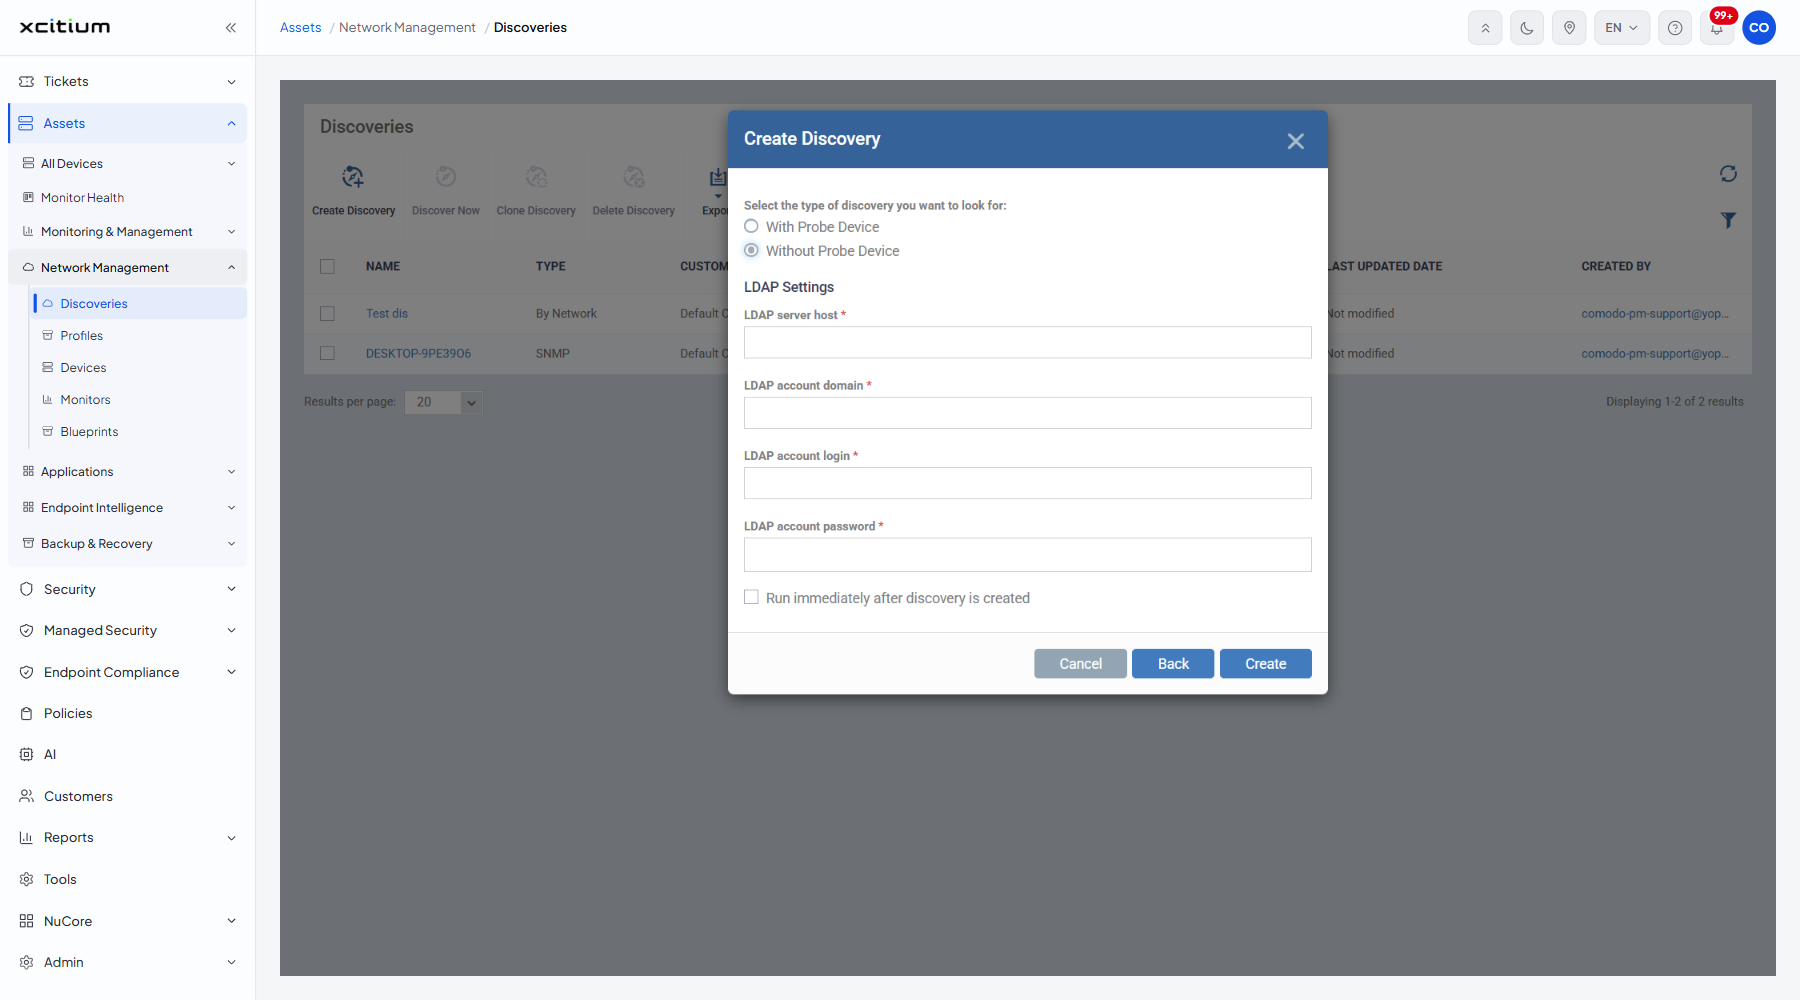
Choosing 'Without Probe Device' removes the 'Select Device(s)' picker entirely and leaves the four LDAP fields.
Create a network discovery
- Click 'Assets' > 'Network Management' > 'Discoveries'.
- Click 'Create Discovery'.
- Type a name into 'Discovery Name'.
- Leave 'by Network' selected and click 'Next'.
- Start typing a device name in 'Select Device(s)' and pick the managed device that should do the scanning. The first one you pick becomes the main probe device.
- Tick 'Enable SNMP for discovery' if you want printers, routers and other SNMP devices found as well.
- Tick 'Run immediately after discovery is created' to start the scan as soon as you finish.
- Click 'Create'.
Create an Active Directory discovery
- Click 'Create Discovery', name it, choose 'by Active Directory' and click 'Next'.
- Choose 'With Probe Device' or 'Without Probe Device'.
- If you chose ‘With Probe Device’, pick the managed device that will read the directory.
- Fill in the four LDAP fields with the address of the directory server and an account that may read it.
- Click 'Create'.
Note: the address ranges a network discovery scans are set after it is created, in the ‘IP Ranges’ section of its General tab.