Role Management
Role Management is where you create roles, see what each one can do, and check which roles a person holds. It has two tabs, Roles and Users.
Getting there
- Click Admin, then Users.
- Click Role Management. The page shows Loading… for a moment before the tabs appear.
Roles tab
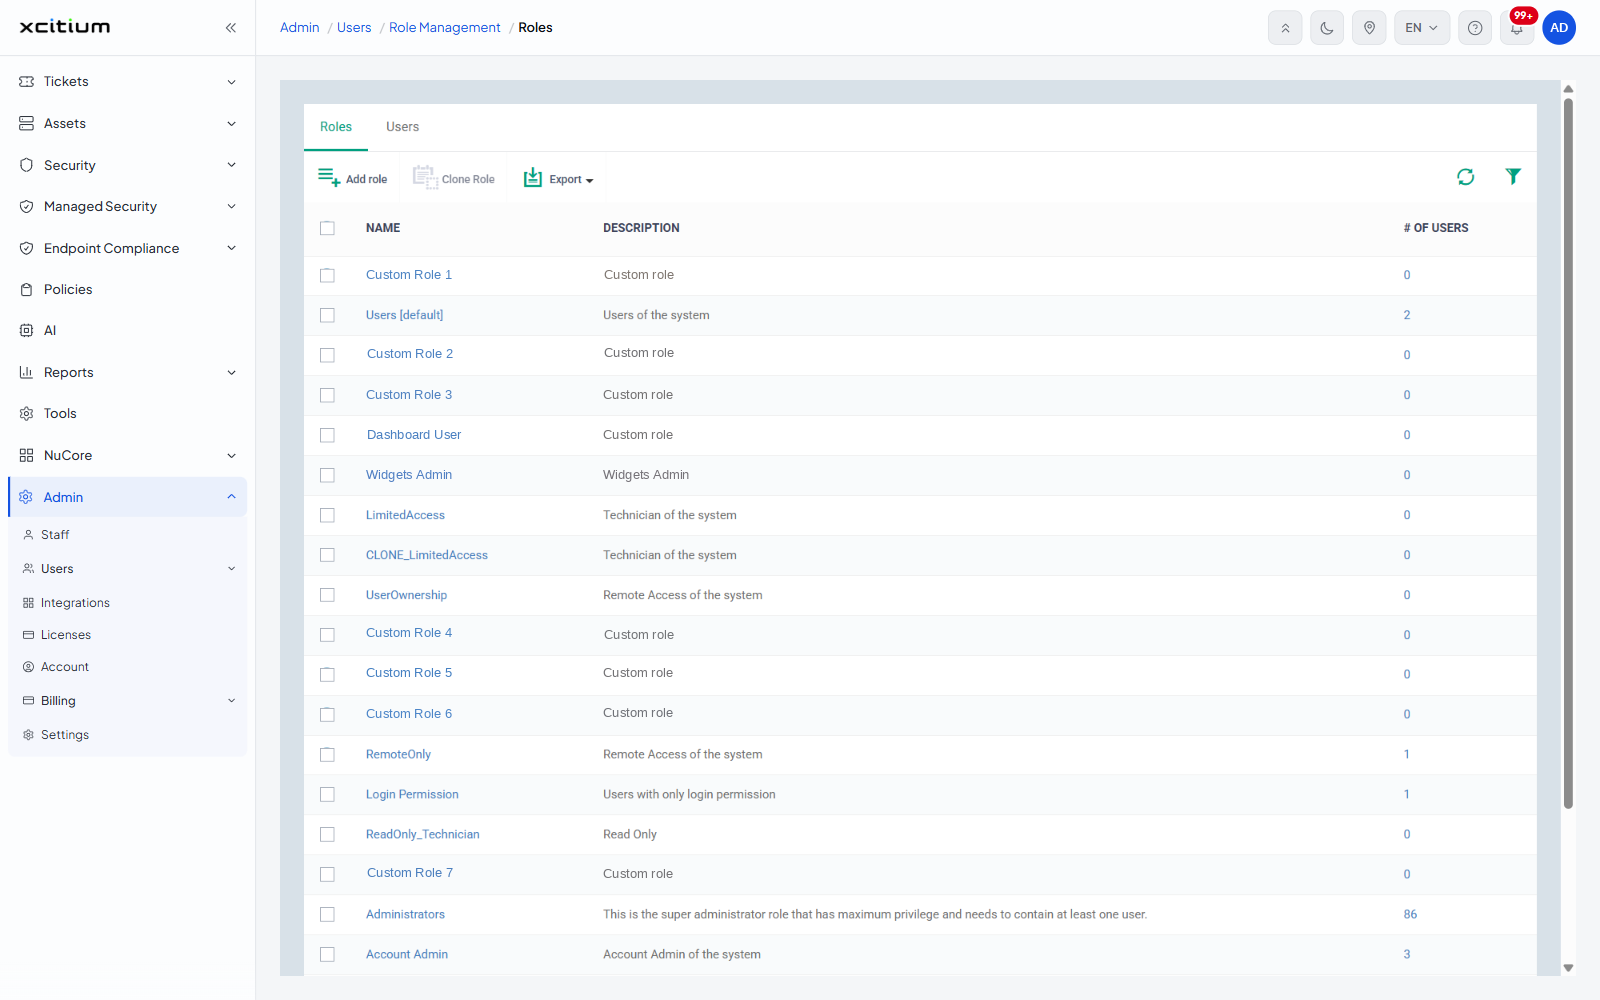
- Name — click it to open the role's permissions
- Description
- The number of users holding the role — click it to see who they are
All three columns sort. The role new users get by default is marked in its Name cell as [default]. Results per page offers 20, 50, 100 and 200. The toolbar holds Add role, Clone Role, Export, Table refresh and Table filter; Clone Role becomes available once you tick a role, and copies it as the starting point for a new one.
Create a role
- Click Add role.
- Enter a Name and a Description. Both are required.
- Confirm with the button in the dialog footer.
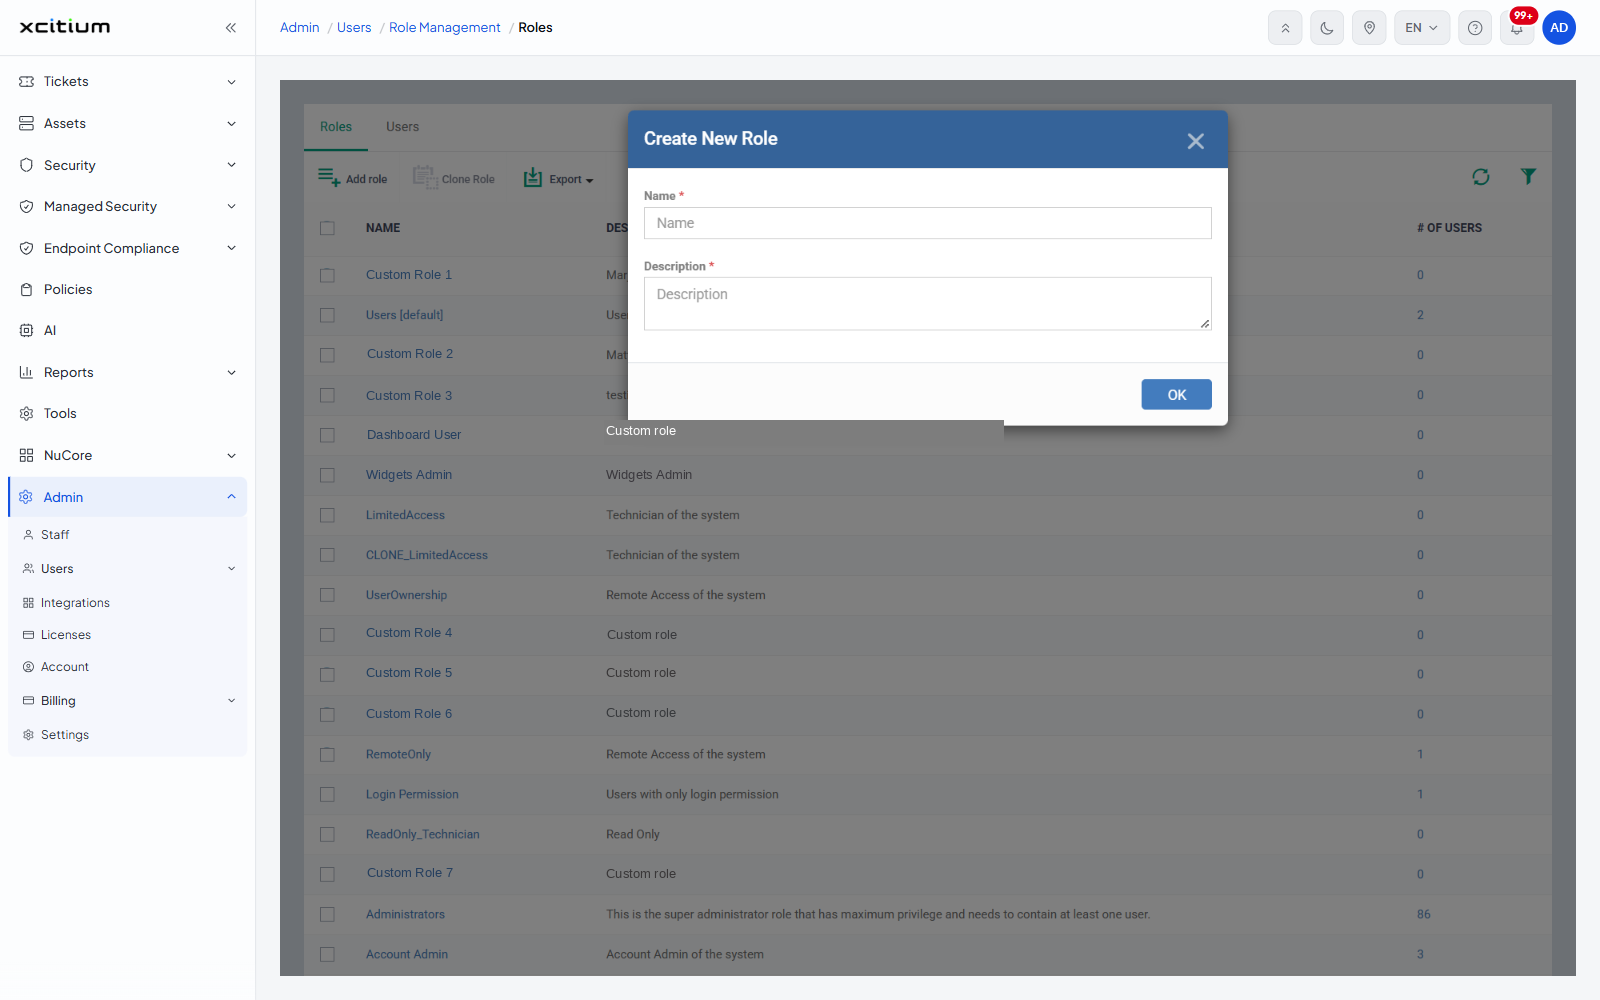
Close the dialog with the × in its header to discard it. Set the new role's permissions afterwards by opening it from the Roles list.
Users tab
The Users tab lists every account and the roles it holds, so you can check someone's access from the person's side rather than the role's.
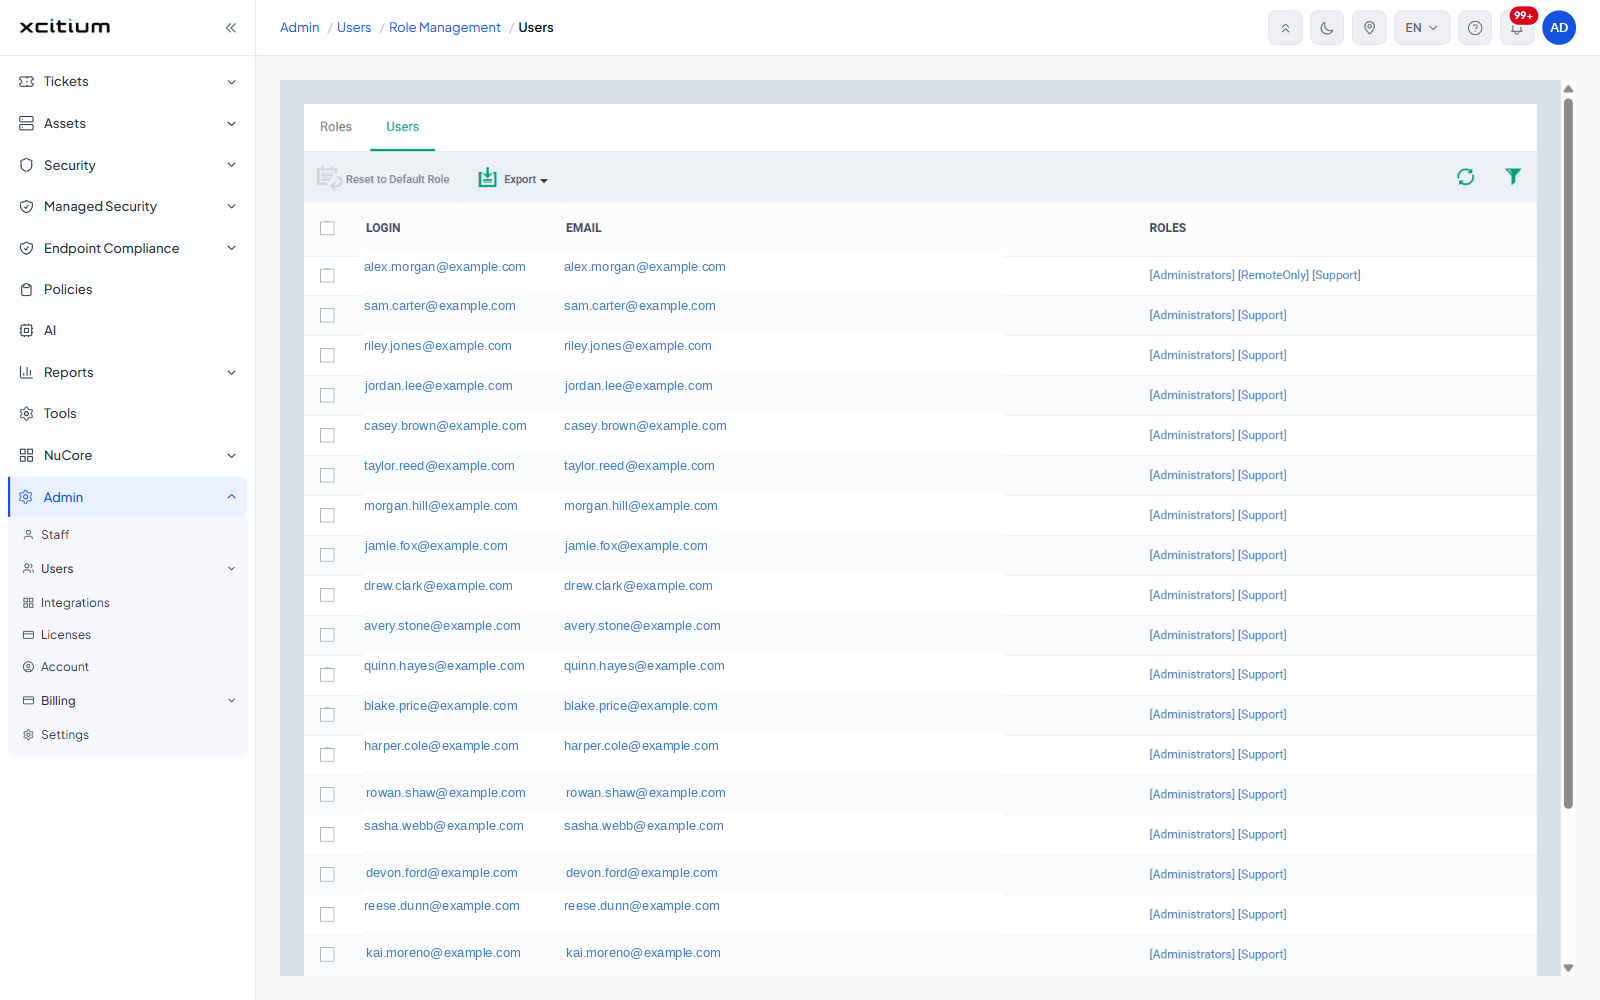
- Login — click it to open that person's roles
- Email
- Roles — every role the account holds, each a link to that role
Login and Email sort; Roles does not. The toolbar holds Reset to Default Role, Export, Table refresh and Table filter; Reset to Default Role becomes available once you tick an account and puts it back on the default role.
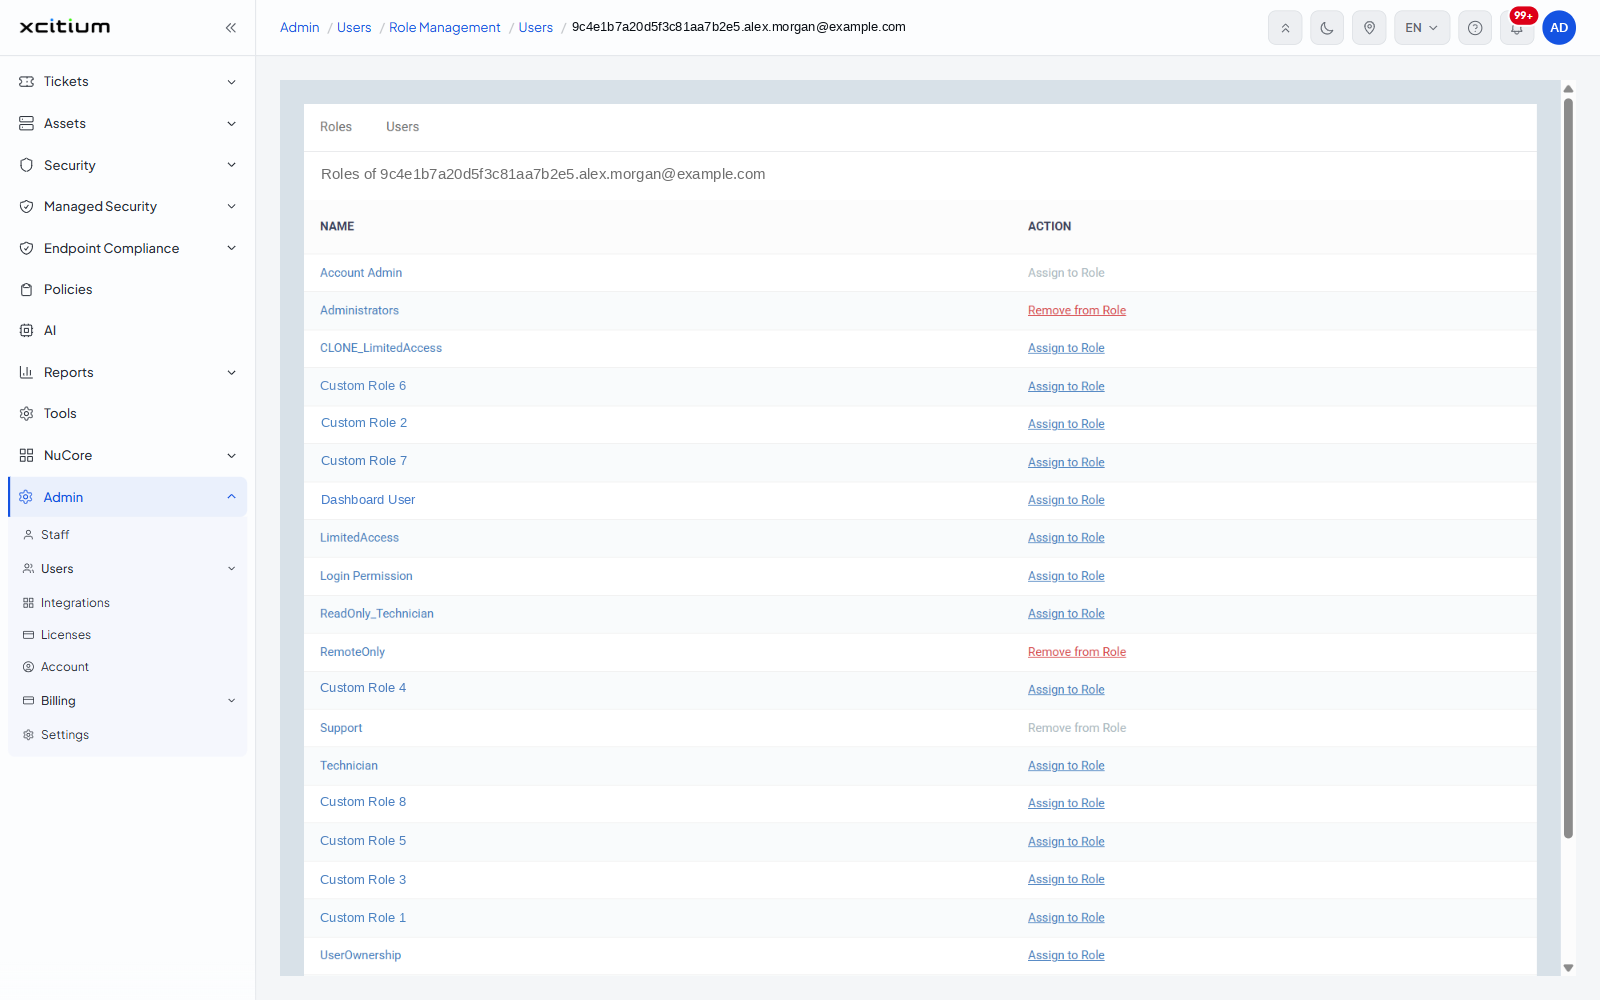
Change the roles a person holds
Click a Login to open Roles of that person. The page lists every role on the account with an Action beside each: Remove from Role for the roles they already hold, and Assign to Role for the rest.