


Create an Alert
- Open the Alerts screen, then click 'Create Alert' on the toolbar.
Creating an alert takes two steps: name it here, then open it and set what it actually does. The create dialog itself asks for nothing but a name and a description.
You can name the alert, describe what it is for, and then open it to configure its behaviour and recipients.
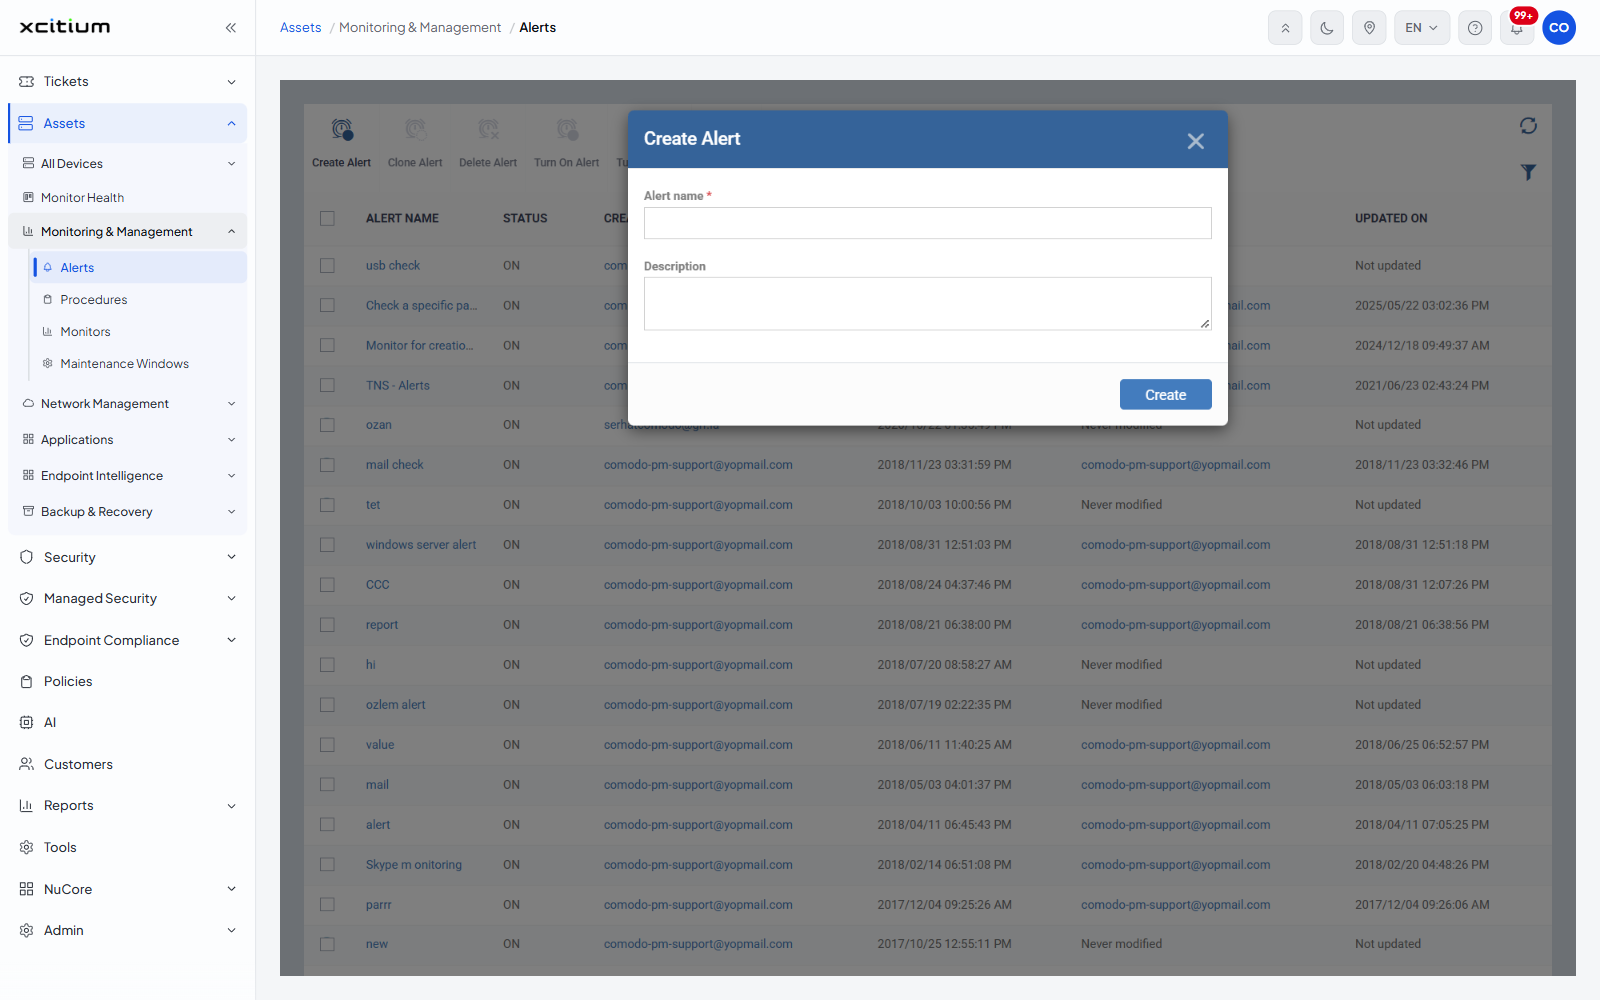
The fields
| Field | Type | Options / default | Required |
| Alert name | Text | Empty by default. | Yes |
| Description | Textarea | Empty by default. | No |
The alert's pages
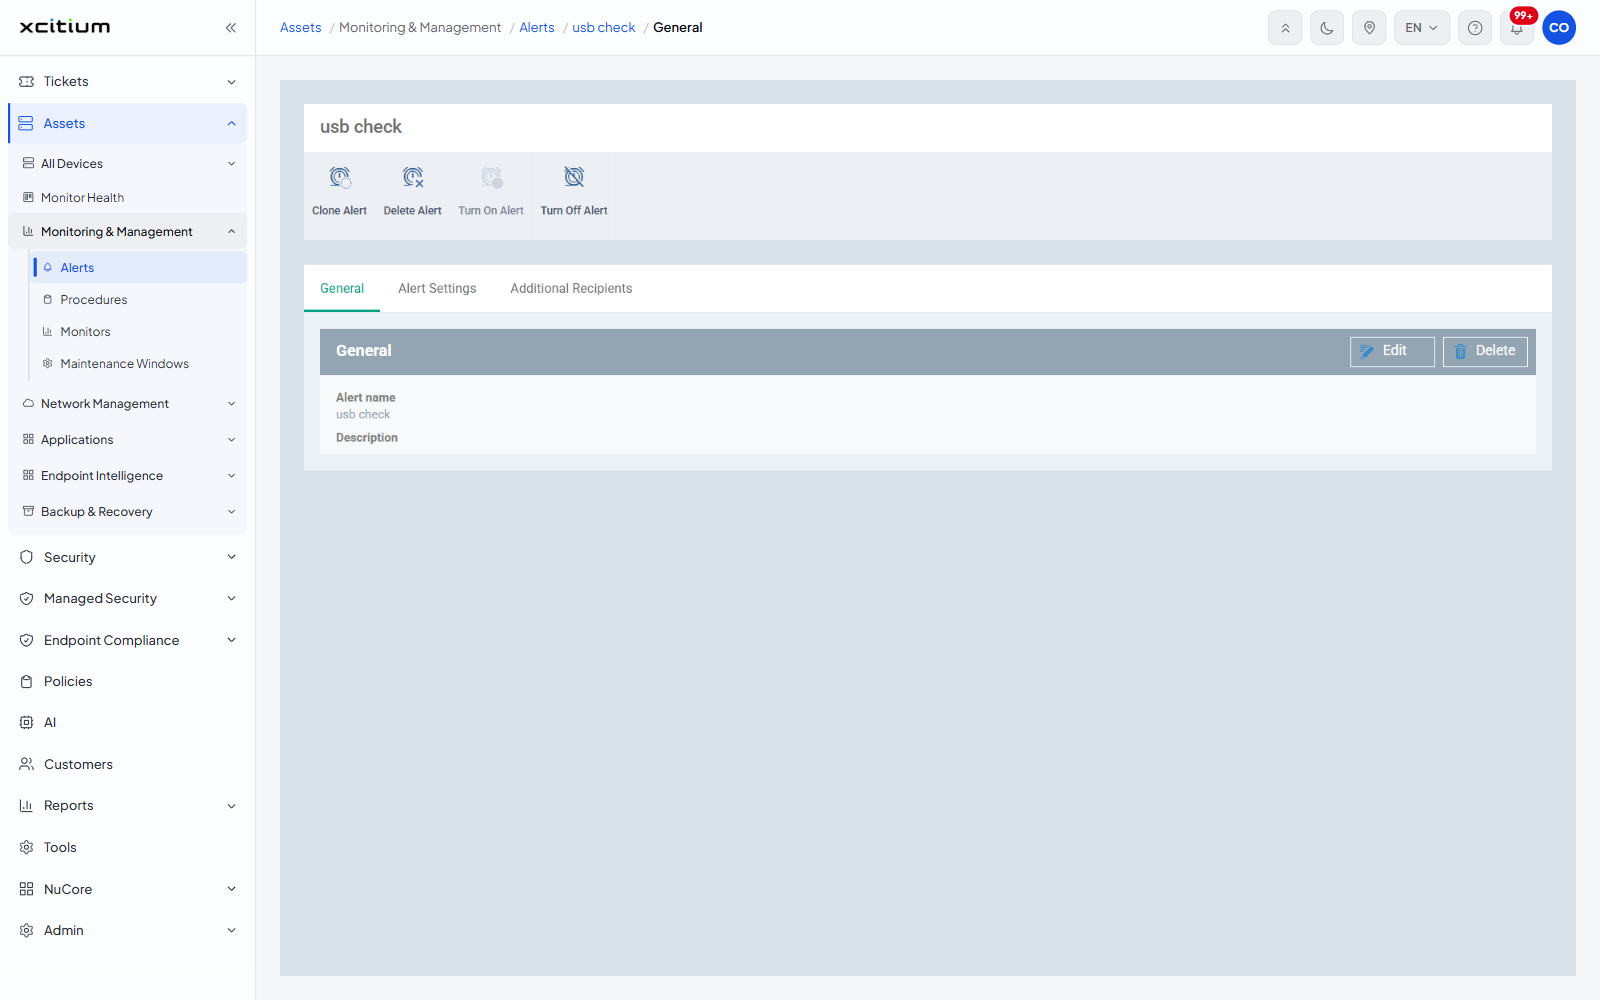
Once created, clicking the alert opens it. The header carries the alert name and four buttons.
| Button | Description |
| Clone Alert | Copies this alert. |
| Delete Alert | Removes it. |
| Turn On Alert | Sets it to ON. Greyed when it is already on. |
| Turn Off Alert | Sets it to OFF. |
Three tabs sit below:
- General — the alert name and description. This is the default.
- Alert Settings — what the alert does. See Configure Alert Settings.
- Additional Recipients — who is emailed. See Set Alert Recipients.
Each tab's panel carries its own 'Edit' and 'Delete' buttons. 'Edit' turns the panel into a form with 'Cancel' and 'Save'.
Create an alert
- Click 'Assets' > 'Monitoring & Management' > 'Alerts'.
- Click 'Create Alert'.
- Type a name into 'Alert name'.
- Add a description if it helps.
- Click 'Create'.
- Click the new alert in the list, then open 'Alert Settings' and set what it should do.
Note: a new alert does nothing until you configure its settings. Creating it only reserves the name.