


The Profile Editor
Click 'Policies', then click a profile name in the list, to open this interface.
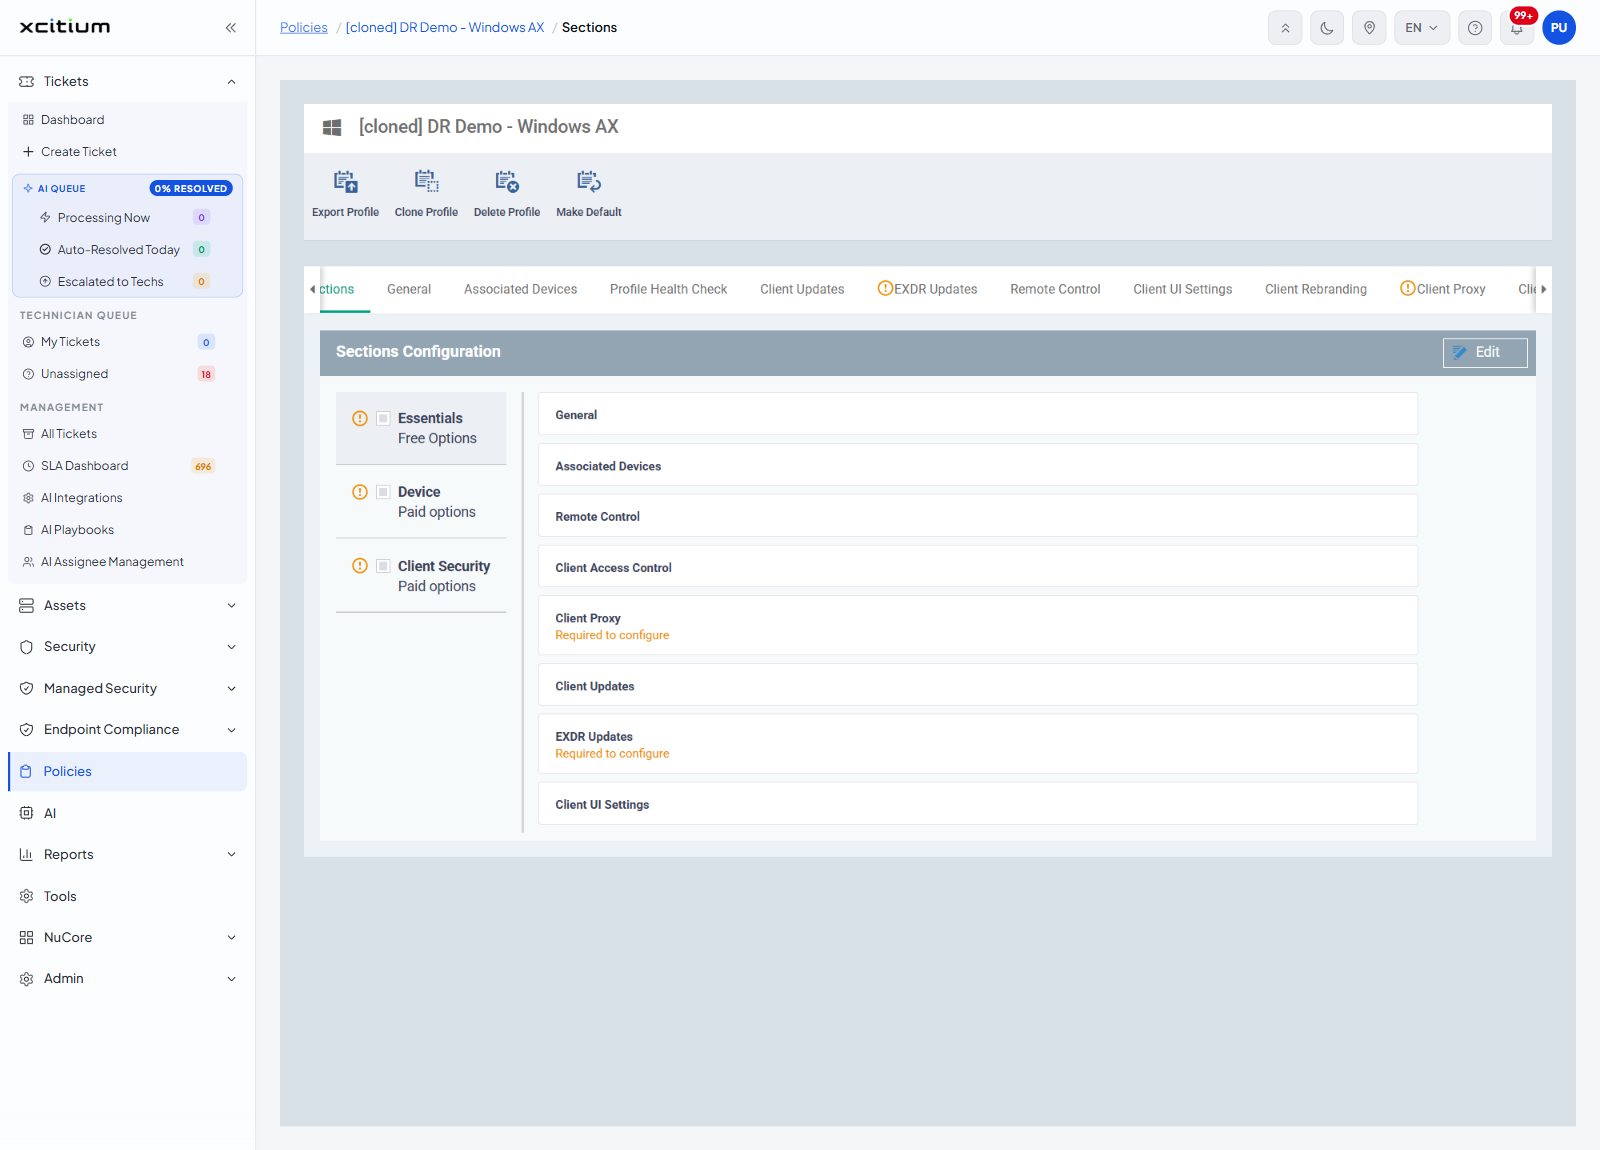
The profile editor shows one profile. The profile name sits at the top next to an operating-system icon, a small toolbar sits under it, and a strip of tabs runs across the page. There is one tab for each section that has been added to the profile, plus a 'Sections' tab at the front.
You can read and change every section of the profile, add and remove sections, and export, clone, delete or default the profile from this interface.
Toolbar
| Button | Description |
| Export Profile | Downloads the profile as a file. |
| Clone Profile | Makes a copy of the profile. |
| Delete Profile | Removes the profile from the account. |
| Make Default | Marks the profile as the default for its operating system. |
The tab strip
The tabs are the profile's sections. The strip scrolls: a small arrow at each end moves it left and right when there are more tabs than fit.
A tab whose section has been added but not yet filled in carries an orange exclamation icon before its name. On a Windows profile those are 'EXDR Updates', 'Client Proxy', 'XCS Proxy', 'XCS Logging Settings' and 'Performance'.
The first tab, 'Sections', is not a section. It is where you choose which sections the profile has. See Sections Configuration.
How a section panel is laid out
Each section fills the page with a grey header bar carrying the section name on the left and its buttons on the right. Which buttons appear depends on the state of the section:
| Buttons | What it means |
| Edit and Delete | The section is configured and is being shown read-only. Click 'Edit' to change it, or 'Delete' to take the section out of the profile. |
| Cancel and Save | The section has not been configured yet, so the panel opens ready for input. Fill it in and click 'Save', or click 'Cancel' to leave it alone. |
| Save and Delete | Used by the large security sections such as 'Antivirus', 'Firewall', 'EDR' and 'Containment', whose settings are always editable on the page. |
Some sections divide their settings further, into their own row of sub-tabs underneath the header bar.
The breadcrumb
The breadcrumb at the top of the window reads 'Policies / [profile name] / [section name]' and follows you as you move between tabs. Only 'Policies' is a link.
Open and edit a profile
- Click 'Policies' in the left navigation bar.
- Click the profile name in the list.
- Click the tab for the section you want.
- Click 'Edit' on the section's header bar if the fields are read-only.
- Change the settings and click 'Save'.
Note: 'Export Profile', 'Clone Profile', 'Delete Profile' and 'Make Default' act as soon as you click them.
Note: policies opened from the 'Policy Configuration', 'Default Policies' or 'Predefined Policies' tabs use a different editor, with the sections in a tree down the left-hand side. See The Policy Editor.