


Mobile Application Control
- Click 'Assets' > 'Applications' > 'Mobile Application Control' to open this interface.
This screen lists the applications installed on your managed mobile devices and lets you block them, and it holds the iOS and Android application catalogues you install from. Mobile Application Control needs a Mobile license and at least one enrolled mobile device.
The screen has three tabs.
- Mobile Applications — applications found on managed devices. This is the default tab.
- iOS Store — iOS applications you add and distribute.
- Android Store — Android applications you add and distribute.
Mobile Applications
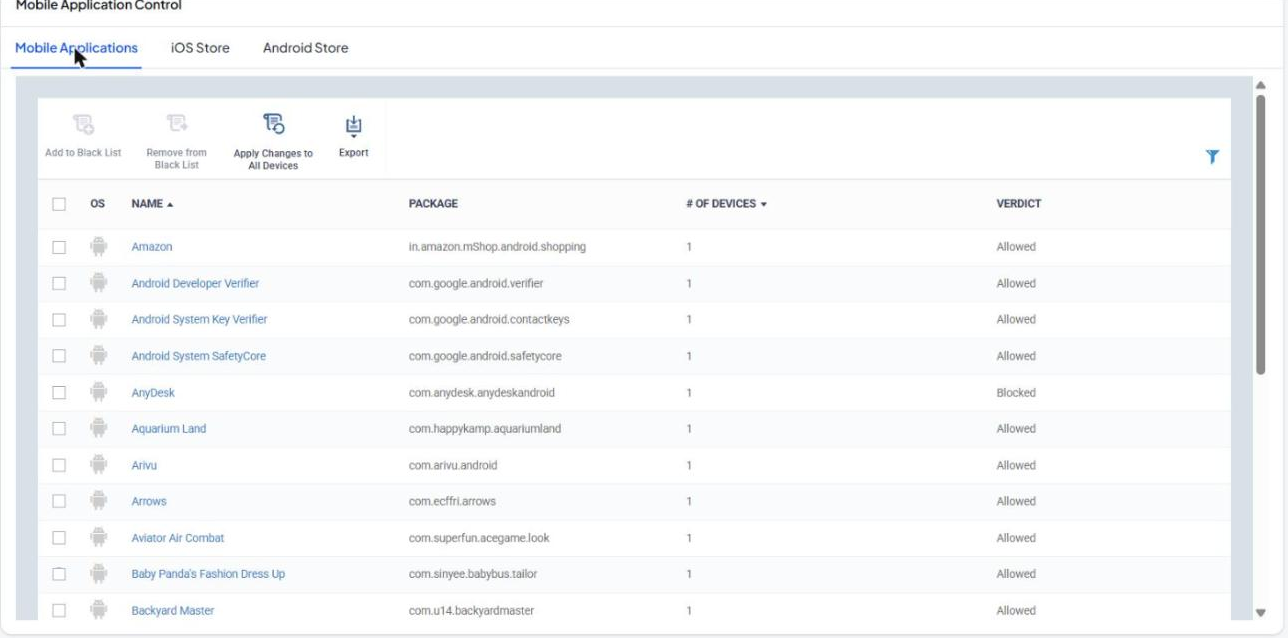
Each row is one application found on at least one managed device.
| Column | Description |
| OS | The operating system icon: Android or iOS. |
| Name | The application name. Click it to open its details, including the devices it is installed on. |
| Package | The application package identifier. |
| # of Devices | How many managed devices have the application installed. |
| Verdict | 'Allowed' or 'Blocked'. |
The toolbar above the list has these buttons:
| Button | Description |
| Add to Black List | Blocks the selected applications. Select one or more rows first. |
| Remove from Black List | Unblocks the selected applications. |
| Apply Changes to All Devices | Sends the current black list to every managed device. |
| Export | Exports the list. |
Filter the list
Click the funnel icon at the right of the toolbar to open the filter panel.
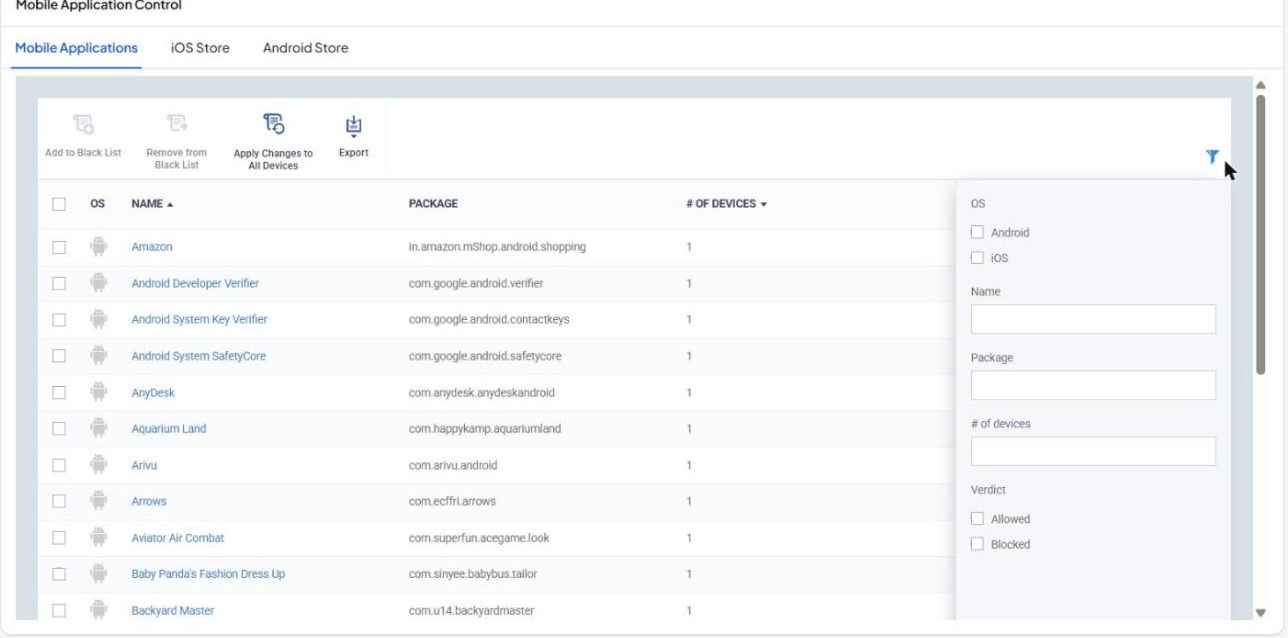
| Field | Description |
| OS | Tick 'Android' and/or 'iOS'. |
| Name | Part of the application name. |
| Package | Part of the package identifier. |
| # of devices | Number of devices. |
| Verdict | Tick 'Allowed' and/or 'Blocked'. |
Block an application
- Open the 'Mobile Applications' tab.
- Select the check box next to the application.
- Click 'Add to Black List'.
- Click 'Apply Changes to All Devices' to push the change to your devices.
To allow an application again, select it and click 'Remove from Black List', then click 'Apply Changes to All Devices'.
iOS Store
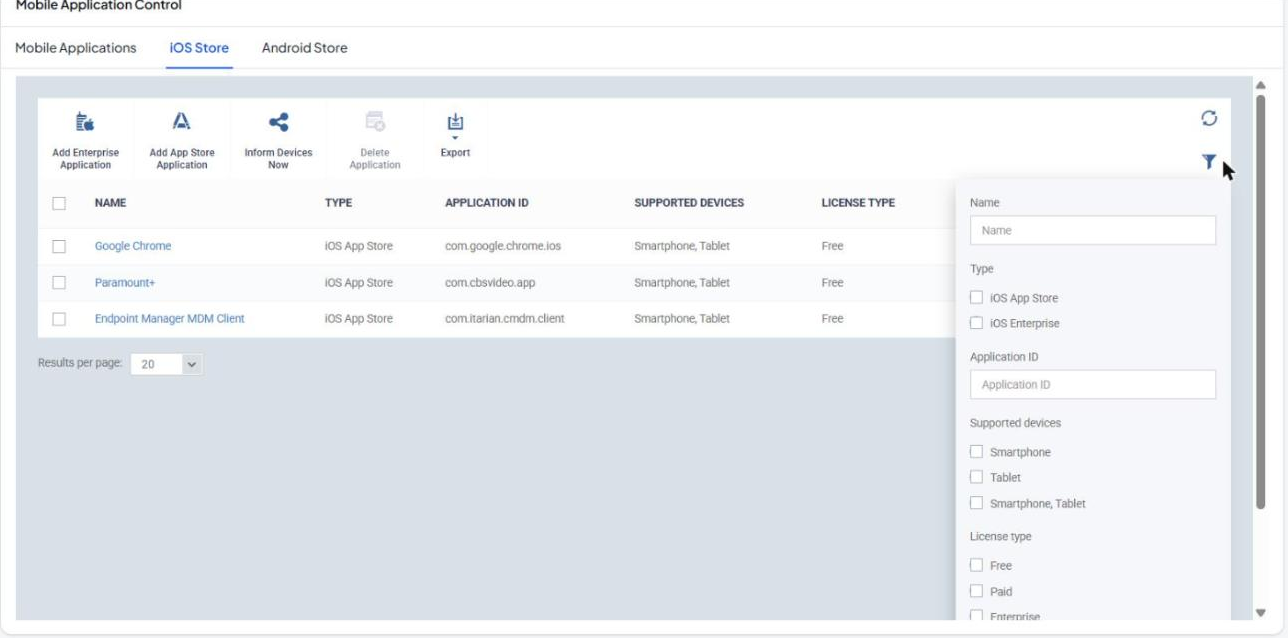
The list shows the iOS applications you have added.
| Column | Description |
| Name | The application name. Click it to open its details. |
| Type | 'iOS App Store' or 'iOS Enterprise'. |
| Application ID | The application bundle identifier. |
| Supported Devices | 'Smartphone', 'Tablet' or 'Smartphone, Tablet'. |
| License Type | 'Free', 'Paid' or 'Enterprise'. |
| Mandatory | 'Yes' if the application is installed on devices automatically. |
| Added | Date and time the application was added. |
The toolbar has these buttons:
| Button | Description |
| Add Enterprise Application | Adds an in-house iOS application. |
| Add App Store Application | Adds an application from the Apple App Store. |
| Inform Devices Now | Tells managed devices to check for the latest application changes. |
| Delete Application | Deletes the selected applications. |
| Export | Exports the list. |
The filter panel has Name, Type ('iOS App Store', 'iOS Enterprise'), Application ID, Supported devices, License type ('Free', 'Paid', 'Enterprise') and Mandatory ('Yes', 'No').
- Open the 'iOS Store' tab.
- Click 'Add App Store Application'.
- Complete the form (see the table below).
- Click 'Save'. Click 'Cancel' to close the form without adding the application.
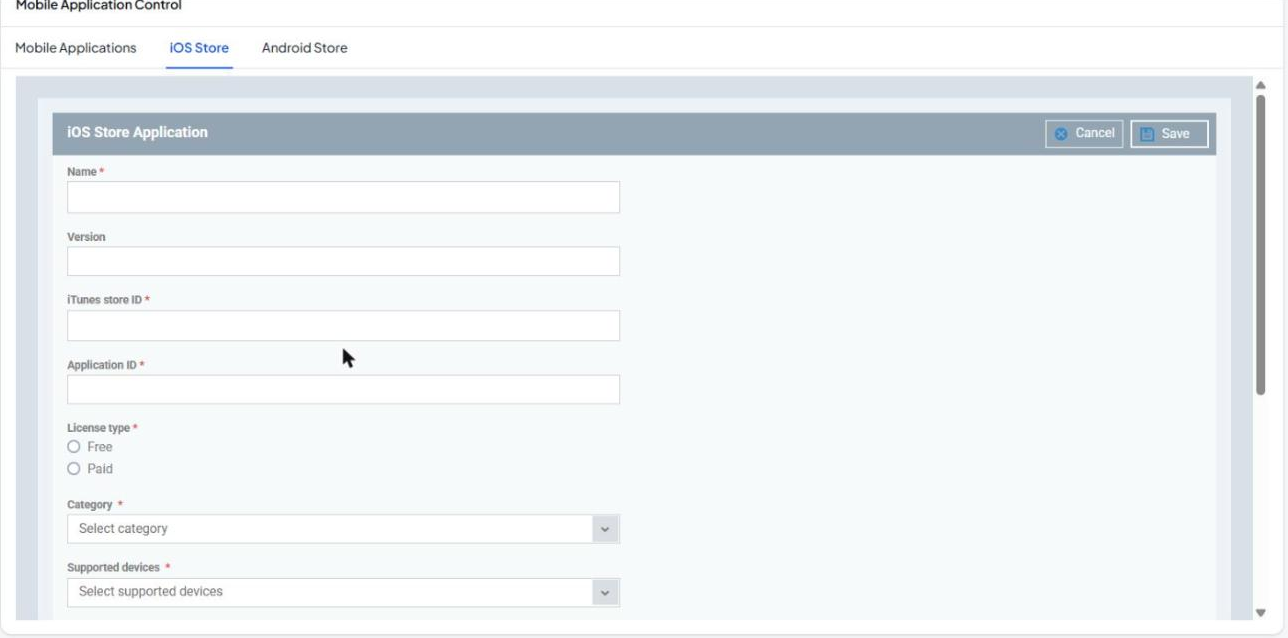
| Field | Description |
| Name | The application name. Required. |
| Version | The application version. |
| iTunes store ID | The numeric ID of the application in the App Store. Required. |
| Application ID | The application bundle identifier. Required. |
| License type | 'Free' or 'Paid'. Required. |
| Category | The application category. Required. |
| Supported devices | The device types the application runs on. Required. |
| Description | A free-text description. |
| Application logo | The logo image. Required. Click 'Browse' to choose a file. |
| Application screenshots | Optional screenshots. Click 'Browse' to choose files. |
Scroll down to 'Distribution Options':
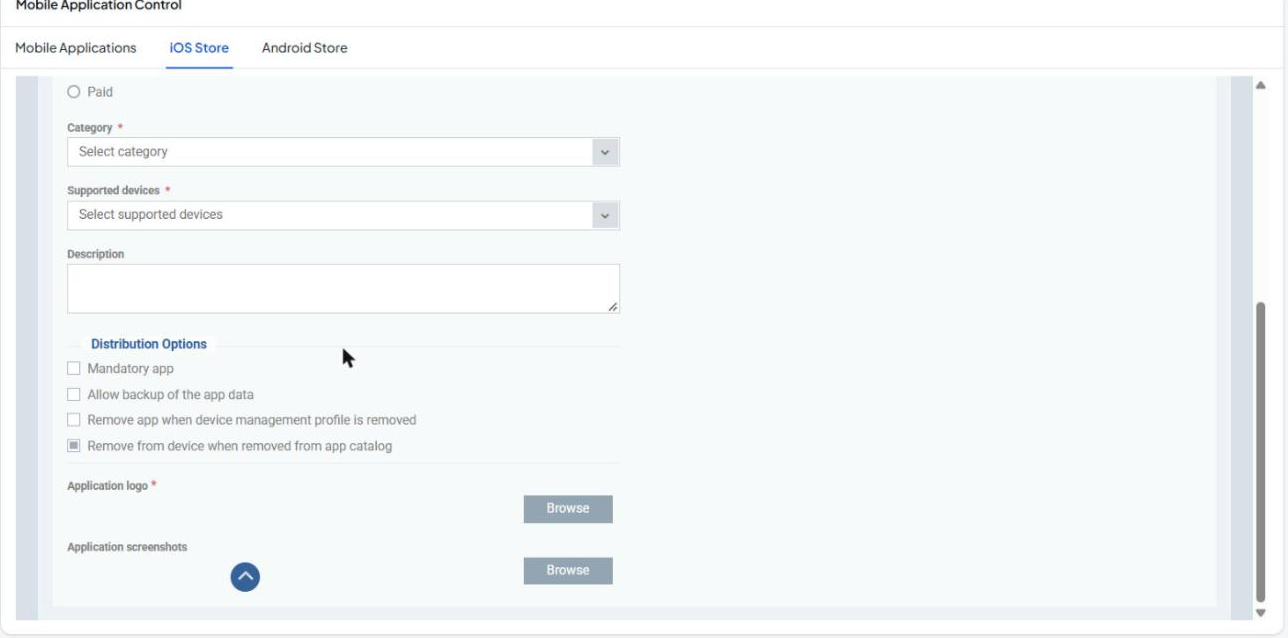
| Option | Description |
| Mandatory app | Installs the application on devices automatically. |
| Allow backup of the app data | Lets the application data be included in device backups. |
| Remove app when device management profile is removed | Removes the application when the device is unenrolled. |
| Remove from device when removed from app catalog | Removes the application from devices when you delete it here. Ticked by default. |
Android Store
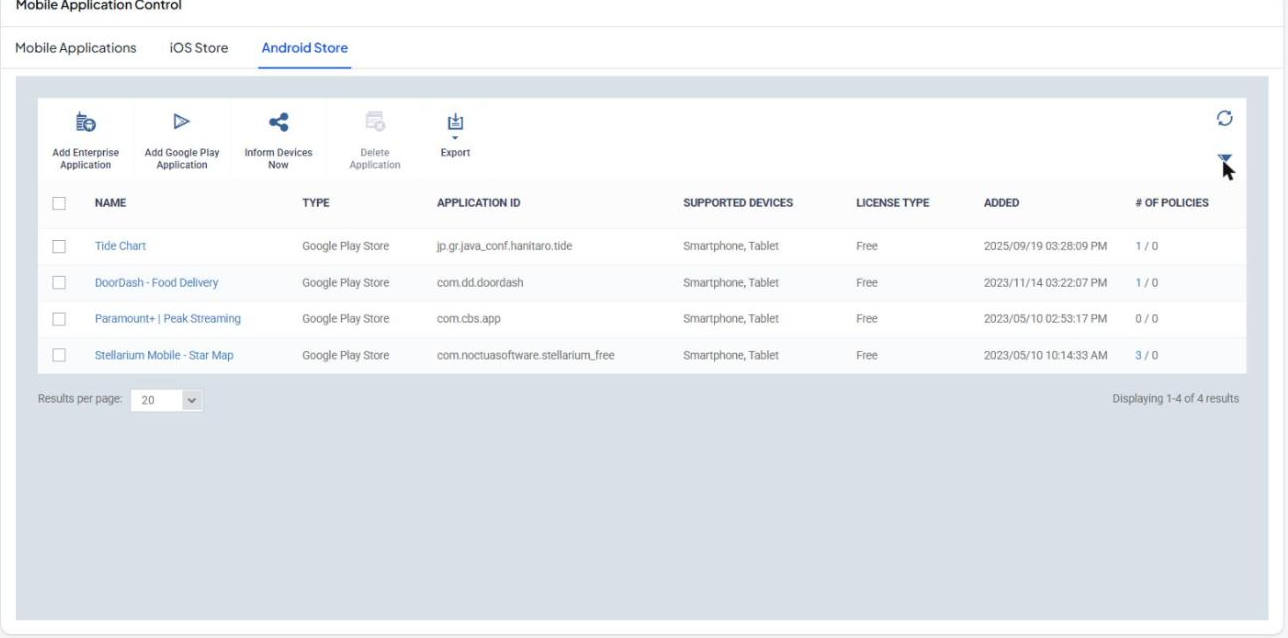
The list has the same layout as the iOS Store tab. Its columns are Name, Type ('Google Play Store' or 'Android Enterprise'), Application ID, Supported Devices, License Type, Added and # of Policies. The '# of Policies' column shows how many policies use the application. The toolbar has 'Add Enterprise Application', 'Add Google Play Application', 'Inform Devices Now', 'Delete Application' and 'Export'. Click the funnel icon to filter by Name, Type, Application ID, Supported devices and License type.
- Open the 'Android Store' tab.
- Click 'Add Google Play Application'.
- Complete the form (see the table below).
- Click 'Save'. Click 'Cancel' to close the form without adding the application.
| Field | Description |
| Name | The application name. Required. |
| Version | The application version. Required. |
| Application ID | The Google Play package name. Required. |
| License type | 'Free' or 'Paid'. Required. |
| Category | The application category. Required. |
| Supported devices | The device types the application runs on. Required. |
| Description | A free-text description. |
| Application logo | The logo image. Required. |
| Application screenshots | Optional screenshots. |
| Profile(s) | Profiles that use the application. Shown when the application is opened later. |
| Profile(s) with disabled component | Profiles that use the application while the required component is switched off. |
Add an Android enterprise application
- Open the 'Android Store' tab.
- Click 'Add Enterprise Application'.
- Complete the form, then click 'Save'. Click 'Cancel' to close it without saving.
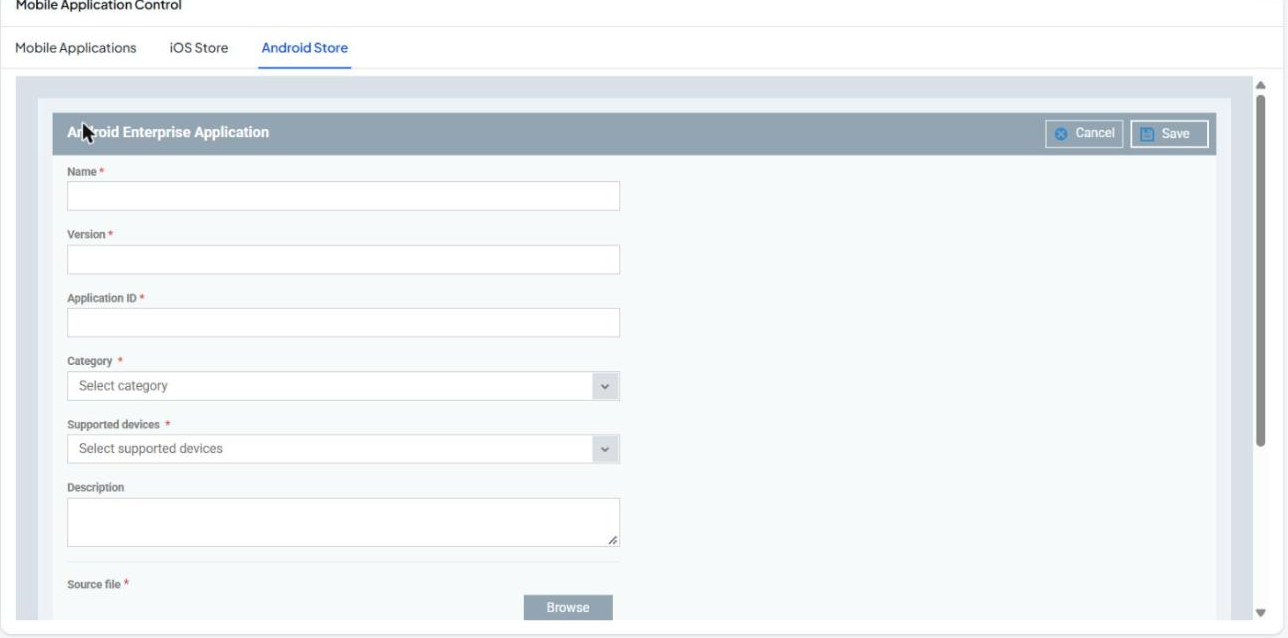
The form has the same fields as the Google Play form, except that it has no 'License type' and it has a required 'Source file' field. Click 'Browse' next to 'Source file' to choose the application package.
Click an application name on the iOS Store or Android Store tab to open its details. The 'Details' panel shows the values from the form. Click 'Edit' to change them.