


Asset Problems, Solutions and Compliance
- Click 'Endpoint Compliance' > 'All Assets' > an asset > the tab you want.
Besides 'System Information', the asset detail pane carries seven more tabs. They narrow the whole-estate pages of this section down to the single asset you have selected.
You can review an asset's findings, the fixes available for them, its compliance results, its open ports, its installed software and its tags from these tabs.
Problems
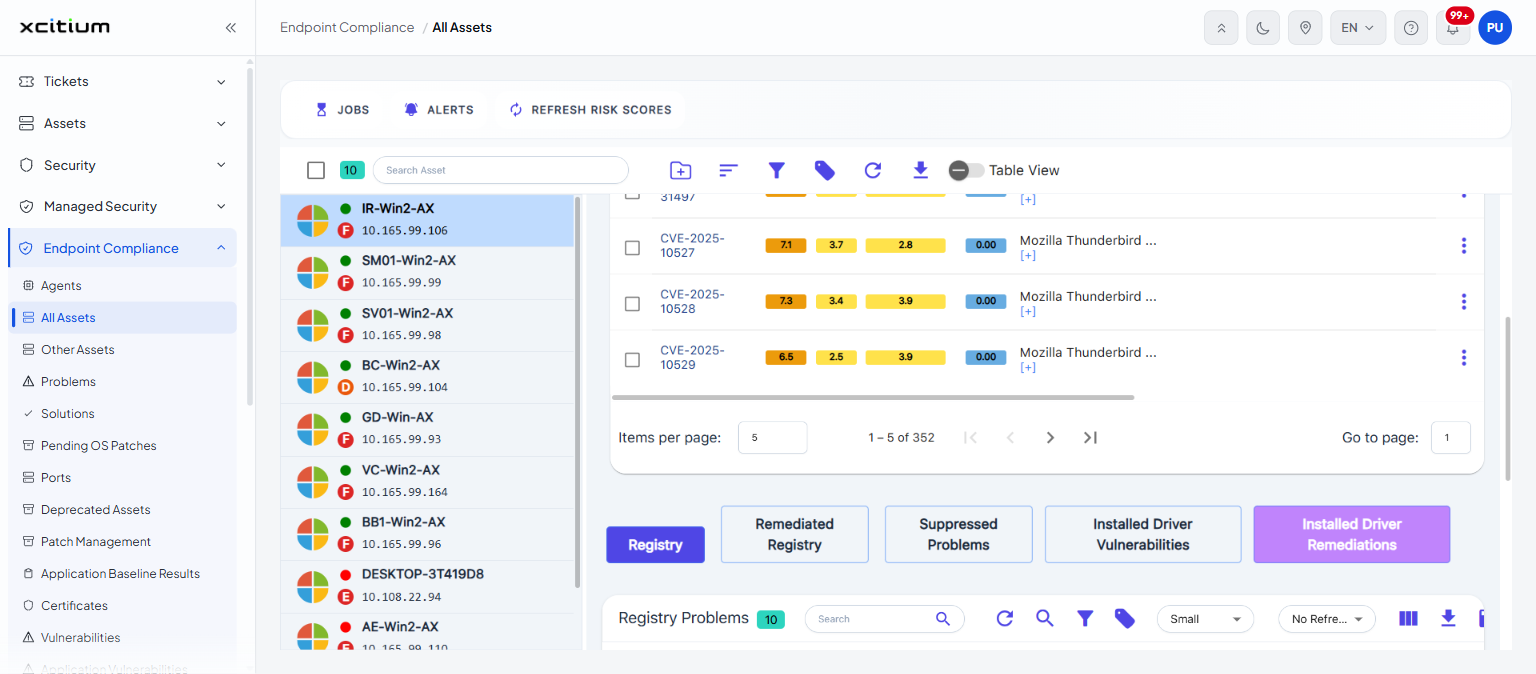
Buttons above the list choose the problem category: 'Problem Category', 'All Vulnerabilities', 'Suppressed Problems' and 'Auto Suppressed'. The list itself is headed 'Problem Details' with a chip showing how many there are.
| Column | Description |
| Problem Name | The identifier of the finding, for example a CVE number. |
| Base | The base severity score. |
| Impact | The impact sub-score. |
| Exploitability | The exploitability sub-score. |
| EPSS | The probability that the finding will be exploited. |
| Software Name | The software the finding belongs to. |
| Ports | The ports involved. |
| Script Output | What the check script reported. |
| Description | A description of the finding. |
| Confirmed | Whether the finding has been confirmed. |
| First Vulnerability Discovered | When the finding was first seen. |
| Action | Opens the row menu. |
Below the list a second row of buttons opens further views: 'Registry', 'Remediated Registry', 'Suppressed Problems', 'Installed Driver Vulnerabilities' and 'Installed Driver Remediations'. The 'Registry' view is a card headed 'Registry Problems' with these columns:
| Column | Description |
| Problem Name | The name of the registry finding. |
| Vul ID | Its vulnerability identifier. |
| Fix | The fix that resolves it. |
| Description | A description of the finding. |
| Score | Its severity score. |
| Confirmed | Whether the finding has been confirmed. |
| Action | Opens the row menu. |
Solutions
Buttons above the list choose the view: 'Remediation Plan', 'Remediated', 'Suppressed Remediation' and 'Auto Suppressed'. An 'Info' panel headed 'EPSS Categorization' explains the bands used to prioritise work:
| Band | Guidance shown |
| ≥ 0.95 | Remediate within 3 days, 95% probability of exploitation. |
| 0.90-0.95 | Remediate within 15 days, 90% probability of exploitation. |
| 0.85-0.90 | Remediate within 30 days, 85% probability of exploitation. |
| 0.00-0.85 | Remediate at your own schedule. |
Each band has a 'View' link that opens the findings in it.
| Column | Description |
| Action | The remediation to carry out. |
| Product | The product the remediation applies to. |
| OS Name | The operating system it applies to. |
| EPSS Score | The probability of exploitation for the findings it fixes. |
| Severity | How severe those findings are. |
| Ports | The ports involved. |
| KB/Fix | The patch or knowledge-base article that fixes it. |
| Total Vulnerabilities | How many findings the remediation clears. |
| Critical | How many of them are critical. |
| High | How many are high. |
| Medium | How many are medium. |
| Low | How many are low. |
| Last Vulnerability Discovered | When the most recent of them was found. |
| Is Patchable | Whether a patch is available. |
| Software Type | The kind of software involved. |
| End Of Life | Whether the software is out of support. |
| Evidence | What the scan saw. |
| Action | Opens the row menu. |
Compliance
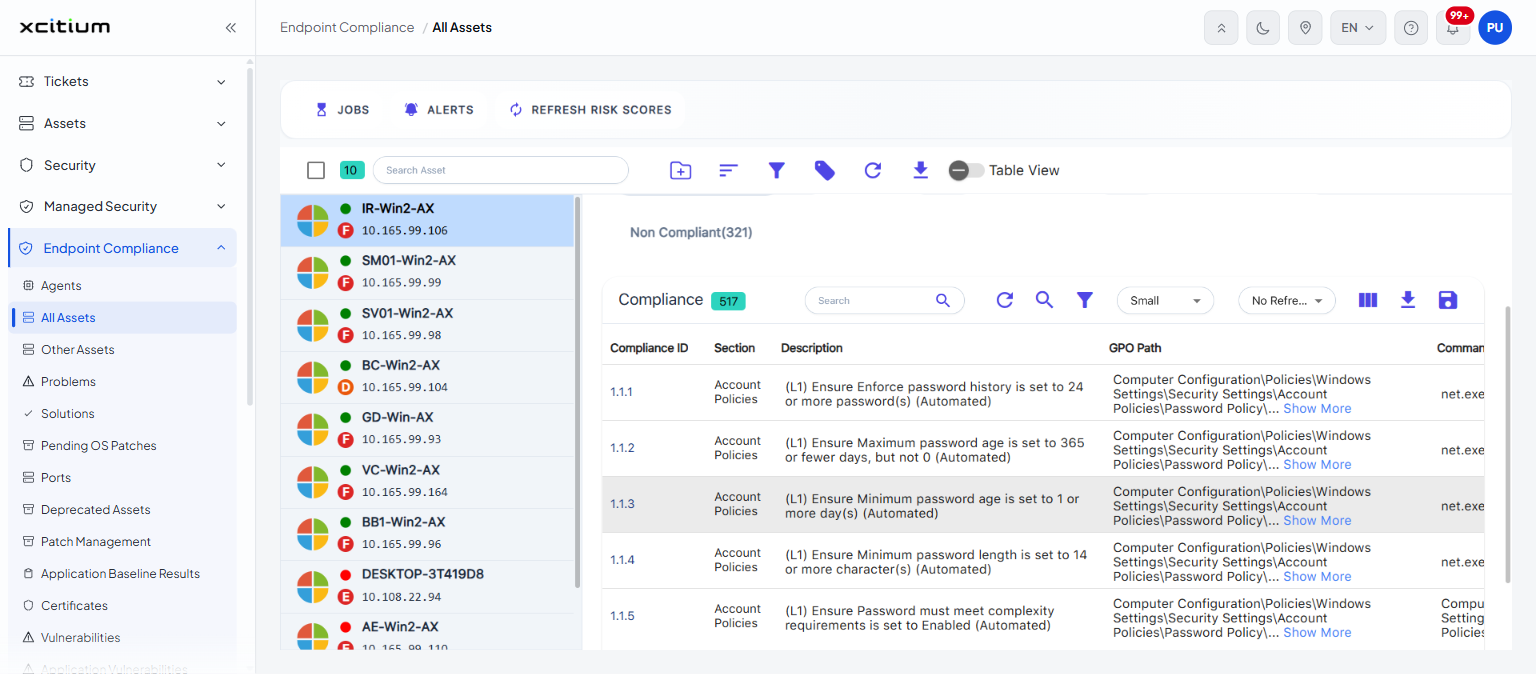
A 'Compliance Type' control chooses the standard, for example 'CIS'. Beside it, chips show the counts in each result state - 'All Compliant', 'Compliant', 'Manual Compliant', 'Manual Non Compliant' and 'Non Compliant' - and clicking a chip filters the list to it.
| Column | Description |
| Compliance ID | The numbered identifier of the check in the standard. |
| Section | The section of the standard the check belongs to. |
| Description | What the check requires. |
| GPO Path | The group policy setting that governs it. |
| Command | The command used to test it. |
| Maturity | The maturity level the check belongs to. |
Internal Ports
| Column | Description |
| Port | The port number. |
| Service | The process listening on it. |
| Path | The executable that process runs. |
| Protocol | The protocol number. |
| Address | The address it is bound to. |
External Ports
| Column | Description |
| Port | The port number. |
| Service | The service answering on it. |
| Product | The product providing that service. |
| Protocol | The protocol. |
| Status | Whether the port is open. |
| Is Secure | Whether the service is considered secure. |
| Vulnerability Count | How many findings relate to it. |
When nothing has been found the list shows 'No data available!'.
Software
| Column | Description |
| Name | The application's name. |
| Version | Its version. |
| Path | Where it is installed. |
| Uninstall String | The command that removes it. |
| Publisher | Who published it. |
| Release | The release identifier. |
| Installed Date | When it was installed. |
| Critical Vulnerabilities | How many critical findings are attributed to it. |
| High Vulnerabilities | How many high findings. |
| Medium Vulnerabilities | How many medium findings. |
| Low Vulnerabilities | How many low findings. |
| Vulnerability Count | The total. |
| Confirmed | Whether the findings have been confirmed. |
Tags
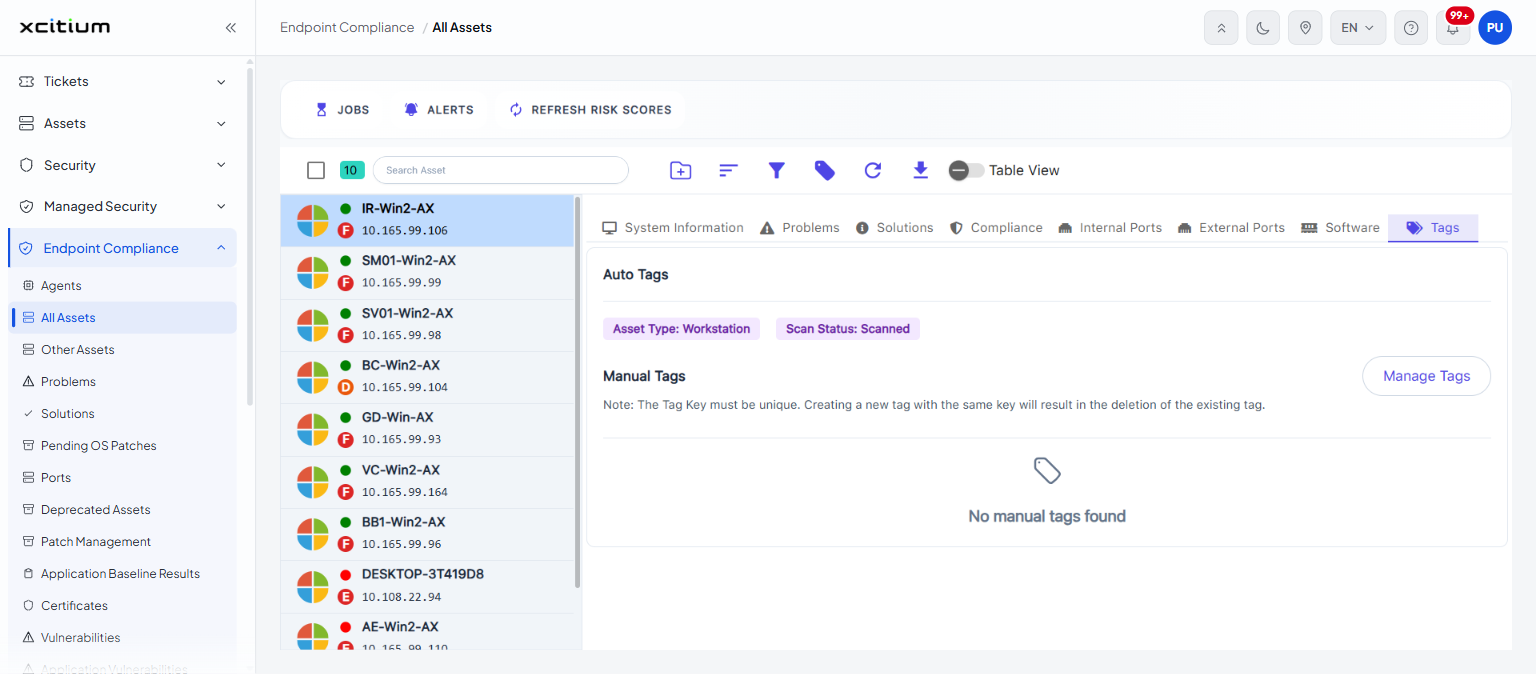
The 'Tags' tab has two parts. 'Auto Tags' lists the tags the system applied by itself, shown as chips, for example 'Asset Type: Workstation' and 'Scan Status: Scanned'. 'Manual Tags' lists the tags you have added, and carries a 'Manage Tags' button. When no manual tags exist the area shows 'No manual tags found'.
The tab carries this note: 'The Tag Key must be unique. Creating a new tag with the same key will result in the deletion of the existing tag.'
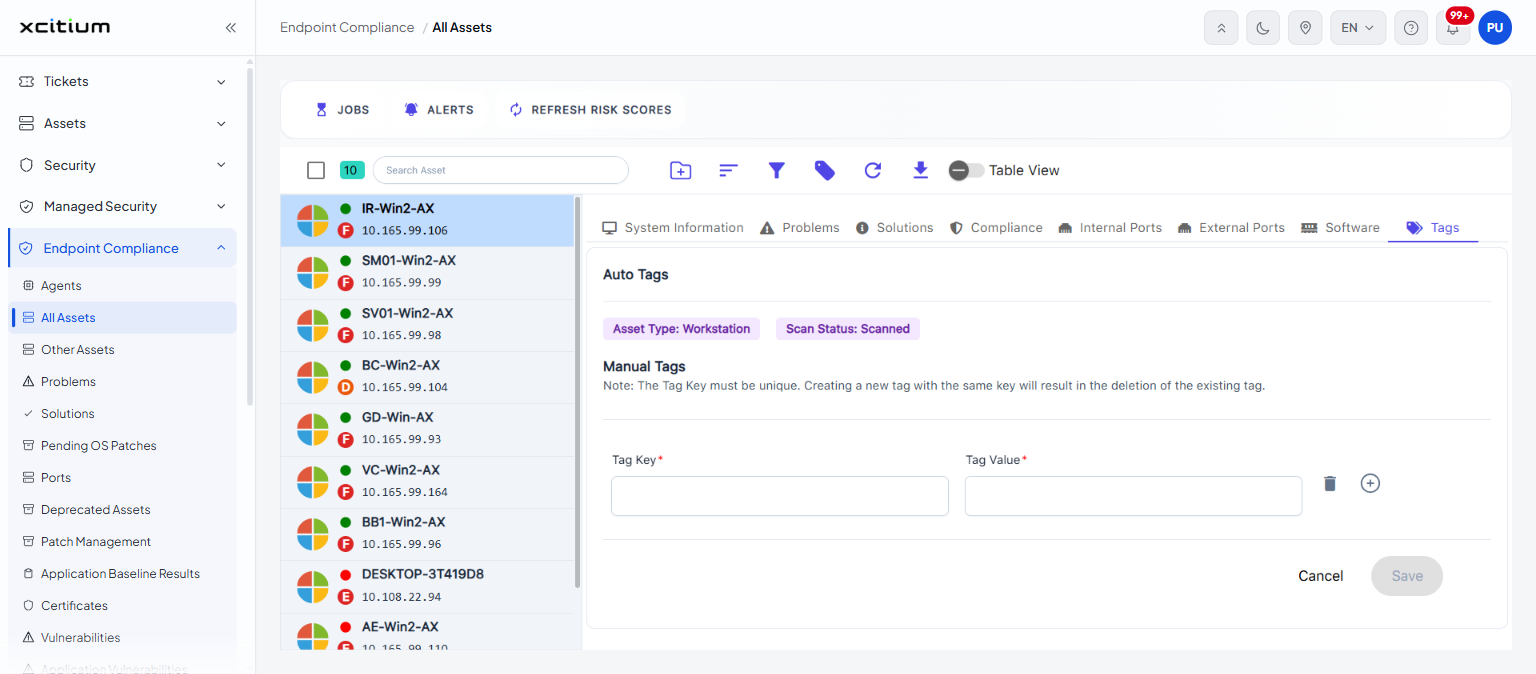
Clicking 'Manage Tags' opens an editor with these controls:
| Control | Description |
| Tag Key | The name of the tag. Required. |
| Tag Value | The value of the tag. Required. |
| Bin icon | Removes that tag row. |
| + icon | Adds another tag row. |
| Cancel | Closes the editor without saving. |
| Save | Stores the tags against the asset. |
To add a tag to an asset:
- Click 'Endpoint Compliance' > 'All Assets' and select the asset.
- Click the 'Tags' tab.
- Click 'Manage Tags'.
- Type the tag's name in 'Tag Key' and its value in 'Tag Value'.
- Click the '+' icon if you want to add another tag.
- Click 'Save'.
Note: enter the tag key and value exactly as they should appear, with no spaces around them.