


Filter the Profile List
- Click 'Policies' > the funnel icon on the right of the toolbar to open this panel.
The filter panel slides in over the right-hand side of the list. It holds four groups of criteria. Criteria combine, so a profile has to match everything you set before it is shown.
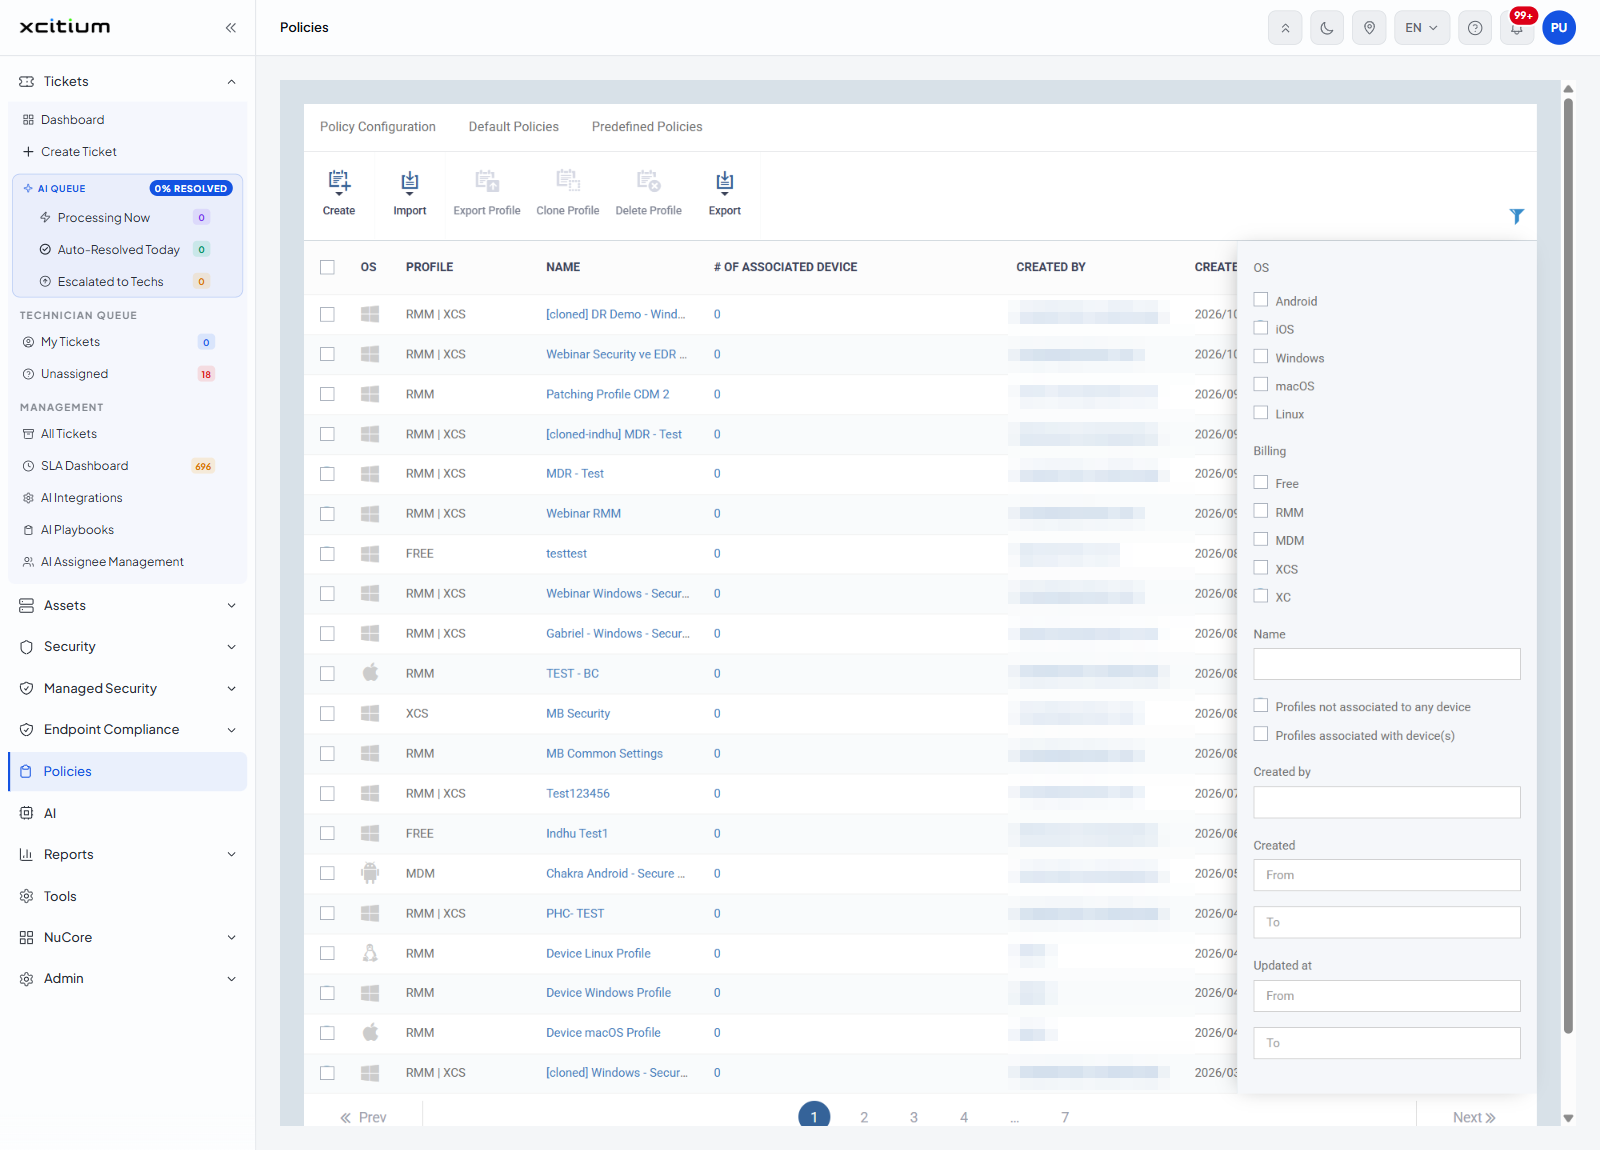
Filter controls
| Group | Control | Options |
| OS | Check boxes | 'Android', 'iOS', 'Windows', 'macOS', 'Linux'. None ticked by default. |
| Billing | Check boxes | 'Free', 'RMM', 'MDM', 'XCS', 'XC'. None ticked by default. |
| Name | Single-line text box | Free text. Empty by default. |
| (device association) | Two check boxes | 'Profiles not associated to any device' and 'Profiles associated with device(s)'. Neither ticked by default. |
| Created by | Single-line text box | Free text. Empty by default. |
| Created | Two date boxes | 'From' and 'To'. Both empty by default. |
| Updated at | Two date boxes | 'From' and 'To'. Both empty by default. |
Applying the filter
There is no 'Apply' button until you set something. As soon as one criterion is in place, a small bar appears over the list showing how many criteria are set — for example '1 filters' — next to an 'Apply' button. Click 'Apply' to redraw the list.
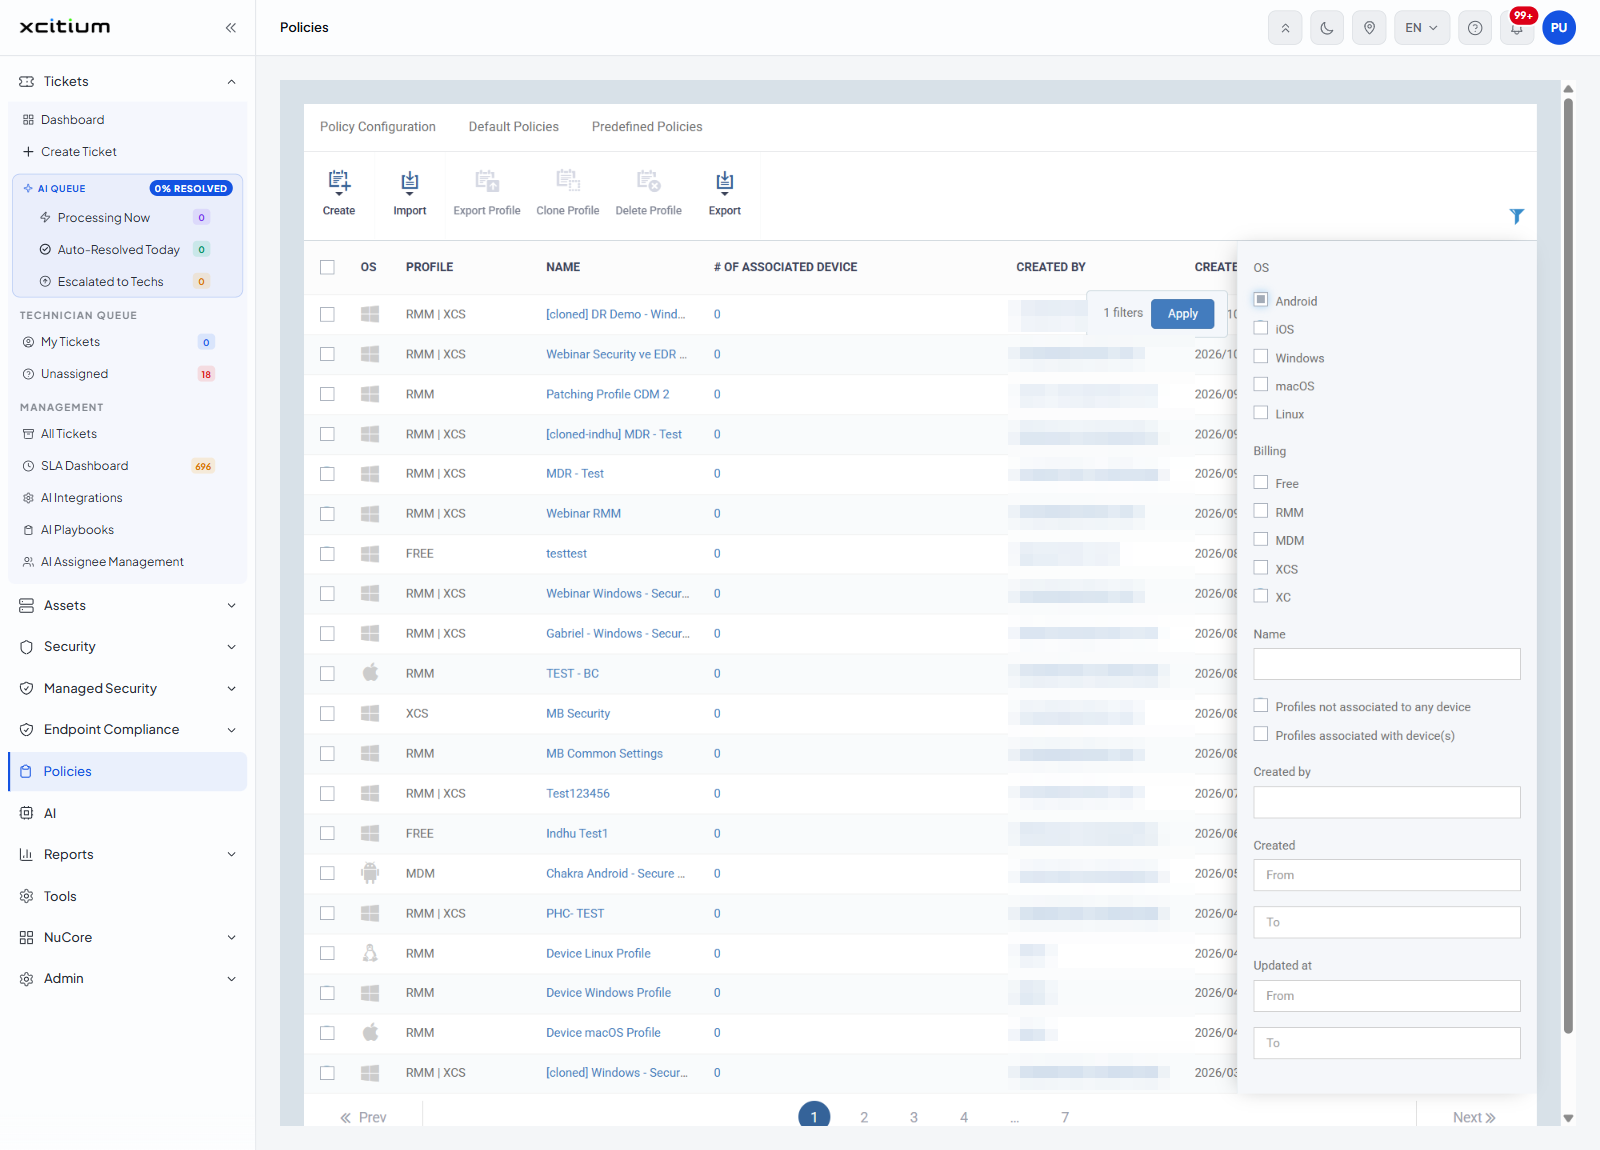
Filter the list
- Click 'Policies' in the left navigation bar.
- Click the funnel icon on the right of the toolbar. The panel opens.
- Tick the operating systems you want under 'OS'.
- Tick the licence components you want under 'Billing'.
- Type part of a profile name in the 'Name' box, or part of a user name in the 'Created by' box.
- Use 'Profiles not associated to any device' or 'Profiles associated with device(s)' to separate profiles that are in use from profiles that are not.
- Set the 'Created' and 'Updated at' date ranges if you want them.
- Click 'Apply' on the bar that appears over the list.
Note: the funnel icon only appears on the profile list. The 'Policy Configuration', 'Default Policies' and 'Predefined Policies' tabs filter with drop-down lists and a search box instead.