


Sections Configuration
- Open a profile, then click the 'Sections' tab.
'Sections' is the first tab of the profile editor. The card is headed 'Sections Configuration' and shows which sections the profile carries, sorted into the three licence plans they belong to.
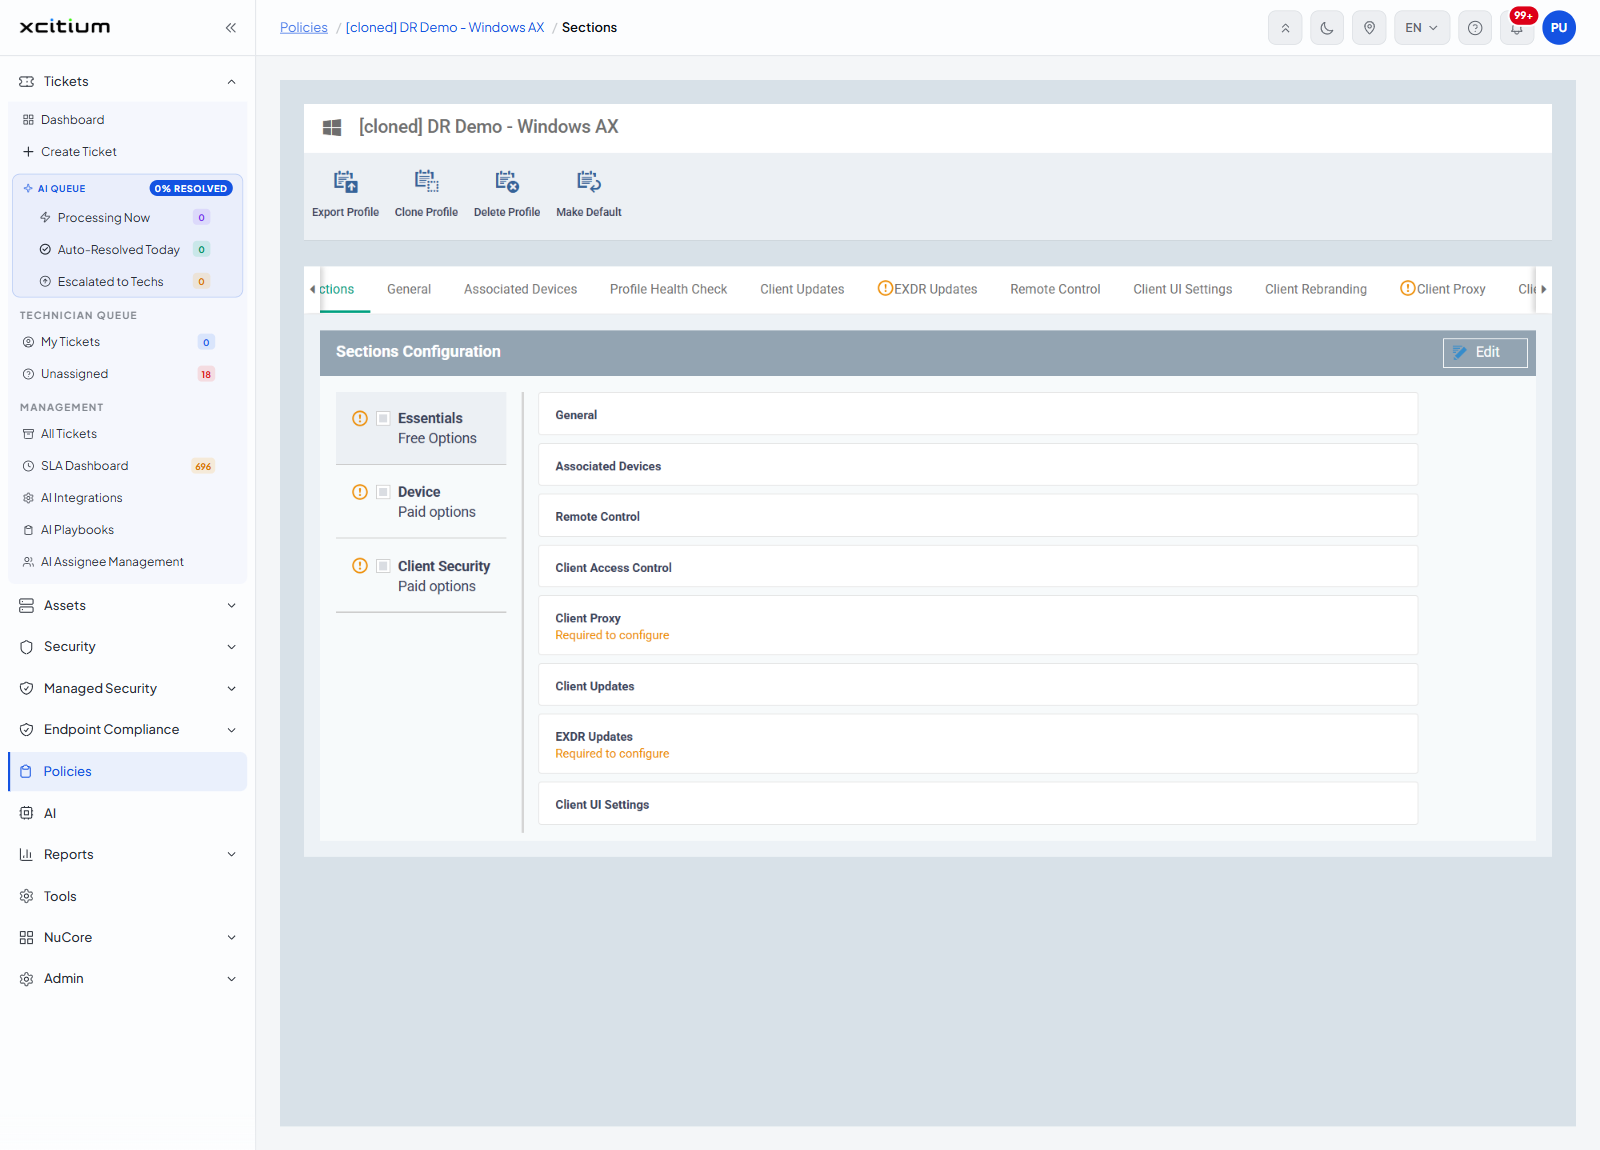
The plan column
The left-hand column lists three plans. Click one to see its sections on the right. Each plan shows a warning icon when one of its sections is still unconfigured, a check box, the plan name and a hint line.
| Plan | Hint line |
| Essentials | Free Options |
| Device | Paid options |
| Client Security | Paid options |
The section column
The right-hand column lists the sections in the selected plan, one per row. A row whose section has been added but not yet filled in shows the words 'Required to configure' in orange under the section name.
The Edit button
'Edit' at the top right of the card switches the screen into edit mode, where the check boxes become live and you choose which sections the profile carries. See Add and Remove Profile Sections.
Read which sections a profile carries
- Click 'Policies' in the left navigation bar.
- Click the profile name.
- Click the 'Sections' tab.
- Click 'Essentials', 'Device' or 'Client Security' in the left-hand column.
- Read the list on the right. Rows marked 'Required to configure' still need their settings filling in.
Note: the sections on this screen are the same ones that appear as tabs across the top of the profile editor.