


- Introduction
- Tickets
- Assets
- All Devices
- Device List
- Filter The Device List
- Group Management
- Enroll A Device
- Device Details
- View And Edit The Device Name
- View Device Summary Information
- View Network Information
- View Policies Associated With A Device
- View Applications Installed On A Device
- View The Command Queue
- View MSI Installation State
- View And Manage Patches On A Device
- View A Device's Groups
- View Device Logs
- Manage A Device's Policies
- Run A Procedure On A Device
- Install And Manage Packages On A Device
- Reboot Or Shut Down A Device
- Collect Performance Logs
- Change A Device's Owner
- Delete A Device
- Bulk Installation Package
- Device List
- Monitor Health
- Monitoring And Management
- Alerts
- Procedures
- Monitors
- Filter The Monitors List
- Create A Monitor
- A Monitor's General Tab
- A Monitor's Conditions Tab
- Add A Performance Condition
- Add A File Size Condition
- Add A Folder Size Condition
- Add A Disk Condition
- Add A Service Condition
- Add A Process Condition
- Add An Event Condition
- Add A TCP Condition
- Add A Ping Condition
- Add A Web Page Condition
- Add A Device Status Condition
- Add A Custom Script Condition
- Add A Security Events Condition
- Add A Security Client Events Condition
- Add An OS Patches Event Condition
- A Monitor's Policies Tab
- A Monitor's Logs Tab
- Clone, Import, Export And Delete Monitors
- Maintenance Windows
- Network Management
- Applications
- Endpoint Intelligence
- All Devices
- Security
- Threat Dashboards
- Endpoint Security
- SIEM - X
- Cloud Security
- Network Security
- Email Security
- Threat Labs
- Managed Security
- Endpoint Compliance
- Work With Endpoint Compliance Lists
- Agents
- All Assets
- Other Assets
- Deprecated Assets
- Problems
- Solutions
- Pending OS Patches
- Ports
- Patch Management
- Application Baseline Results
- Certificates
- Vulnerabilities
- Application Vulnerabilities
- Vulnerability By OS
- OS Vulnerabilities
- Network Scan Findings
- Compliance Standards
- Compliance Assessment
- Compliance Check Master
- Discovery Settings And Credentials
- Manage Mapping
- Jobs
- Alerts
- Policies
- The Profile List
- Policy Configuration
- Default Policies
- Predefined Policies
- The Policy Editor
- The Profile Editor
- Sections Configuration
- Add And Remove Profile Sections
- Profile Sections On Other Operating Systems
- General (Windows Profile)
- Associated Devices (Windows Profile)
- Profile Health Check
- Client Updates
- EXDR Updates
- Remote Control
- Client UI Settings
- Client Rebranding
- Client Proxy
- Client Access Control
- Remote Tools
- Monitors
- Procedures
- Patch Management
- Maintenance Window
- Global Proxy
- Client Logging Settings
- Antivirus
- Firewall
- EDR
- File Rating
- Containment
- VirusScope
- Xcitium Verdict Cloud
- Agent Discovering Settings
- External Devices Control
- Miscellaneous
- Script Analysis
- Data Loss Prevention
- XCS Access Control
- XCS Proxy
- XCS Updates
- XCS UI Settings
- XCS Logging Settings
- Performance
- Applications
- Chat
- Thumbnails
- AI
- Customers
- Reports
- Standard Reports
- Custom Reports
- The Report Catalogue
- Configure And Generate A Custom Report
- Generated Reports
- Advanced Reports
- Reports Beta
- SLA Reports
- Audit Logs
- Tools
- NuCore
- Admin
Client Rebranding
- Open a Windows profile, then click the 'Client Rebranding' tab.
'Client Rebranding' sets the name, the logos and the support details the communication client shows on the device. The panel carries 'Edit' and 'Delete' buttons and previews what the device user will see.
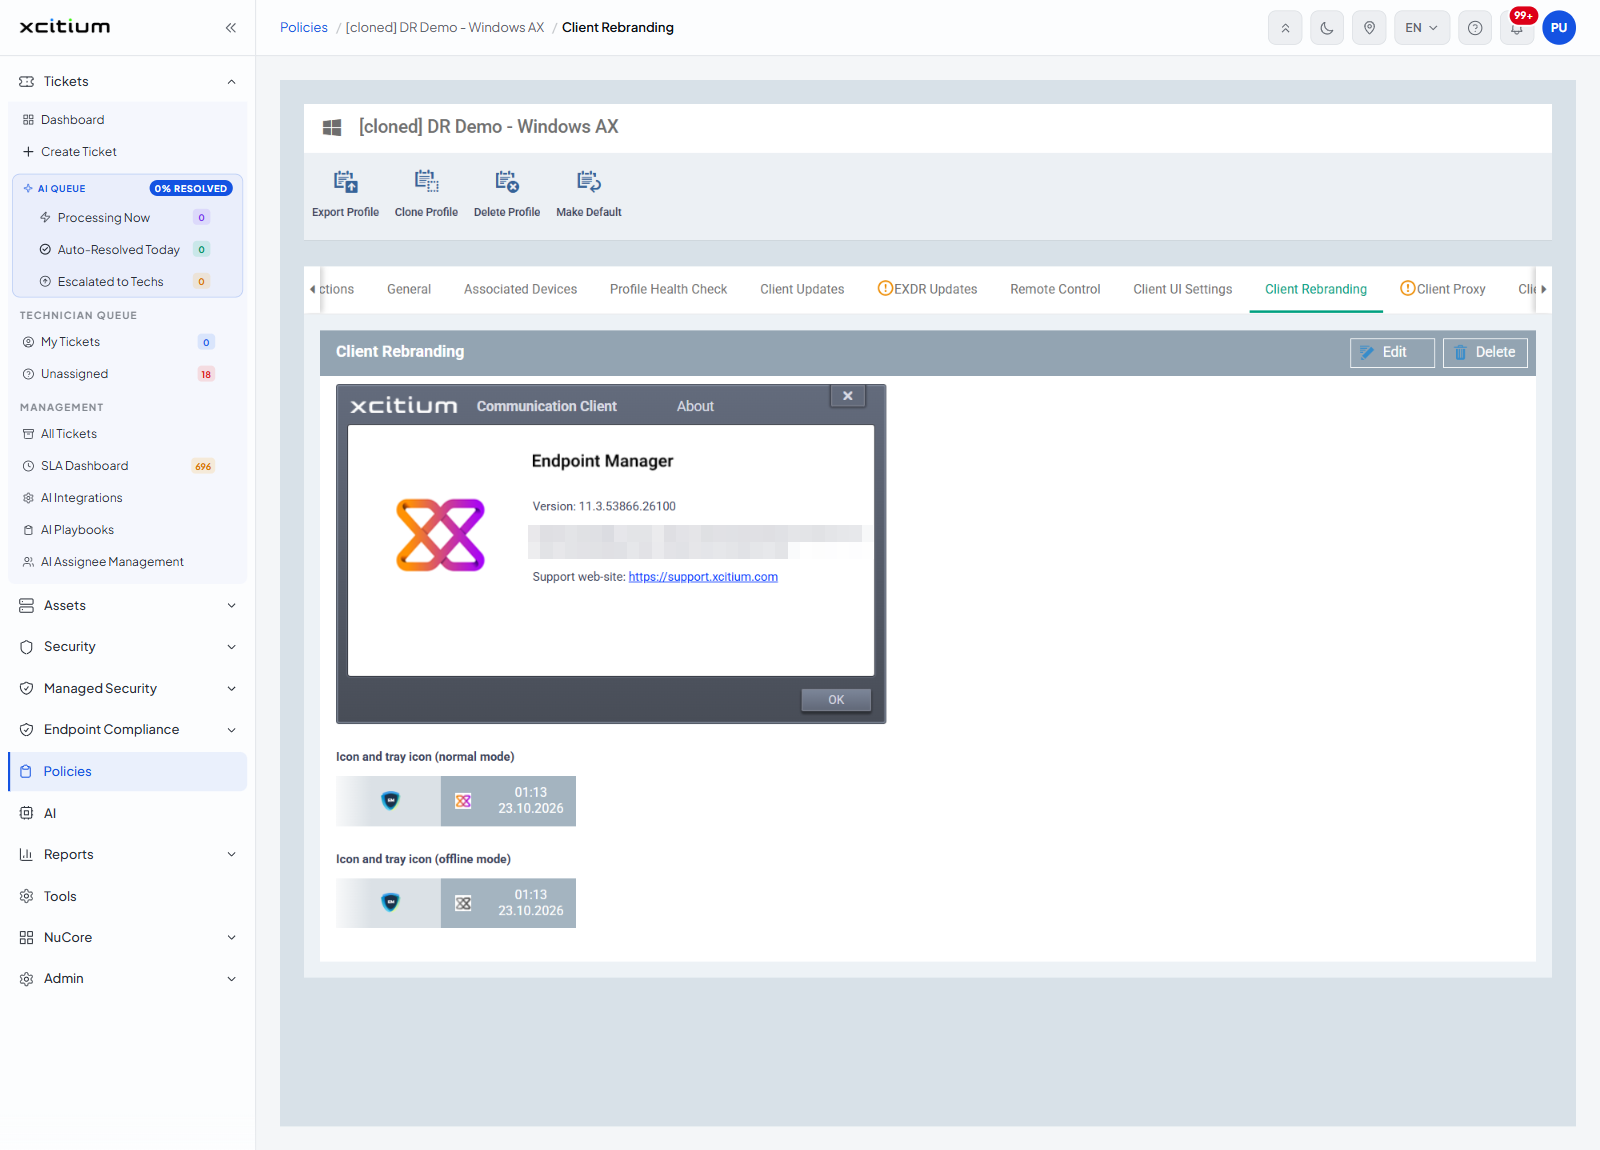
What the panel shows
| Preview | Description |
| Communication Client — About | A preview of the client's About window. It lists 'Version', 'Endpoint Manager server', 'Last communication time' and 'Support web-site', with an 'OK' button. |
| Icon and tray icon (normal mode) | A preview of the icon the client shows while it is in touch with the platform. |
| Icon and tray icon (offline mode) | A preview of the icon the client shows when it is not. |
Rebrand the client
- Click 'Policies' in the left navigation bar and open the profile.
- Click the 'Client Rebranding' tab.
- Click 'Edit'.
- Change the details and images you want the device user to see.
- Click 'Save'.
Note: the previews in this section show the values that are in force now. They change as soon as you save new ones.
Note: the security client is rebranded separately. See XCS UI Settings, which has its own 'XCS Rebranding' sub-tab.