XCS Updates
- Open a Windows profile, then click the 'XCS Updates' tab.
'XCS Updates' controls how the security client updates itself and its virus database, and where it fetches them from. The panel is headed 'Xcitium Client - Security', carries 'Edit' and 'Delete' buttons, and has two sub-tabs.
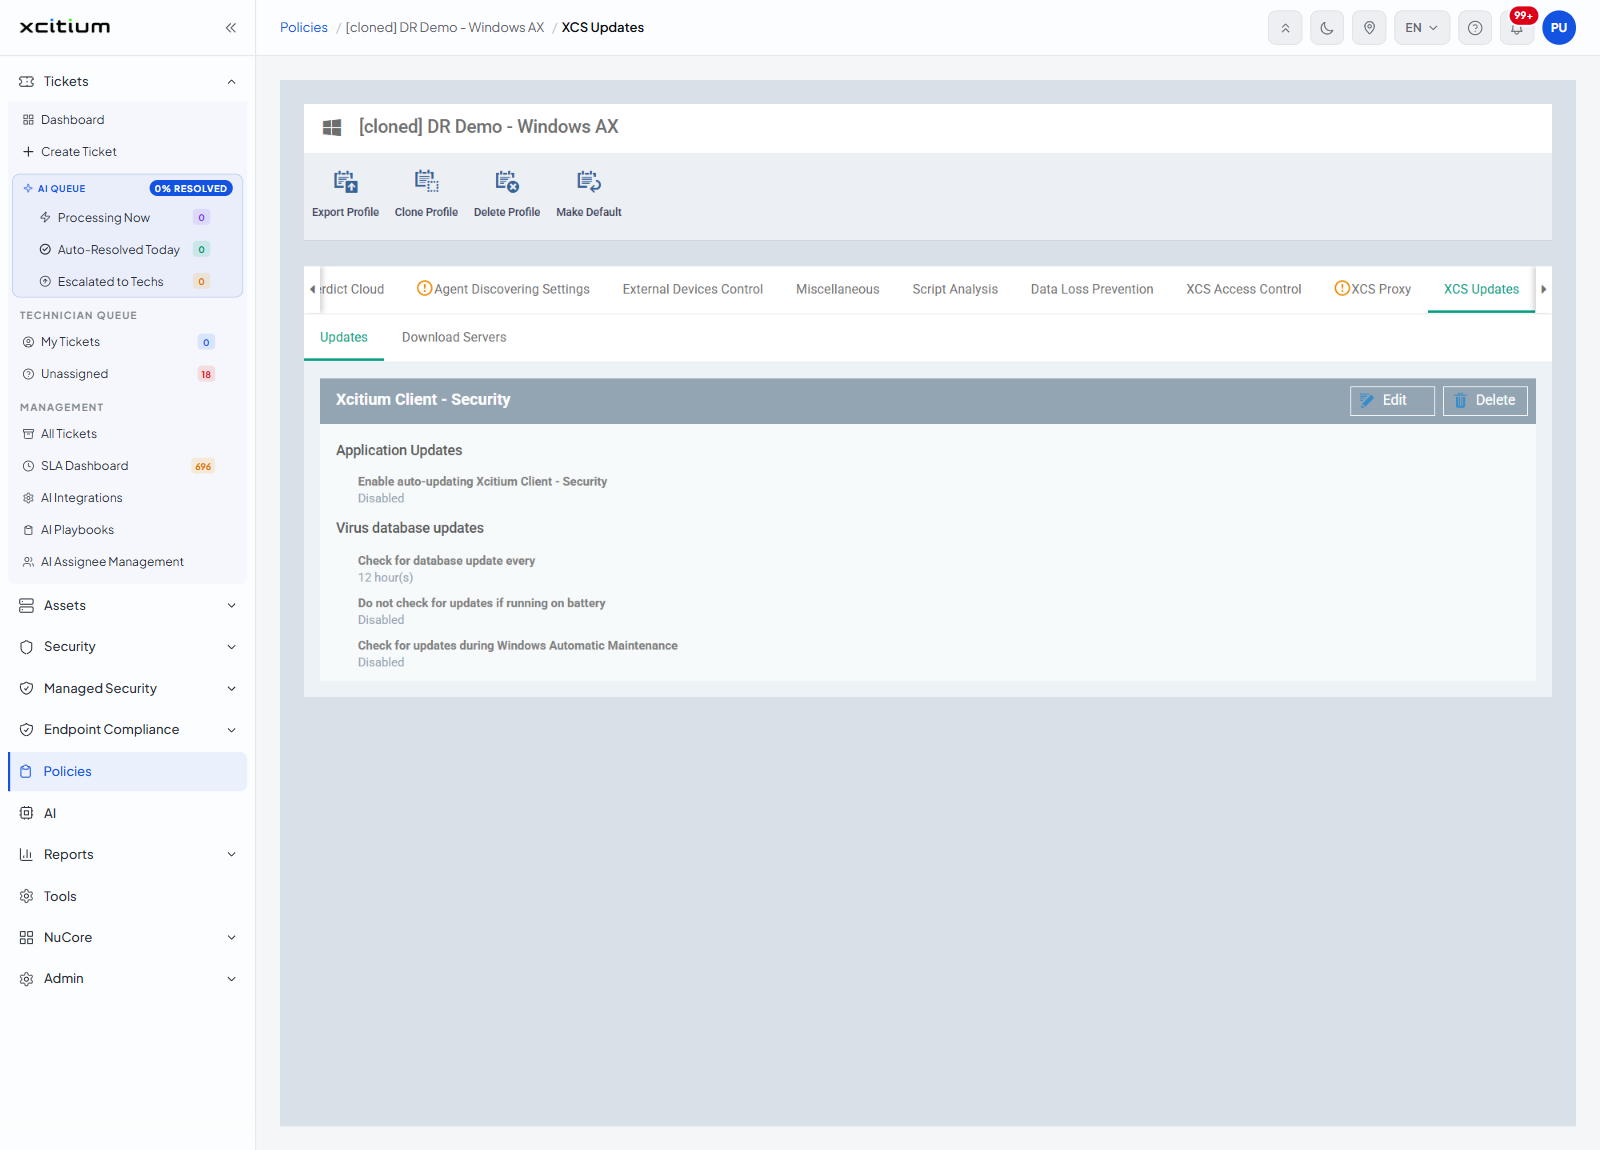
Application Updates
| Setting |
Value seen |
| Enable auto-updating Xcitium Client - Security |
Disabled |
Virus database updates
| Setting |
Value seen |
Description |
| Check for database update every |
12 hour(s) |
How often the client looks for a new virus database. |
| Do not check for updates if running on battery |
Disabled |
Holds updates back while the device is unplugged. |
| Check for updates during Windows Automatic Maintenance |
Disabled |
Ties update checks to the Windows maintenance period. |
Download Servers
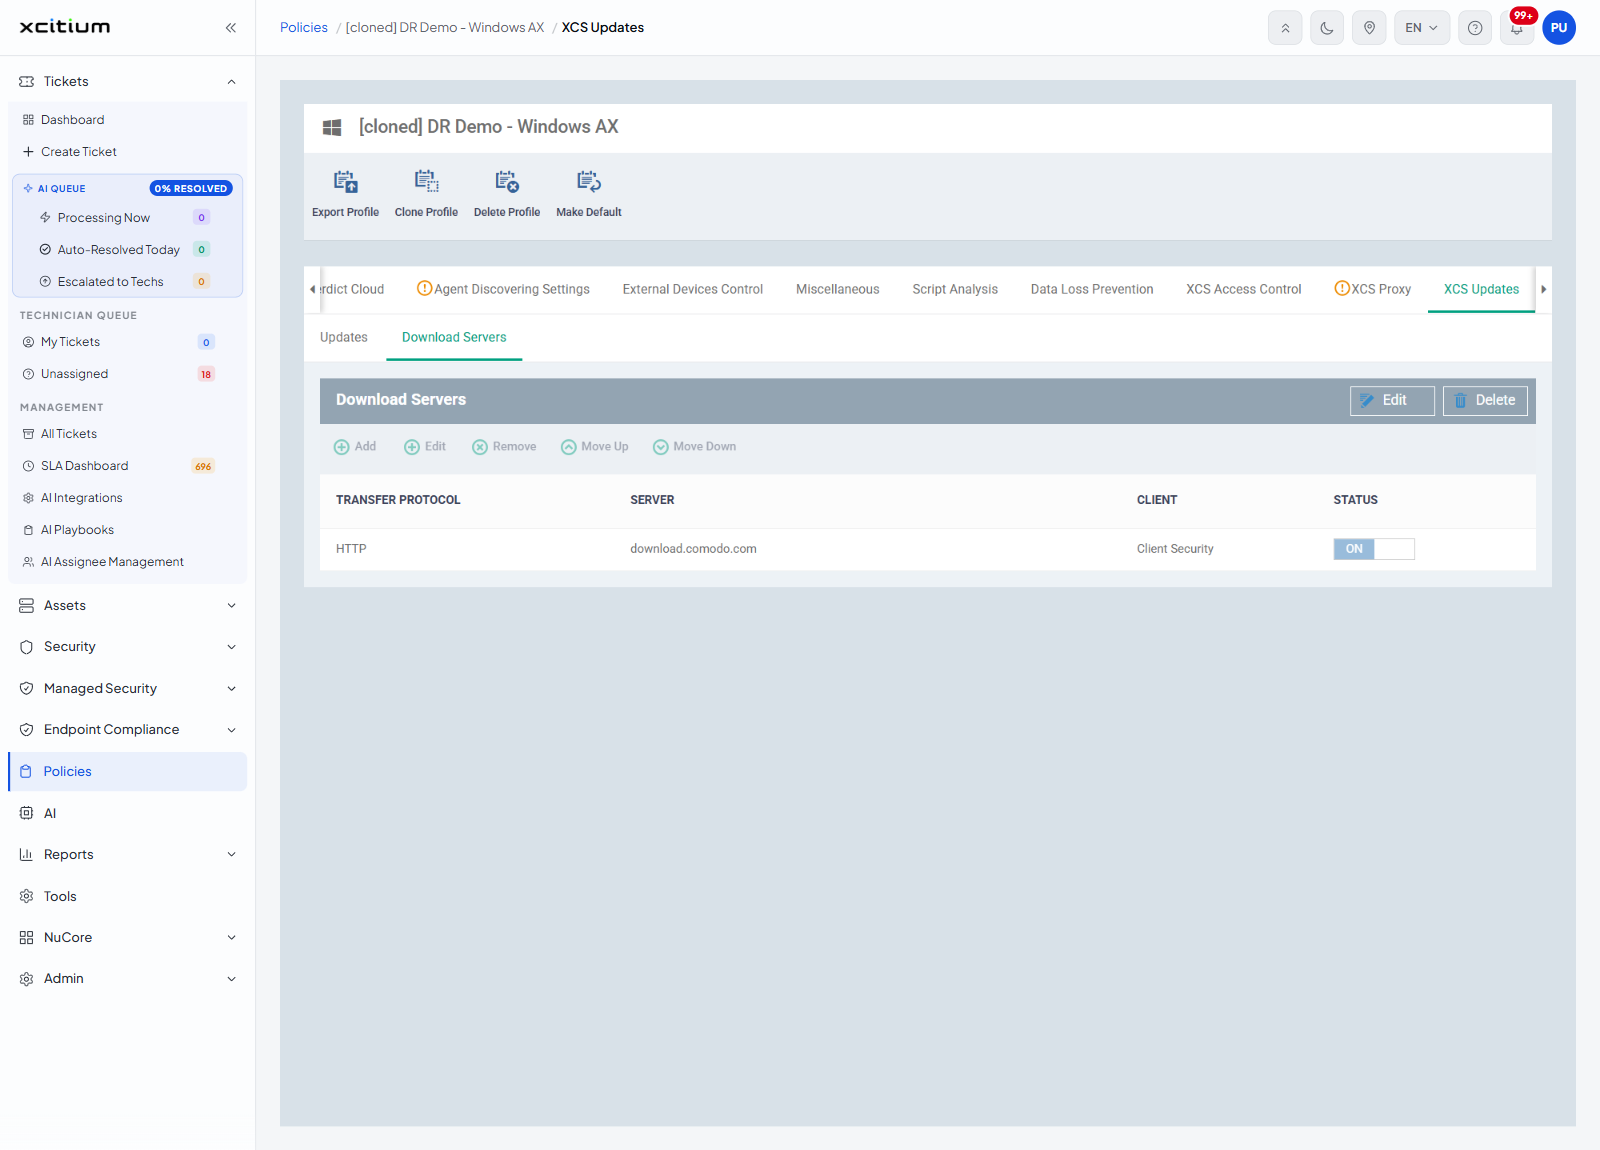
The second sub-tab lists the servers the security client fetches updates from, in the order it tries them.
| Button |
Description |
| Add |
Adds a server to the list. |
| Edit |
Changes the selected server. |
| Remove |
Takes the selected server off the list. |
| Move Up |
Moves the selected server earlier in the order. |
| Move Down |
Moves the selected server later in the order. |
| Column |
Description |
| TRANSFER PROTOCOL |
How the client reaches the server, 'HTTP' or 'HTTPS'. |
| SERVER |
The address of the download server. |
| CLIENT |
Which client the server serves. The entry reads, for example, 'Client Security'. |
| STATUS |
An ON/OFF toggle that turns the server on or off without removing it. |
The Add Server dialog
'Add' is greyed out until you click 'Edit'. Once edit mode is on, 'Add' opens the 'Add Server' dialog.
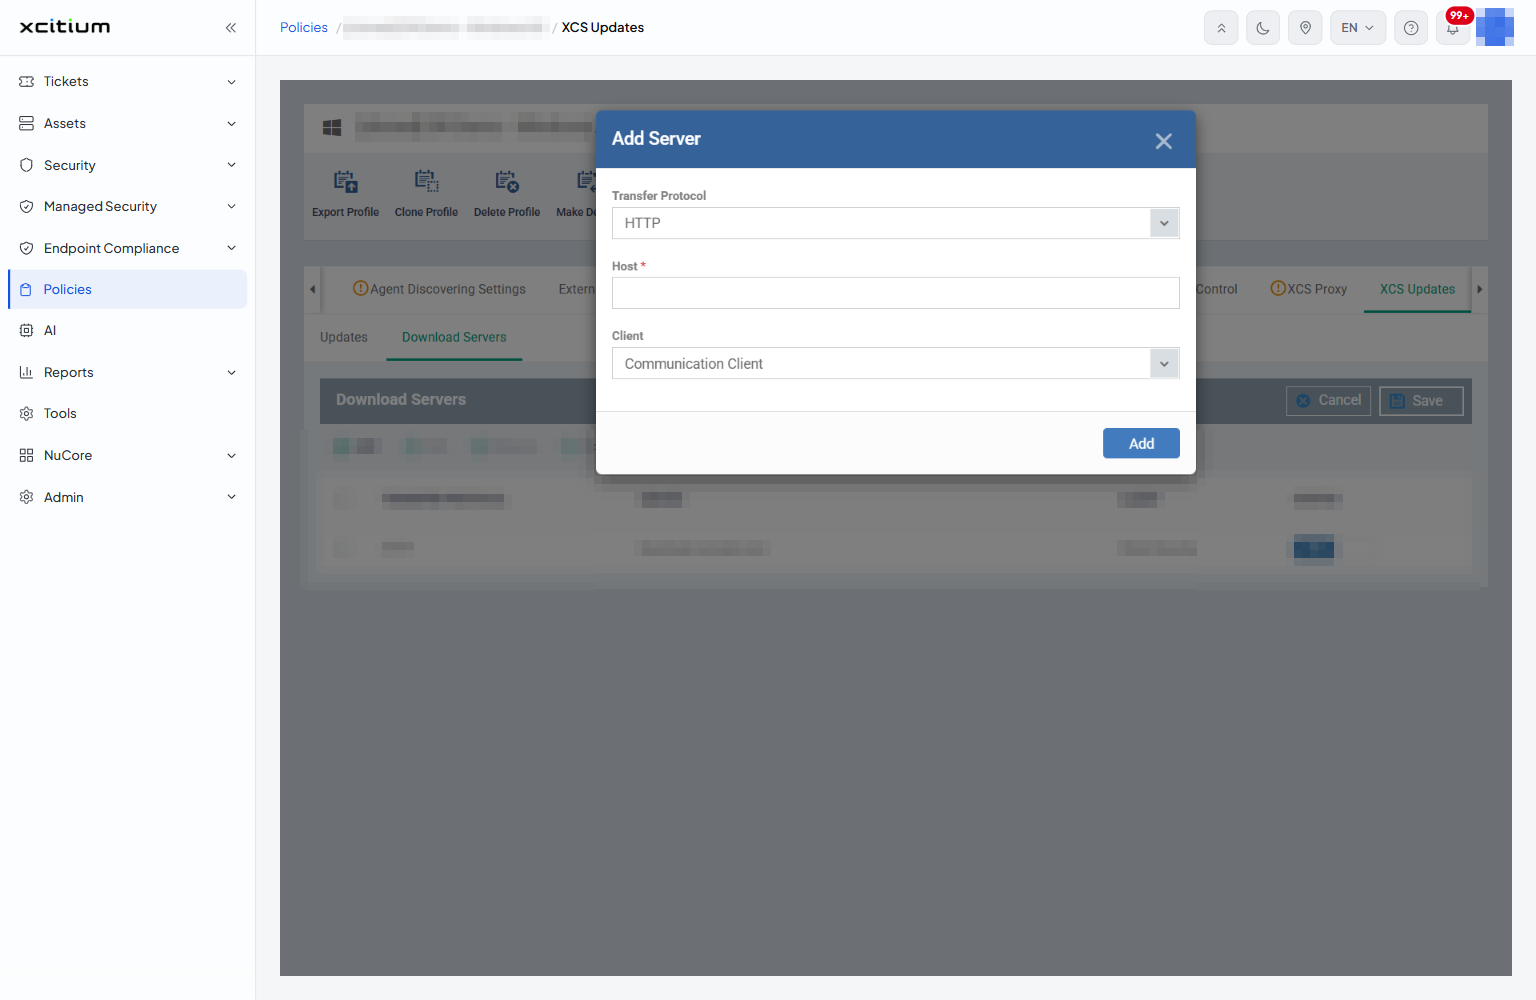
| Field |
Control |
Required |
| Transfer Protocol |
Drop-down offering 'HTTP' and 'HTTPS'. It opens on 'HTTP'. |
No |
| Host |
Single-line text box for the address of the server. |
Yes — marked with a red asterisk |
| Client |
Drop-down offering 'Communication Client', 'Client Security' and 'Communication Client + Client Security'. It opens on 'Communication Client'. |
No |
| Button |
Description |
| Add |
Puts the server on the list. |
| X (top right of the dialog) |
Closes the dialog without adding anything. |
Add a download server
- Click 'Policies' in the left navigation bar and open the profile.
- Click the 'XCS Updates' tab, then click 'Edit'.
- Click 'Download Servers', then click 'Add'.
- Choose 'HTTP' or 'HTTPS' in 'Transfer Protocol'.
- Type the address of the server in 'Host'.
- Choose which client the server serves in 'Client'.
- Click 'Add'.
- Use 'Move Up' and 'Move Down' to set the order the servers are tried in.
- Click 'Save'.
Set up security client updating
- Click 'Policies' in the left navigation bar and open the profile.
- Click the 'XCS Updates' tab, then 'Edit'.
- Turn on 'Enable auto-updating Xcitium Client - Security' if the client should update itself.
- Set how often the virus database is checked, and whether battery power or the Windows maintenance period change that.
- Click 'Download Servers' and add, order or switch off servers as you need.
- Click 'Save'.
Note: the communication client updates through its own section, which uses the same 'Add Server' dialog. See Client Updates.


